I hate metalworking

GroupDIY Audio Forum

Help Support GroupDIY Audio Forum:

This site may earn a commission from merchant affiliate links, including eBay, Amazon, and others.

ENS Audio

Well-known member
Joined
Oct 23, 2007
Messages
425
Location
USA
Any tips/tricks that specifically applies to metalworking??  I have a few books that show examples of measuring and marking but it seems I'm going to have aquire quite the collection in rulers and other gadgets in order to do the job correctly.

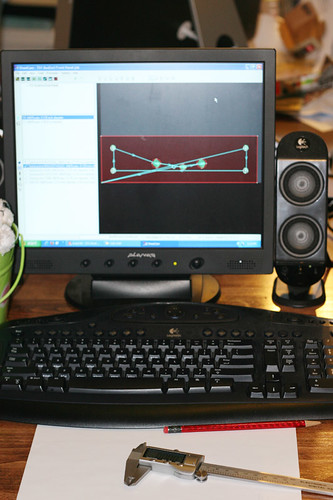
  I'm just trying to mount vertically my Green PCBs and have them allign with the Front panel which hasnt been a fun experience :mad:  There are so many little angles,e.t.c which makes my caliper and R-Angle ruler work up to a certain extent.

I do agree with Owel also about woodworking as well ;)


BTW going through some of these metalworking books that I have there are some DIY "jigs" for the use of making drilling/cutting easier.  Any links in reference to these type of projects???


Thanks
 
right tools make the job easy. there is the usual of measure twice drill/cut once. That is a given.

If your like me and do not have a drill press drilling holes can be a pain and if not carful the drill bit will walk. That means you will not end up in the spot you intended to drill and may put a hole elsewhere if not careful Start off at low speed so that you are 100% in the right spot. Once you break the surface. start to increase speed. Make sure your bits are sharp.
For doing squares I have a few different ways but what has been working for me at the moment is my dremel tool with a metal router bit. I route out by hand but go slowly. Again measure twice and take your time to make it 100% right. Metal work needs to been done slowly to make it look good and be correct. Take your time. Rome wasn't built in a day.

Lastly I am looking into getting one but a drill guide will make things easier, I just haven't picked one up yet.
 
pucho812 said:
If your like me and do not have a drill press drilling holes can be a pain and if not carful the drill bit will walk.

You sir need a center punch. No more walking bits.
 
i use  a spring loaded punch. you place the tip of the punch on your mark.(the smaller the mark the accurate it is,try a scribe,awl)push down and the punch creates a tiny, dead on ,indent on your metal work. you place your bit on the indent and it will not stray.

http://www.nextag.com/center-punch-spring-loaded/search-html

use sharp bits. drill slowly and use wax or drilling oil frequently.drill press helps alot. also i like to do larger holes with a stepped bit. i have never had a punch so i cant say which is better.
 
I dropped on a table-top drill press from Harbor Freight.  That is satisfying 100% of my needs for now, and I stow it away when not needed.  It was $100 shipped and works great!  My hand drill is a Dewalt, which I waited WAY too long to get.
Center punch!
Good metal ruler with 1/32 scaling
good awl for scratching
good bits and keep em well oiled
stepped drill bits and a good counter-sink bit
nibbler, and files

Oh, and good bandaids.  I like the 3M Nexcare because they stay on while I continue drilling!
Mike
 
Lots of good tips already shared.

going through some of these metalworking books that I have there are some DIY "jigs" for the use of making drilling/cutting easier.

Sometimes a "jig" is just a simple template to make your life easier if you're going to produce the same part (or drill the same hole locations) over and over again on multiple pieces.

For example, I made a "master template" that shows me where each hole I need to drill is located on an aluminum sheet.

Then I just put my new raw material under my master template/jig, clamp them both, and drill away on my drill press using the top template as my hole guide. I can drill 1 or 20 parts and all their holes will be in the right location, without doing a single measurement. I just have to be meticulous making that master template/jig, and after that, it's easy work for each future part.
 
Good thread to bump. What size drill bits would be needed for panel mount XLR's and their screw holes? What's a good basic set of bits that would cover most bases for enclosure work? How do you guys drill the big holes for meters and such, I assume it's not a drill bit but more of a cutting tool? Recommendations on drill presses?
 
bkbirge said:
Good thread to bump. What size drill bits would be needed for panel mount XLR's and their screw holes? What's a good basic set of bits that would cover most bases for enclosure work? How do you guys drill the big holes for meters and such, I assume it's not a drill bit but more of a cutting tool? Recommendations on drill presses?

For circles up to an inch I use step bits also known as uni bits.

http://www.irwin.com/cmt/images/BM/main-unibit.gif

Any thing bigger I will either use a dremel with a metal router bit. I do it by hand and it works out fairly well. Just go slow and take your time, good for free hand stuff or I will use a whole saw depending on the size. I use the dremel for square holes all the time. Some people will mark the size of the whole and use a small drill bit. Make one whole after another around the whole until you can knock it out. Then use a file and file it down.
 
Cool, thanks for the tips. This is new to me but I have a need to build a couple tube mic power supplies so I figured I'd look into what it takes to carve up the boxes too.
 
There was a good thread about drill presses and drilling a while back.
The best tip I saw in terms of drilling holes was starting small with and working up very gradually.

However, I found a CNC place really close to my house.  They'll be doing my future metalwork.
 
The thickness of the sheet material will dictate the size of the drill bit. Drilling holes of 3-4mm onto 1-1.5mm thich material is o.k. But the larger ones above this up to 5-6mm you have to be really careful as it will create rag. If you are cutting large holes like 20-25mm in diameter the hole saw is the right tool with plenty of cooling.

However, there is the tip if you have to drill large holes onto thin sheet materials using drill bits. Sandwich the material between two pieces of 5-10mm thick sheet timber and then drill into it. Not only it is safe but it also does not leave any rag. First place the material onto the timber, center your drill, clamp another layer of timber over the material and drill into it. This is also a good practice for cutting  with a jigsaw.

 
For XLRs and other big holes I really like a chassis (aka Greenlee) type of punch.  You can make the pilot hole bigger than needed and then fine-tune the punch location.  Makes it a lot easier to get everything lined up.

And yeah, the cheap drill press.  I've had a $90 Sears one for several years and it really makes things easier and more precise.
 
I hate metalworking too... so I got one of these DIY CNC from eBay. Then "upgraded" bits and pieces of it to make it run better.

3535151666_77ede34b3f.jpg

1u Rear panel screwed on my "jig" made of plywood.

Milling XLR holes on a 1u rear panel.
3534296055_3312d0cfcc.jpg


Close-up shot of the finished XLR holes
3264470320_a366a245ce.jpg


Perfect copies all the time...
3234608751_4f888ffd37.jpg


just tell the program how many holes/cutouts you want and their dimensions.
2616619453_9d09938d59.jpg


;D ;D ;D
 
You can pick-up those CNCs for a very little money these days. In fact couple of years ago Elektor (electronics magazine) had an offer of a German make desktop machine as a self build kit for about £1,000. I had a small desktop  Isel DaVinci and a 1m x 1.2m larger machine both of which I sold. I still have the software ( M*a*s*t*e*r*C*A*M ) as I was not allowed to sell it. So if anybody has an Isel machine I suppose we can do exchange.
 
bkbirge said:
Good thread to bump. What size drill bits would be needed for panel mount XLR's and their screw holes? What's a good basic set of bits that would cover most bases for enclosure work? How do you guys drill the big holes for meters and such, I assume it's not a drill bit but more of a cutting tool? Recommendations on drill presses?

For XLR and a number of other larger sizes - tube sockets, can caps  - I use a combination of a chassis punch and then triangle file for the tops and flanges.

One thing I hardly ever do is try and match the exact bit size with any given hole.  I always use step method starting with the smallest sharpest bit for accuracy ( sans the indispensable center punch) then work to a size big enough for a medium auger(uni bit) and it's a done deal.  Got 5 more holes the same size?  Easy - it's 3 steps down on the auger.

For bigger holes I'll use a chassis punch where applicable. Unless you have a very comprehensive set of punches you'll often find yourself finishing out the holes with a large Greenlee uni-bit and/or file.  A good set files are a great asset.  The big Greenlee uni-bit can be an unpleasant enough experience to make you shell out for more hole punches but it gets the job done. Make sure and hold on tight.

One useful tip/trick I can offer - If you ever use the Hammond or Bud square aluminum chassis, they come with a white protective covering that can be put to very good use.  Say you need to mount a transformer - potted type.  Simply place it on the correct spot and press it firmly into the covering.  You now have accurate indentions to mark your holes.  Slap the correct size circle stencil around the indentions and mark your cross hairs, then drill.  For the mounting holes, I wait until the lug hole is finished.  Then it's just a matter of dropping it in place and marking the holes with a sharpie. Just leave the covering on the chassis until all the holes are finished.  It keeps the chassis from getting scratched up as well.

I used to spend a lot of time making precise measurements, using the mechanical drawings in spec sheets and sweating over microns. Then I out found later that it wasn't really netting me anything working as I do with a hand drill.  I often just eyeball positions and use a stencil for marking center points.  For the screw holes on XLRs and tube sockets - that always gets done by sitting the part in place in it's final position in the hole and putting the drill in the screw hole with the part in place to start the hole ( be careful not to 'spin out').  Sometimes I will even put the screw in the first hole and tighten it into place before starting the second hole.  I do this because I've tried pre marking the holes to 'spec' by stencil or measurement one too many times and still not having the holes line up well.

All the above is relegated to routine DIY.  For commercial level precision and prettiness the CNC would be a good way to go.  Still, who's gonna see your holes - pretty or not so?
 
owel said:
I hate metalworking too... so I got one of these DIY CNC from eBay. Then "upgraded" bits and pieces of it to make it run better.

3535151666_77ede34b3f.jpg

1u Rear panel screwed on my "jig" made of plywood.

Milling XLR holes on a 1u rear panel.
3534296055_3312d0cfcc.jpg


Close-up shot of the finished XLR holes
3264470320_a366a245ce.jpg


Perfect copies all the time...
3234608751_4f888ffd37.jpg


just tell the program how many holes/cutouts you want and their dimensions.
2616619453_9d09938d59.jpg


;D ;D ;D

wooooowwwwwwww!!!!!! :eek:    post the schematic hahaha!!
 
The CNC rules!
Some other things I forgot before-
a box of different sized 2x4, shim, and plywood pieces to create back support.  Necessary when working with press or hand drill.  Great for when you are drilling front and back on one of those C shaped Hammond cases that like to bend.
Shelf liner.  The stuff is magic.  I always have a piece on the press to hold the work material.  I also use it on the bench to hold things without slipping.  It protects knobs on a console when working on extended modules.  Fantastic material.
 

Latest posts

Back
Top