New idea! Finding cheapest way to make custom front panel

GroupDIY Audio Forum

Help Support GroupDIY Audio Forum:

This site may earn a commission from merchant affiliate links, including eBay, Amazon, and others.

ForthMonkey

Well-known member
Joined
Sep 4, 2013
Messages
1,115
Location
Turkey
ANOTHER METHOD

This is the another way to build good looking front panel.More professional!

Check this link!

http://music.codydeschenes.com/?page_id=2035

But it's not exactly what i want!I want to do it like engraved.So just leave your letters blank (or white) and the other places are black.Then try this etching method.So we can see that we have engraved looking panel.It's like making PCBs.

For me it's good idea!I will try this method with a peace of aluminum and i will share my exprience!

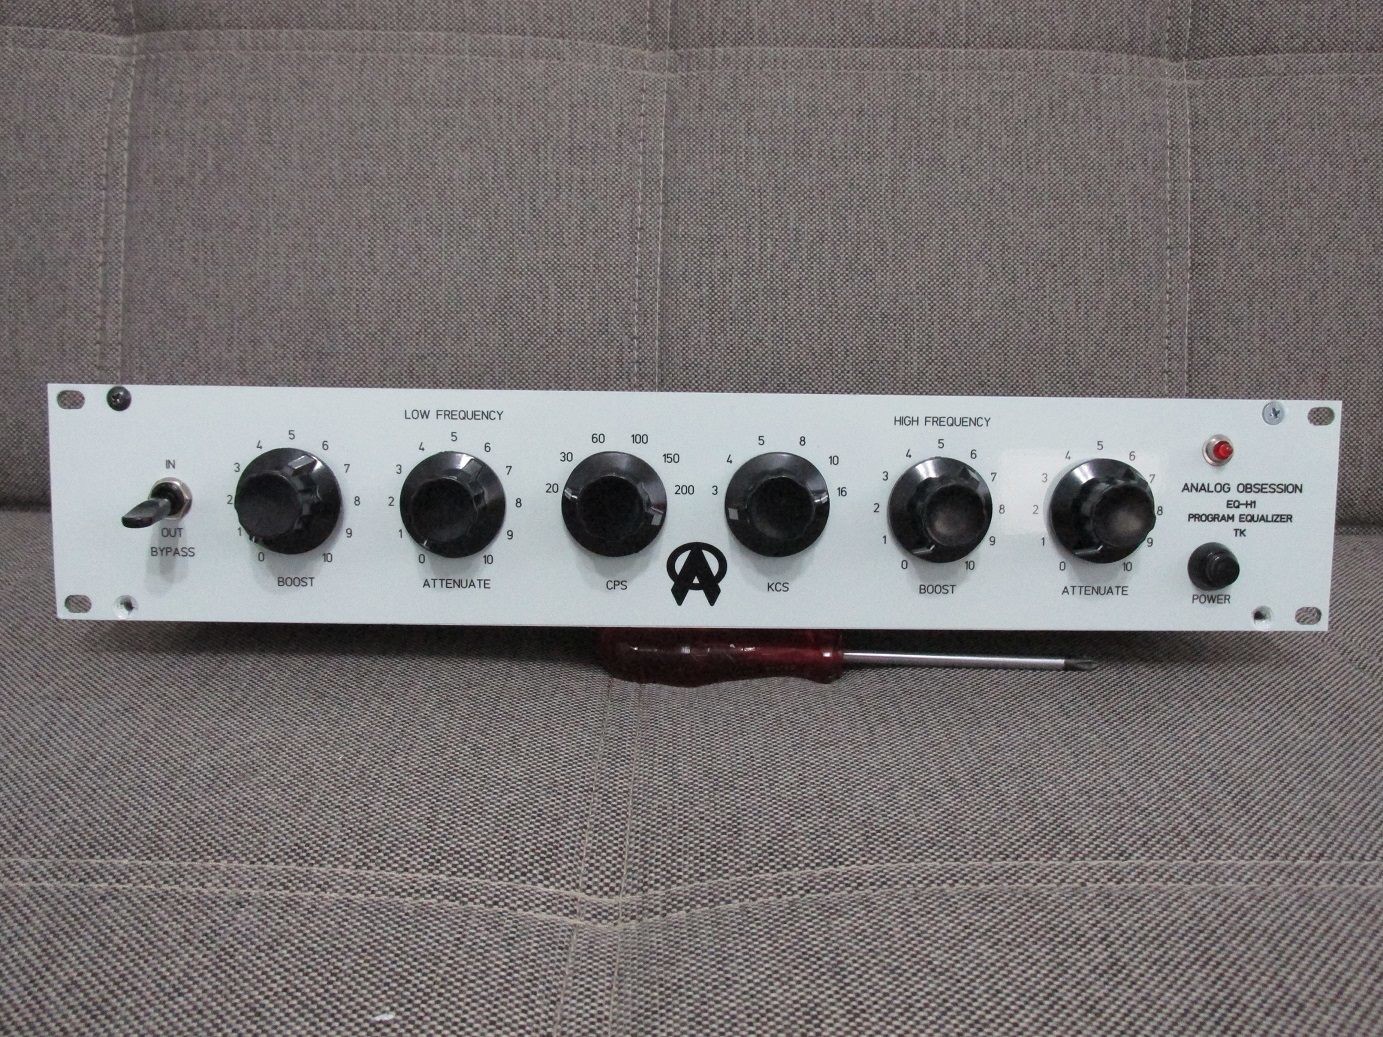
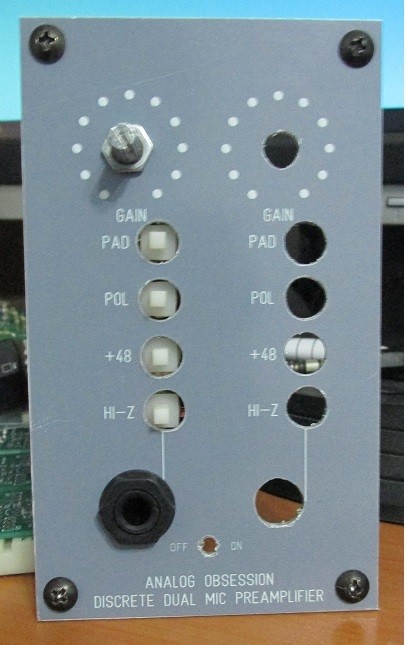
And it's an example of my front panel!

4bY13Q.png


And there are lots of examples!

http://www.diystompboxes.com/smfforum/index.php?topic=85803.160

Another tutorial.

http://www.aronnelson.com/gallery/main.php/v/MarkMs-Gallery/album24/?g2_page=1

---------------------------------------

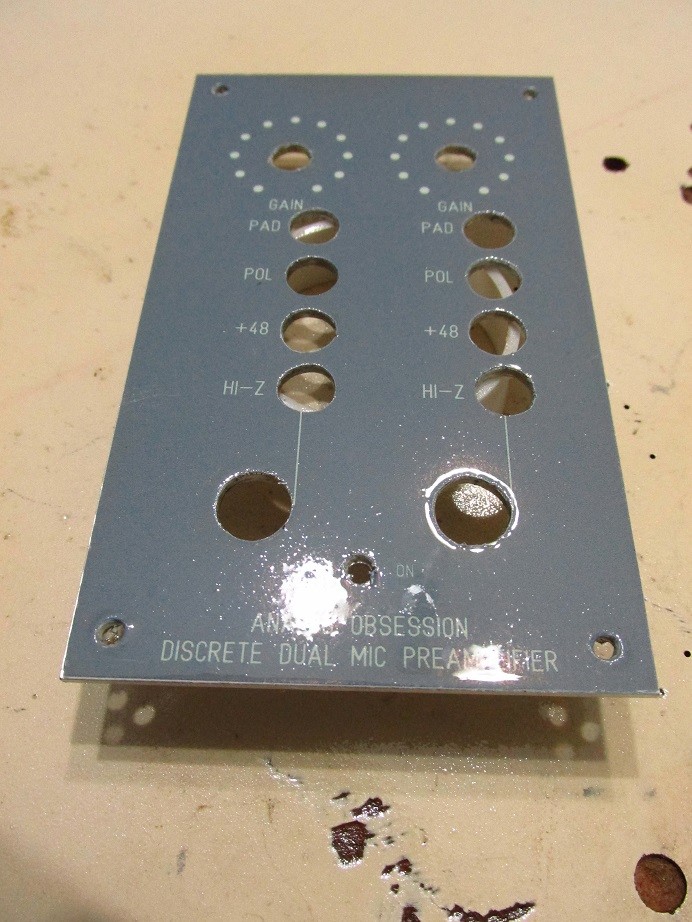
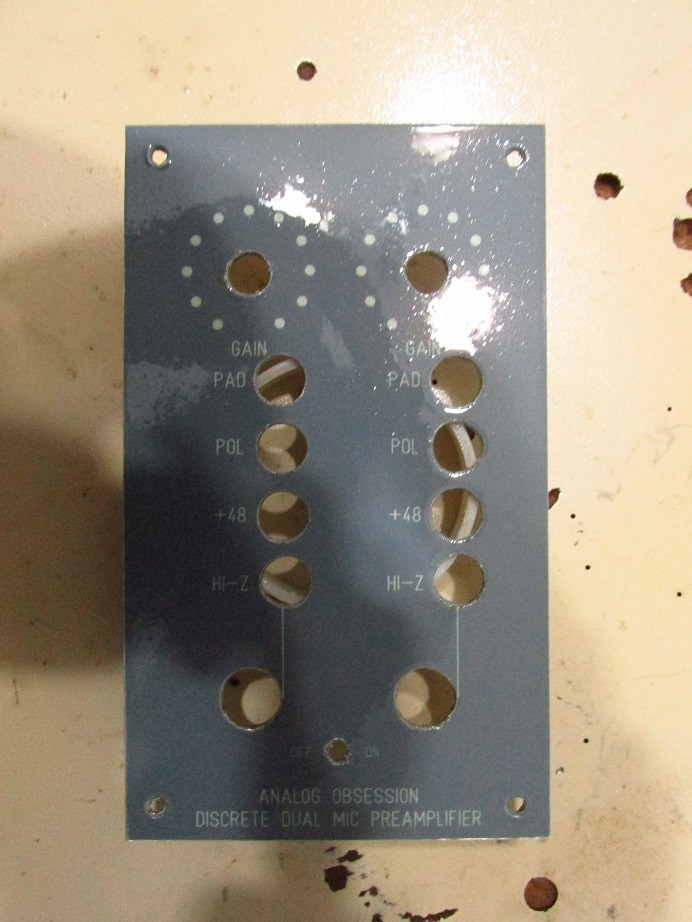
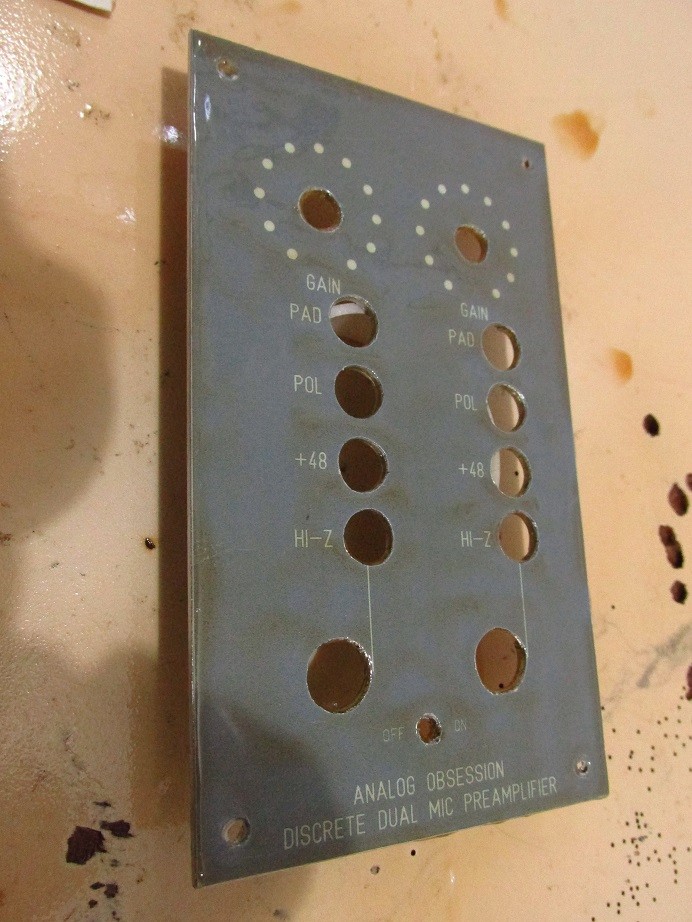
First of all,really expensive to make professional front panel for me.So i'm trying to find cheapest and easiest way to do it.

For now i used self adhesive paper for this.And some gear...

4qjbGq.jpg


JkZnOn.jpg


Looks good but not perfect!And little bit expensive,too!

I found another paste it to front panel with transparent glue.Then some coats of lacquer onto front panel.I belive it'll be better than self adhesive paper.I tried with some aluminum panel to see how it looks.And it's perfect!Really cheap,easy.I believe it's real DIY.

Do you have any idea to make custom front panels?Maybe cheaper or easier?

Thank.
 
I have a supercheap way I do my front plates!

This is what I did few years ago when I wanted to get away without spending money. And it got me intrigued so I did a few more by now. It's not even about cheapness any more - I love doing it!

I buy regular blind front plate from a local shop. Similar can be bought in any music equipment store worldwide, or you can use a piece of aluminum 2-3mm thick.
Since those "blind" plates always come in black color, the main problem is how to print lettering on it without doing silkscreen in white that has rather expensive setup costs.

My solution to this problem is that I buy piece of steel sheet metal 0.55mm thick in hardware store. They come in size 100x30mm and cost around 2 euros/piece. Then I cut a piece of it to match my front plate size, but I cut it smaller to allow for rack screw holes, and some cool aesthetic by leaving sides of the original blind plate. I use scissors for metal. Very easy, quick and precise.

First thing I do is that I screw it to the blind plate. It is held by four screws that usually hold front plate to the rest of the chassis. When those four screws hold firmly my new metal sheet, I drill all the holes for potentiometers and vu meters. It is important to drill them while sheet metal is held on the actual front plate for the holes to be perfectly in sync. It's not complicated and I do it with mid-speed rotation on my hand drill. After all the holes are drilled, I sand my metal plate to smooth it a bit around holes since drilling can produce a bit elevated corners on some holes. This is due to too much pressure when drilling or a blunt drill bit.

After all the holes are done, I first spray paint it with a primer. After one layer of primer I paint it with spray paint of my choice. But the trick is to use light color that can have black letters very visible. After every layer of spray paint I sand it with 1000-1500 sand paper. Usually three light layers of paint cover it completely. It's very important to have last layer sanded to feel smoth like glass. I use 2000 sand paper for this last step.

Then I print my lettering on waterslide decal paper. I use the one for laser printers since I have that type of printer at home, so I'm limited to only black, but there are decals for inkjet printers also. You must match decal paper type to your printer. I've seen decals printed on inkjet and I don't like it's deepness of black, though colors look cool. Still prefer the laser printer type. Pack of 10 sheets of decal paper is around $15-$20 on ebay. Be sure to get the transparent one! One sheet is enough for one front plate. You can cut only the pieces you use, though is cool to have one (almost) constant piece on entire front panel. Since it's A4 or letter format (depending on what you get), it's not wide enough to cover entire front plate, but that doesn't concern me. On the pictures below you can see that I cut small pieces containing only the parts that contain print.

Sticking decal paper is simple. Put it in a warm water and it will separate from the paper background, leaving only transparent foil with print. While it is wet, slide it on the front plate. It will not stick until it's dry so you can take time to adjust it's position. Dry it with hairdryer, but before drying make sure you remove air bubbles that got stuck under decal foil.

Last step is to protect the print. I use acrylic varnish in spray that I bought in hobby shop. It's around 5 euros for 2dl spray. Even cheaper if you don't get spray but decide to use brush to apply it. It's nice to go once with 2000 sandpaper after the varnish is completely dry. I found out that acrylic varnish is very solid and can protect incredibly well from nail scratches when turning knobs. And it also increases the deepness of the black color so it makes it look even better!

And that's it!

5 euros for "blind" plate
2 euros for the sheet metal
15 euros for a 10-pack of waterslide decal paper
5 euros for primer paint in spray (can last for many many front plates)
5 euros for spray paint of your choice (that can also be used over and over)
5 euros for acrylic varnish (2dl can last for at least four front plates)
and few tools - drill bits, drilling machine (cheap home/hobby type), scissors for metal, sand paper...

First investment is higher but tools and sprays last for many other front plates.
It is all possible to do in your own home!

And the best thing is that you can recycle front plates from dead equipment since you're covering original holes it might have with your own piece of sheet metal!

It takes time, but it is rewarding.

DIY to the bone!
:)

Luka
 

Attachments

  • front.jpg
    front.jpg
    418.1 KB · Views: 376
Thanks for reply and idea!It's good to make with water slide but i want to make front panel with only one sheet.Cause i want to print some special colors,too.

Found something about pasting simple paper and coating with vanish.

It's not my work.For example...

Step 1:Glued paper to enclosure

50.jpg~original


Step 2:Sanded paper

50-1.jpg.html


Step 3:Vanished enclosure

IMG_4142.jpg~original


I tried with aluminum and printed simple A4 sheet.Doing great job!They're using Golden GAC200 but i have chance to find it.I tried simple glue for wood.Then applied vanish.Shiny and solid!
 
shot said:
ForthMonkey said:
Step 1:Glued paper to enclosure
(...)

What kind of paper is this? Seems transparent! How?!?!?

It's just standart paper.Like any document.Not special.After glue,it looks like this.Then sanding and it looks smooth.To make it solid,using some coat of vanish.

By the way to glue it,wallpaper paste is useful,too.
 
So if I understand correctly, you print in the mirror on regular paper. Then you glue the paper to the enclosure with print facing down to metal. You sand off the paper and you're left with print only. And you varnish that in the end to protect it.
Did I get it right?
Must be inkjet print, or it doesn't matter?
 
shot said:
So if I understand correctly, you print in the mirror on regular paper. Then you glue the paper to the enclosure with print facing down to metal. You sand off the paper and you're left with print only. And you varnish that in the end to protect it.
Did I get it right?
Must be inkjet print, or it doesn't matter?

Not mirrored.Print normally and glue onto enclosure.Sanding to make it pure before vanishing.

And yes,laser is good,too for this job.No matter inkjet or laser.I have inkjet.But i believe laser will give better results about colors.

As i said,i tried with piece of aluminum and it's really great.I will make my new project's front panel like this.

 
I vanished front panel in first post.For now only 2 coat.Then sanding and polishing to finish.

Actually i don't have to sanding after vanish.It's good and it will be solid.But it's not pure.It's not problem for me.With heavy light you can see roughness.After sanding i will use wax polish to make it shiny.

3jO34p.jpg


p85aQn.jpg
 
And may I ask how did you do your white (or white-ish) lettering on this one?

Regular printers can't print white...
 
shot said:
And may I ask how did you do your white (or white-ish) lettering on this one?

Regular printers can't print white...

Yes,it's not white actually.Greyish...I just use simple inkjet and i got this result.But i believe it's not problem that printers have white or not.Paper is already white  :p
 
I've just been experimenting with the toner transfer method: print the design onto paper with a laser printer, stick the paper to the frontpanel  (or pcb...) and use an electric iron to transfer the toner to the frontpanel. Once I figured out how to do it it works fast and relatively smooth, the quality isn't  perfect (yet?), but totally sufficient for me as prototypes. Actually I like the slightly faded look, it's a bit vintage. It also works for pcbs. I don't know if it has been discussed here before, so please ignore this if it is a repetition.

If you already have a laser printer then the cost is basically the price for the paint to protect the panel and the frontpanel itself.

Michael
 
I'm attaching a pedal i built a few years ago. I did the labels for the front panel by printing on transparent adhesive label film. Then applied the film to a piece of aluminum tape (bought at the hardware store, used for thermal isolation etc.). Then the edges of the film and tape can be cut off together and the tape can be applied to the box. It required a few attempts until I got one without air bubbles on the front, but the material is still very cheap. I think some creativity can make the same method give nice front panel labels too  ;)
 

Attachments

  • comicsansamp.jpg
    comicsansamp.jpg
    462.7 KB · Views: 130
I've just received some lazer cut panels from here.
http://www.tube-town.net/ttstore/Faceplates/Custom-Shop-Name-Faceplates:::560_563.html

Priced by sheet size, so you can cut or engrave as much as you like.
I did 3 x 2U panel overlays plus a few other bits and it was €50.
I'm selling my CNC engraver!
 
mrclunk said:
I've just received some lazer cut panels from here.
http://www.tube-town.net/ttstore/Faceplates/Custom-Shop-Name-Faceplates:::560_563.html

Priced by sheet size, so you can cut or engrave as much as you like.
I did 3 x 2U panel overlays plus a few other bits and it was €50.
I'm selling my CNC engraver!

This seems very economical.  Just to be clear, are you using this to replace an aluminium panel or as a fascia over one?

Cheers

Ian
 
ruffrecords said:
This seems very economical.  Just to be clear, are you using this to replace an aluminium panel or as a fascia over one?

Just as a fascia,  0.8mm flexible laminate in my case.
 

Attachments

  • IMG_20160211_190601.jpg
    IMG_20160211_190601.jpg
    360.4 KB · Views: 193
mrclunk said:
ruffrecords said:
This seems very economical.  Just to be clear, are you using this to replace an aluminium panel or as a fascia over one?

Just as a fascia,  0.8 flexible laminate in my case.

excellent. Sounds a nice way of getting some colour into the front panel without paying a fortune for painting o anodising. Does it include all the holes as well?

Cheers

Ian
 
ruffrecords said:
excellent. Sounds a nice way of getting some colour into the front panel without paying a fortune for painting o anodising. Does it include all the holes as well?

Yup, includes everything!
Worth paying €10 extra for the design check. I'm very meticulous and i had a few weird colour issues on my drawings.
 
mrclunk said:
ruffrecords said:
excellent. Sounds a nice way of getting some colour into the front panel without paying a fortune for painting o anodising. Does it include all the holes as well?

Yup, includes everything!
Worth paying €10 extra for the design check. I'm very meticulous and i had a few weird colour issues on my drawings.

Excellent. One last question. When fitting pots/switches, do the nuts go under or over the fascia? If over does it get scratched?

Cheers

Ian
 

Latest posts

Back
Top