Point to point tube preamp layouts. Help & tips needed

GroupDIY Audio Forum

Help Support GroupDIY Audio Forum:

This site may earn a commission from merchant affiliate links, including eBay, Amazon, and others.

Kingston

Well-known member
Joined
Nov 1, 2005
Messages
3,716
Location
Helsinki, Finland
Hi all,

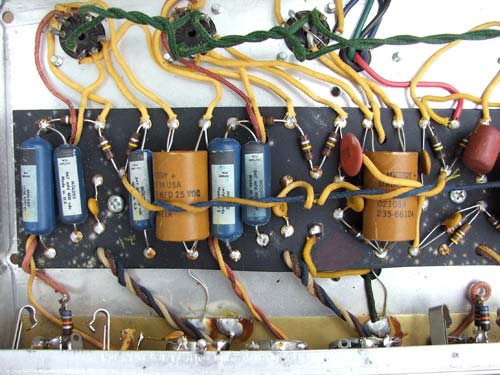
I have this sloppily made NYD two-bottle with very high quality parts that I will completely rebuild. This time I'm gonna draw up the layouts carefully and get it *right*.

I not only have parts for 4 channels, but also an oversized Welter PSU transformer big enough for 4 channels. Based on the previous build I could fit it all in a 2U unit.

So why not?

I have gathered some images from the DIY builds from around here to serve as guides, and I suppose a good starting point for layouts would be NYD's MILA images, since he had zero noise issues. Those seem pretty clear, and I have a decent understanding on grounding (bus vs. star vs. local bus grounding). But I'd like to see more examples.

1. Would any of you have images/links of super high quality point-to-point tube preamp layout work? Something that is known to have absolutely no noise issues with rugged build?

2. If I make 3-4mm aluminum sheet compartments/shields for each channel, does that actually help?

3. How much would such a thing also shield the PSU trafo, or should I ditch the idea and do an external PSU box (something I've done in the past with mixed results)?

4. There are preamps with tubes in their own compartment, or on the back side of the case, and some with tubes on the PCB/turretboards. What's best?

5. separate compartments for audio transformers?

6. other proven layout tips

As these preamps have 60-80db of gain I thought better be safe than sorry. I realise this is a big topic, but also one that should have very clear rules by now since like the fourties, so I'd appreciate any pointers/images/articles. Even little tips, like wire type/size/length.

Thanks for looking,
Mikko
 
If you want to see very good wiring, check out some back issues of Radio Amateurs Handbook.
The Hamster Crowd were a clean lot.

I do not know if there is a relation between clean 90 degree bends and music.

Fender threw out a lot of layouts before they found one they liked.
 
[quote author="CJ"]If you want to see very good wiring, check out some back issues of Radio Amateurs Handbook.[/quote]

This one?

http://www.gutenberg.org/etext/6935

Doesn't seem to have much layout related info. Or did you mean something else?

[quote author="CJ"]I do not know if there is a relation between clean 90 degree bends and music.[/quote]

Can't say I'm much interested in exact 90 degree wire bends, but tried and tested noise-blocking layout methods, shielding and point to point guidelines. You know, little tips about high impedance wiring with heaters vs. grounding and noise/hum issues, for example and how people have fought them.

Could be I have the wrong keywords, but google seems awfully silent on this issue, and even here on the forum the knowledge seems to be scattered in little pieces in misc threads, with lots of the example photos disappeared through the years.
 
So that's what you've been into instead of hanging @kvr..

keeping an eye on this
 
You can do similar with fully etched FR2 boards (or perfos w/o the copper pads) instead of "phenolic wood". So, no turret boards necessary either. You can do rings as on photos with remains of the resistor/cap. leads.

Won't be as pretty, but works and can be done neatly.

Perhaps you could use some plexiglass for the boards?
 
[quote author="bcarso"]See this for how some audiophoolish ones do it:

http://www.audionote.co.uk/products/preamp/m9_phono_01.shtml

This is emphatically not an endorsement, but fun to watch.[/quote]

:shock: Silver! and I thought teflon was decorative!

The layout certainly looks neat, but would be nice to know why many of the wires are routed certain way. There's odd looking double wires, some of them twisted, some of them not. I wonder why. Kind of hard to see how grounding or high impedance wires are handled in that one as well.

[quote author="tv"]You can do similar with fully etched FR2 boards (or perfos w/o the copper pads) instead of "phenolic wood". So, no turret boards necessary either. You can do rings as on photos with remains of the resistor/cap. leads.

Won't be as pretty, but works and can be done neatly. [/quote]

I definitely prefer turret boards to those rings, and fiber glass instead of plexi. I mean, I definitely should be able to fit a single channel of a two tube pre amp on something like 8cm X 25cm turret board, and stay very neat as well.
 
I thought you would prefer turrets.. but looks may be deceiving: if you mount "tru-hole" as on pictures (or on boards), you can _twist_ the component leads (and wires), which means that the unit wil be as sturdy as it gets.. which aslo means that virtually _no_ bad solder joints develop over time, because the joints are already mechanically very tight, stable and conducting _before_ soldering takes place.


Downside: repairs are pita, mods are pita, ... and anything along these lines.

For smaller stuff that gets thrown around a lot, it rocks though. If you glue two perfboards on top of each other, and mount the circuit on that, it's unbreakable (not just "virtually").


Turrets look more "it", though. Similar to the "mac" thing, they look more "pro". :green:
 
I thought you would prefer turrets.. but looks may be deceiving

I don't prefer them for the looks (obviously), but for the ease of mounting and clearly visible component layouts. I guess I could also go halfway. I was already going to do ground "bar" instead of wires in turret slots. You know, some 10cm long and 5mm diameter ground iron/copper bus (looks like a thin handle when mounted). Used in prototyping a lot as well. Somewhat bombproof.
 
[quote author="tv"]Are you making turretboards yourself or buying?[/quote]

Making myself. It's this 3x80x400mm fiberglass board (probably will cut in half), where I can stick the turret rivets and ground bar where I please.

There's infinite layout possibilities, and hence a lot of my questions in this thread.

I've done it once, did it severely wrong (and messy), and this time I want to get it right. :oops:

Kind of layout and shielding rules 101.
 
Imo that's the only way to make a proper layout for _your_ build.

Unfortunatelly, I can't help you with tube-related specifics - I have zero experience with building tube stuff. Otoh, I have done a couple funky discrete builds on eyelet boards and no-copper pertinax etc.

There's one neat procedure how to do bussing on boards: draw your layout first and decide where to route busses (i.e. wires) on your board (in a manner similar to routing vias on pcbs).

You can use 90° and 45° angle routing for maximum neatness. You plan this as follows: your bus wire is wrapped around eyelet/turret close to board, i.e. below the components. Then you need to drill a hole (~3-5mm) so you pull the bus-wire on the other side of the board. Where there is a turn, drill a hole and route the wire on the top side again, etc etc until you bring it to the destination eyelet.

This way you can "fake" some pretty delicate wiring, similar to a PCB pattern only far stronger. I even used the cheap, hard-copper PVC-insulated electro-instalation wire for some speaker stuff, and it's bulletproof. The holes in your mainboard will hold the buss wire in-place no-matter-what.

I suspect this will work for tube stuff just as well as it worked for my stuff. Consult resident doctors here for the second opinion on the matter :green:
 
thanks both of you. I can get started with that.

I also know heater wiring should stay as far as possible from, well, everything.

A couple of things still bother me. Should I be worried about my 300V B+ lines? Twisted wires or not, and with what?

Are the hot and cold balanced input wires inside the case subject to noise from heaters or B+?
 
board-05.jpg
 
[quote author="nickt"]http://www.discretesynthesizers.com/nova/intro.htm

Best to sit down before opening this link :wink:[/quote]

:shock: I'm glad some people find this kind of outlets for their insanity.

Found this in the lab as well,

levelamp1.jpg


Great stuff, and exactly what I need to see.
 
[quote author="bcarso"]That Novachord restoration bit is wonderful. Thanks for that.[/quote]

No worries - the site was better when I first found it. The guy seems to have all the really detailed stuff on a CD or something now. Nevertheless its still a bit of a jawdropper. :cool:
 
[quote author="nickt"]http://www.discretesynthesizers.com/nova/intro.htm

Best to sit down before opening this link :wink:[/quote]

the title page should read "The Undertaking"

-What a restoration!
 

Latest posts

Back
Top