You are using an out of date browser. It may not display this or other websites correctly.
You should upgrade or use an alternative browser.
You should upgrade or use an alternative browser.
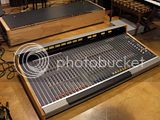
Need a new armrest for my console—any suggestions?
- Thread starter Skylar
- Start date
Help Support GroupDIY Audio Forum:
This site may earn a commission from merchant affiliate
links, including eBay, Amazon, and others.
pucho812
Well-known member
We are doing the same thing at work. If your armrest is anything like the one on our SSL 4000, then it should be easy to remove. You can get material to recover it. That and a nice staple gun should take care of it. What you cover it with is up to you. Make it a 2 person job so that it comes out nice and tight. Add extra foam for comfort. I am lucky in that L.A. has a place called foam mart. I think they do online orders
www.foammart.com
anyway get material and have at it. This is DIY. But if your not sure then take it to someone who reupholsters furniture.
www.foammart.com
anyway get material and have at it. This is DIY. But if your not sure then take it to someone who reupholsters furniture.
I have done them in leather, fabric, and in pleather. Your specific rubrail looks from the pic like it is not padded? In that case you have to scrape the glued goo off and get it really clean first. Then a new cover glued with contact cement.
If I can't see and it is padded, then upholstery shop as Pucho mentioned has the padding and the material.
From experience, there is a stiffness/durability continuum you have to walk. Very durable material is very stiff and does not finish well at the ends ie. school bus seat covering. Soft material looks great but does not last long. Fabric and leather went into private studios that do not get commercial use.
If there was padding, then the newer paddings are much better and stiffer. Less off-gassing too.
Sometimes the client has chucked the whole thing in favor of some nice wood, although it is not as comfy as a, err, mustache.
Mike
Skylar,
I redid the armrest on my Sony console in a light grey marine vinyl that would go pretty well with the console you've shown.
My armrest was a piece of wood with some foam on it, wrapped with the vinyl. I took off the old stuff, took out all the staples from the wood, and used an electric stapler to attatch the new vinyl (you stretch it over and staple to the under side, so you don't see the staples once it's installed again.
I've got enough left over to do another one. Your more than welcome to the material. Drop me a pm if interested.
Regards
Jon
helterbelter
Well-known member
When I look at yours, it should be fairly straight forward, since there aren't any angles involved. The way Fum suggests will probably be the best way to do it then. Also because what Sodderboy said about the choice of materials.
This is the way I did it. You can see there are some angles in it, so I've chosen to use a fake leather, stretching fabric. The padding I used here is Neoprene. I hope it will last long. Time will tell. The glue I used is re-positionable glue in a spraycan.
The armrest with the neoprene slabs :

apply the glue :

Attach the fabric :

hmmm, bad photoquality


I used tape and glue to attach the fabric. Stapling it richely would be better of course, but I can't find the stapler at the moment...
et voilá !


Next thing for me to do is the sidepanels.....
This is the way I did it. You can see there are some angles in it, so I've chosen to use a fake leather, stretching fabric. The padding I used here is Neoprene. I hope it will last long. Time will tell. The glue I used is re-positionable glue in a spraycan.
The armrest with the neoprene slabs :

apply the glue :

Attach the fabric :

hmmm, bad photoquality


I used tape and glue to attach the fabric. Stapling it richely would be better of course, but I can't find the stapler at the moment...
et voilá !


Next thing for me to do is the sidepanels.....
Skylar
Well-known member
Thanks for the tips everyone! You guys are awesome.
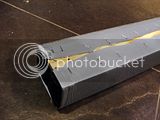
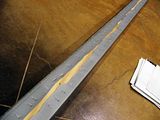
The armrest is is padded.
I was able to pull it off pretty easily.
Looks like the vinyl material was stretched and stapled.
I don't see any signs of adhesives, and there's a backing fabric between the foam padding and vinyl.
Hey fum, thanks for the offer. That's super-nice of you, but I think I want to go with a darker color.
I'm going to try to find a marine-grade faux leather in a deep blue or black as a fallback.
Anyone know how this effect is achieved?


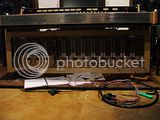
In the meantime, here's what I'm getting sorted out:
The armrest is is padded.
I was able to pull it off pretty easily.
Looks like the vinyl material was stretched and stapled.
I don't see any signs of adhesives, and there's a backing fabric between the foam padding and vinyl.


Hey fum, thanks for the offer. That's super-nice of you, but I think I want to go with a darker color.
I'm going to try to find a marine-grade faux leather in a deep blue or black as a fallback.
Anyone know how this effect is achieved?


In the meantime, here's what I'm getting sorted out:

bruno2000
Well-known member
The armrests on our SSL 4Ks were getting really beat up and torn, so I had a local cabinet maker make some out of oak and finish them with marine varnish. No fabric covering. If / when they get scratched, we'll just pull them off, sand them down, and re-finish. It cost $150 for the 64 frame, and $100 for the 40 frame. It would have cost twice as much to have them re-covered.
Bruno2000
Bruno2000
> how this effect is achieved?
Hard to be sure in the pictures. It is probably a variation of a classic custom-car upholstery technique.

I believe you want a sewing-machine foot which has a groove, which runs along the cord and keeps the stitching tight and uniform, so when the seam is pull over the padding the lump has a consistent height.
http://www.google.com/search?q=tuck+and+roll+upholstery
Hard to be sure in the pictures. It is probably a variation of a classic custom-car upholstery technique.

I believe you want a sewing-machine foot which has a groove, which runs along the cord and keeps the stitching tight and uniform, so when the seam is pull over the padding the lump has a consistent height.
http://www.google.com/search?q=tuck+and+roll+upholstery
Skylar
Well-known member
Larry Sheehan
Well-known member
That's sexy!
pucho812
Well-known member
looking good
Wow Skylar! Great deal man. Plus, it looks very nice indeed. 8)Skylar said:...$25 got me this...
Jeff
helterbelter
Well-known member
25 dollars..... That's 25 dollars very, very well spent, hahaha !
(by the way, I found my stapler again.....)
(by the way, I found my stapler again.....)
Similar threads
- Replies
- 50
- Views
- 3K
- Replies
- 12
- Views
- 1K
- Replies
- 85
- Views
- 8K
- Replies
- 44
- Views
- 3K


