


Been a long time lurker, but I finally decided to post a little. Alas, all I've got to add is another API312 build that isn't even finished, but what the heck. I build guitar stuff, mic pres are a fun change and I'm excited to have something nice for myself.
For back story, I wanted to do this 5 or 6 years ago, but couldn't get my hands on 2520s. When I came back to Prodigy a while back, thinking I'd sort it all out, all the problems had been solved! Several folks have great op amps and kits and putting it all together is so easy it's almost anticlimactic.
I went with Whistlerock's ML12 board and 2520 op-amp kits. I also used his power supply and am happy I did. It's really well designed. I started with two of them, plus the EA tranny sets. They sounded so good I went ahead and ordered two more ML12 boards, op amp boards, and some DI boards. Alas, ClassicAPI was out of trannies by that point, so I have two up and running and I'll get to the other two in a couple of weeks.
Mike at Whistlerock let me have the ML12 boards before they were officially released, and was super helpful. I'm glad, because they have some great features -- they fit 4 in a 1u rack with ease, have an automatically switching DI option, and include a header for the extra winding on the tranny in case you want to set up metering or do a monitor out. I was a little reticent about the pot instead of a stepped attenuator, but then I thought "They're APIs! The trannies are iron, and I'll probably cook the 550s in the op amp until they're out of range, anyway!" I was foolish to have worried -- the pot is actually nice, and allows fine tuning of gain with ease.
The only difficult part of this project might be the op amps, which require actual skill with a soldering iron. I've built a hundred guitar pedals and a score of amps, and done enough repairs that I can ham fist my way through almost any PCB, but for a beginner the op amp kit will require patience.
Results are fantastic. Certifiable buttloads of headroom, distinctively rich but pleasingly open sound, and I'm dying to get someone into the studio who can really sing and play so I can engineer with these things.
Some pics of the build (In process, only two channels are done):
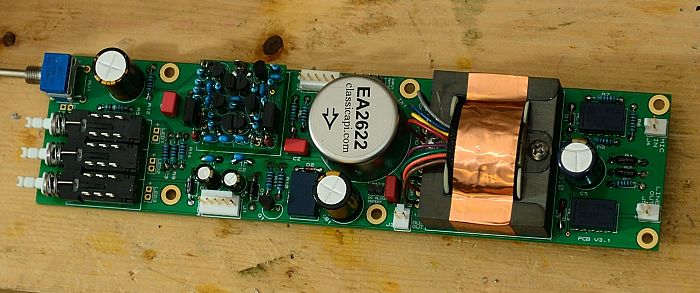
A stuffed board:
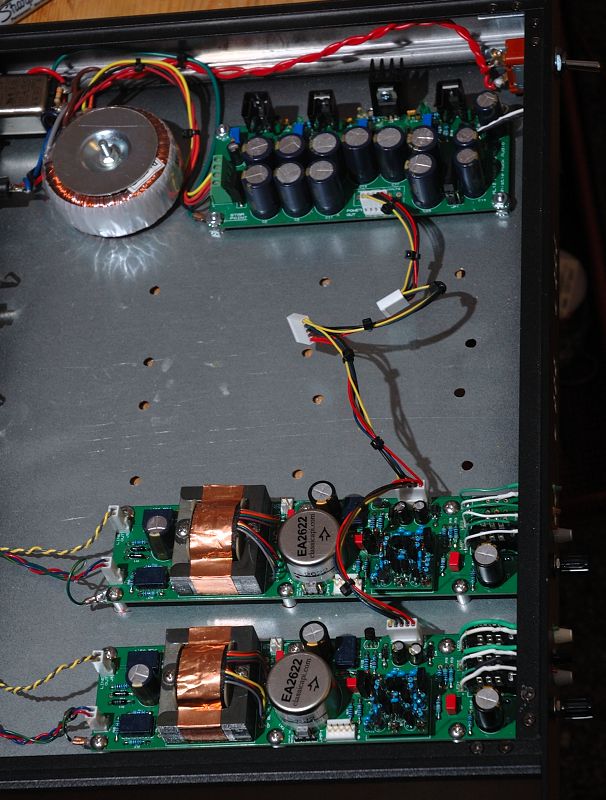
Test fitting the case:
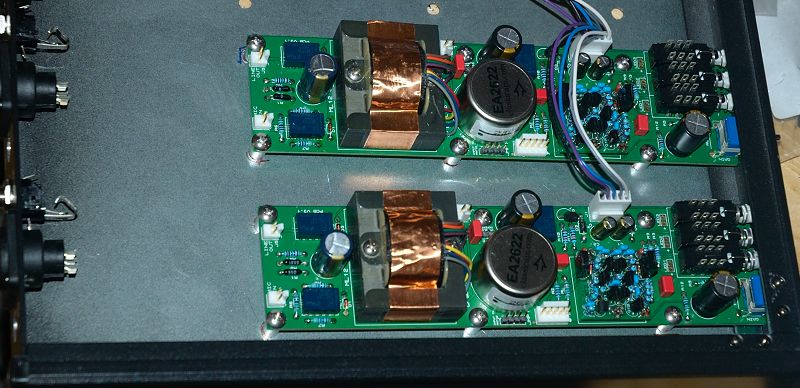
Two channels working + the Whistlerock PSU
I made some samples using this rig:
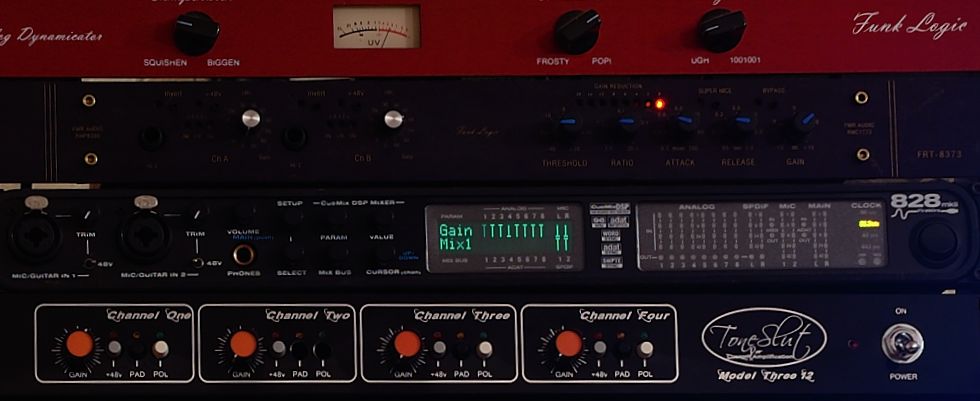
The samples were done as simply as possible. Used the API and an FMR RNP (the most honest and bland preamp I have) into a pair of pretty well matched SDCs. I set the mics up as close as possible to each other, then stood in front of them with an instrument and made some noise.
http://toneslut.com/sounds/samples/API/ShakeShakeShake_API.mp3
http://toneslut.com/sounds/samples/API/ShakeShakeShake_RNP.mp3
http://toneslut.com/sounds/samples/API/IggyLeLe_API.mp3
http://toneslut.com/sounds/samples/API/IggyLeLe_RNP.mp3
http://toneslut.com/sounds/samples/API/HighString_API.mp3
http://toneslut.com/sounds/samples/API/HighString_RNP.mp3
http://toneslut.com/sounds/samples/API/DtunedAcoustic_API.mp3
http://toneslut.com/sounds/samples/API/DtunedAcoustic_RNP.mp3
APIs rock. I feel like, with two of these and some talent, I could record Siamese Dream. In fact, the only thing that I can't rave about on this project is the case, which I bought from Circuit Specialists. I'd have done better with a basic case from Par Metal for the extra $20.
In summary:
For back story, I wanted to do this 5 or 6 years ago, but couldn't get my hands on 2520s. When I came back to Prodigy a while back, thinking I'd sort it all out, all the problems had been solved! Several folks have great op amps and kits and putting it all together is so easy it's almost anticlimactic.
I went with Whistlerock's ML12 board and 2520 op-amp kits. I also used his power supply and am happy I did. It's really well designed. I started with two of them, plus the EA tranny sets. They sounded so good I went ahead and ordered two more ML12 boards, op amp boards, and some DI boards. Alas, ClassicAPI was out of trannies by that point, so I have two up and running and I'll get to the other two in a couple of weeks.
Mike at Whistlerock let me have the ML12 boards before they were officially released, and was super helpful. I'm glad, because they have some great features -- they fit 4 in a 1u rack with ease, have an automatically switching DI option, and include a header for the extra winding on the tranny in case you want to set up metering or do a monitor out. I was a little reticent about the pot instead of a stepped attenuator, but then I thought "They're APIs! The trannies are iron, and I'll probably cook the 550s in the op amp until they're out of range, anyway!" I was foolish to have worried -- the pot is actually nice, and allows fine tuning of gain with ease.
The only difficult part of this project might be the op amps, which require actual skill with a soldering iron. I've built a hundred guitar pedals and a score of amps, and done enough repairs that I can ham fist my way through almost any PCB, but for a beginner the op amp kit will require patience.
Results are fantastic. Certifiable buttloads of headroom, distinctively rich but pleasingly open sound, and I'm dying to get someone into the studio who can really sing and play so I can engineer with these things.
Some pics of the build (In process, only two channels are done):
A stuffed board:
Test fitting the case:
Two channels working + the Whistlerock PSU
I made some samples using this rig:
The samples were done as simply as possible. Used the API and an FMR RNP (the most honest and bland preamp I have) into a pair of pretty well matched SDCs. I set the mics up as close as possible to each other, then stood in front of them with an instrument and made some noise.
http://toneslut.com/sounds/samples/API/ShakeShakeShake_API.mp3
http://toneslut.com/sounds/samples/API/ShakeShakeShake_RNP.mp3
http://toneslut.com/sounds/samples/API/IggyLeLe_API.mp3
http://toneslut.com/sounds/samples/API/IggyLeLe_RNP.mp3
http://toneslut.com/sounds/samples/API/HighString_API.mp3
http://toneslut.com/sounds/samples/API/HighString_RNP.mp3
http://toneslut.com/sounds/samples/API/DtunedAcoustic_API.mp3
http://toneslut.com/sounds/samples/API/DtunedAcoustic_RNP.mp3
APIs rock. I feel like, with two of these and some talent, I could record Siamese Dream. In fact, the only thing that I can't rave about on this project is the case, which I bought from Circuit Specialists. I'd have done better with a basic case from Par Metal for the extra $20.
In summary:
- Classic API are great to deal with
- Whistlerock's boards, op amps, and power supplies are highly recommended
- The EA trannies are perfect for this type of amp
- The project was entirely too easy
")