SSLtech
Well-known member
This week I had a visit from Lukas (Livingnote) and his charming girlfriend. -They were passing through town on their way home to Europe, so I gave them the tour of where I am and what I do, as they passed by on the way to Kennedy Space Center to watch the shuttle launch.
Well, it seems that they had a few disappointments (apart from meeting me, that is! ;D) not least of which was the storm clouds which rolled in JUST before the launch (I'd set my alarm clock to wake me so I could watch it from my house, because night-time launches are always spectacular) meant that they had to go home without seeing a lift-off.
...But worse than that, Lukas's 'pride and joy' version of the buss limiter had apparently been damaged in travel, and had sustained quite a mighty blow to the front.
-Now bear in mind that this front panel appears to be made from high chromium steel (certainly, it's untreated, unvarnished etc, yet it does not rust, even a tiny bit!) and that it's the thickest DIY front panel I've ever seen, and you might have some idea of how much it got banged up, when I point out that it was bent by about 10° down towards one end...
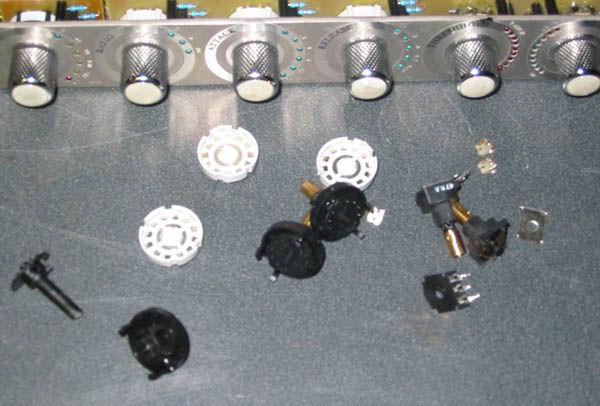
In addition, most of the front panel controls were destroyed. -The Lorlin switches were smashed, as were most of the pots. Some of the LEDs were also smashed/shattered, and Lukas had taken it apart to survey the damage, before apparently beginning to somewhat despair of putting it back together.
Now, being that I've ALWAYS been both particularly enthusiastic and especially impressed with this particular build, I pretty much decided that I just HAD to work on it! -Certainly, I think they would have had an impossible task of getting this on a plane back to Germany... Too many loose twisted wires and questionable bits of home-assembled circuitry for security-conscious airline personnel to EVER take a chance on flying, I'm certain!
-So after they left, I set to work on repairing and re-assembling the unit. Here's a couple of photos of what I've been up to in the last couple of evenings...
Some broken bits which were removed:

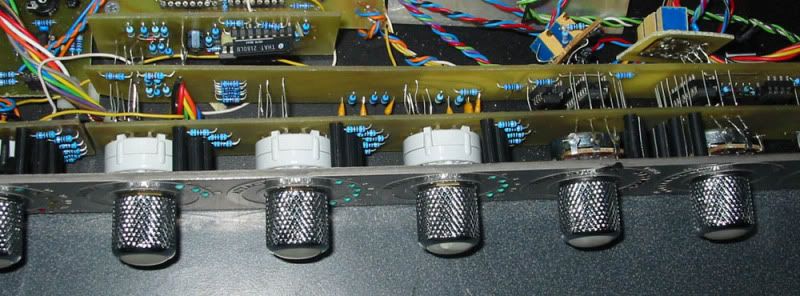
The re-assembled panel up close:

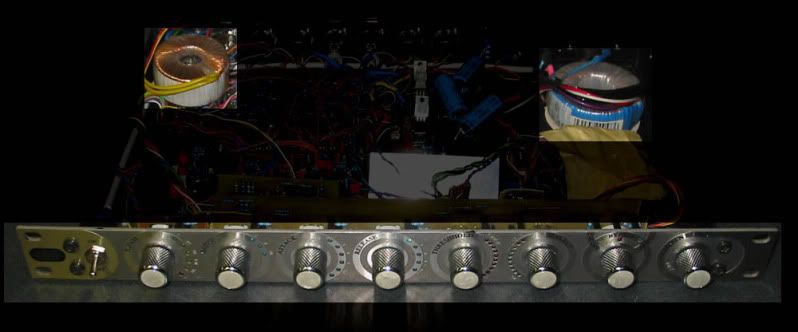
Right now I have to replace the (240V primary) power transformer, -I've ramped the power up gently with a variable autotransformer, and a 240V step-up... and so far everything looks pretty good, apart from one blue LED which is internally broken. (I'll have to try and source one which looks similar both illuminated and unlit). -But apart from that, I think I'll look into modifying the unit a little more.
I'm extremely surprised at how 'proprietorial' I've become towards this unit; it's turning into a true 'labor of love' -this might just be my favourite piece of DIY... EVER!
Extremely well done, Lukas!
-Keith
Well, it seems that they had a few disappointments (apart from meeting me, that is! ;D) not least of which was the storm clouds which rolled in JUST before the launch (I'd set my alarm clock to wake me so I could watch it from my house, because night-time launches are always spectacular) meant that they had to go home without seeing a lift-off.
...But worse than that, Lukas's 'pride and joy' version of the buss limiter had apparently been damaged in travel, and had sustained quite a mighty blow to the front.
-Now bear in mind that this front panel appears to be made from high chromium steel (certainly, it's untreated, unvarnished etc, yet it does not rust, even a tiny bit!) and that it's the thickest DIY front panel I've ever seen, and you might have some idea of how much it got banged up, when I point out that it was bent by about 10° down towards one end...
In addition, most of the front panel controls were destroyed. -The Lorlin switches were smashed, as were most of the pots. Some of the LEDs were also smashed/shattered, and Lukas had taken it apart to survey the damage, before apparently beginning to somewhat despair of putting it back together.
Now, being that I've ALWAYS been both particularly enthusiastic and especially impressed with this particular build, I pretty much decided that I just HAD to work on it! -Certainly, I think they would have had an impossible task of getting this on a plane back to Germany... Too many loose twisted wires and questionable bits of home-assembled circuitry for security-conscious airline personnel to EVER take a chance on flying, I'm certain!
-So after they left, I set to work on repairing and re-assembling the unit. Here's a couple of photos of what I've been up to in the last couple of evenings...
Some broken bits which were removed:

The re-assembled panel up close:

Right now I have to replace the (240V primary) power transformer, -I've ramped the power up gently with a variable autotransformer, and a 240V step-up... and so far everything looks pretty good, apart from one blue LED which is internally broken. (I'll have to try and source one which looks similar both illuminated and unlit). -But apart from that, I think I'll look into modifying the unit a little more.
I'm extremely surprised at how 'proprietorial' I've become towards this unit; it's turning into a true 'labor of love' -this might just be my favourite piece of DIY... EVER!
Extremely well done, Lukas!
-Keith


