How to: restuff an electrolytic can capacitor

GroupDIY Audio Forum

Help Support GroupDIY Audio Forum:

This site may earn a commission from merchant affiliate links, including eBay, Amazon, and others.

emrr

Well-known member
Joined
Apr 12, 2006
Messages
8,539
Location
NC, USA
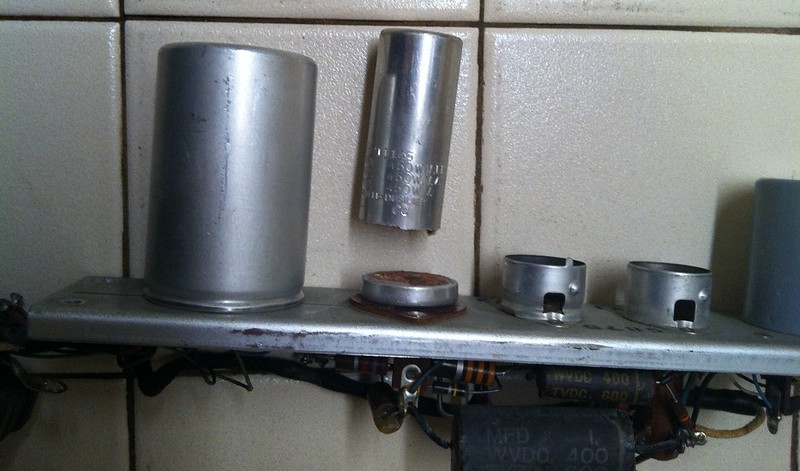
Sometimes you get a multi-section cap capacitor that is mechanically integral to the construction of a piece. In this example, every connection relating to B+ feed is built off of the cap connections, and there's no room to build with new parts elsewhere. Maybe you could pull the original can, and find a little extra space, but then there'd be an obvious ugly hole in the chassis. Maybe, like this example, the original mounting wafer is riveted in place rather than screwed down.

Here's the solution, which also keeps original look intact.
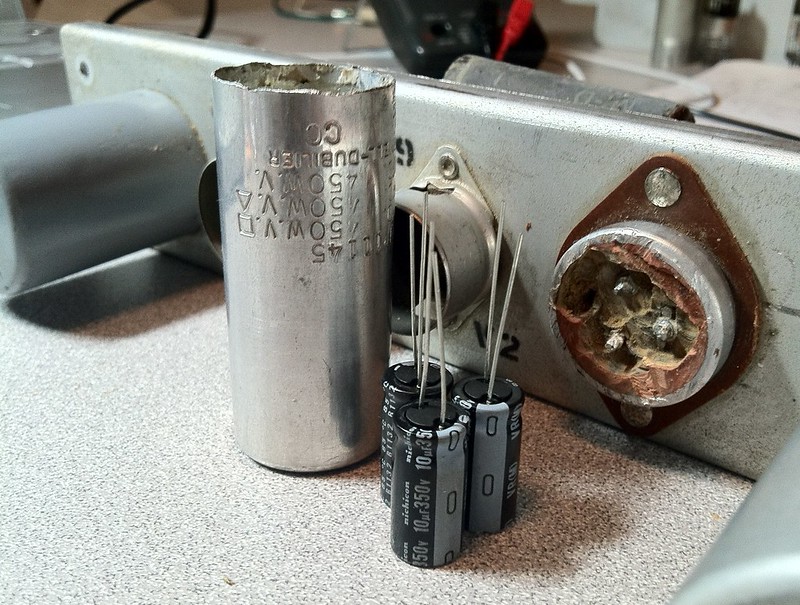
Cut the can near the base, a hacksaw will do it in 20-30 seconds.
Drill through remaining cap base beside the original terminals, and once through the very center for the ground connection, only as large as needed for the new cap leads.
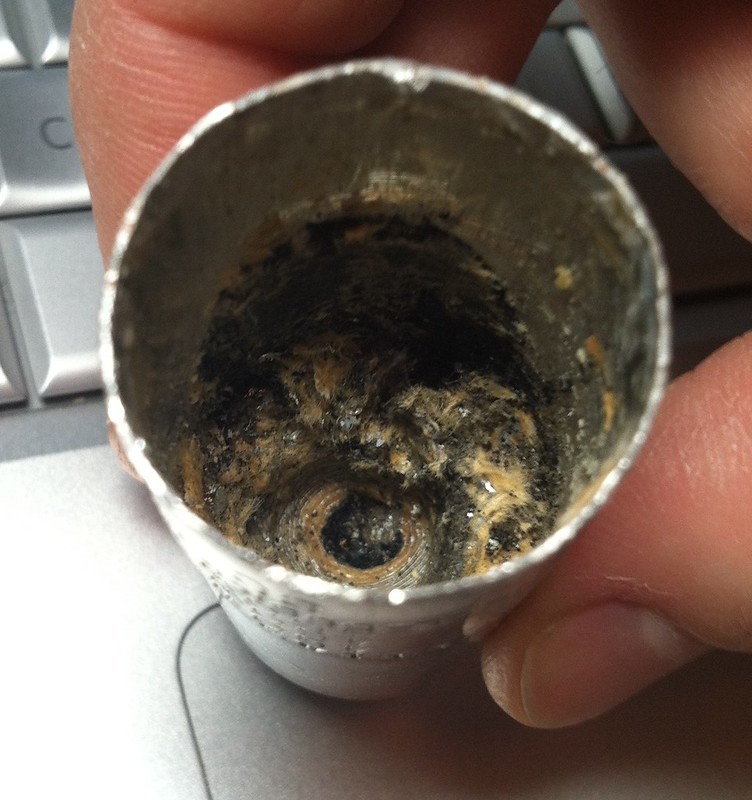
Run a drill into the core of the old cap, this will allow you to then pull out enough of the remaining layers of paper and foil to make room for new caps.
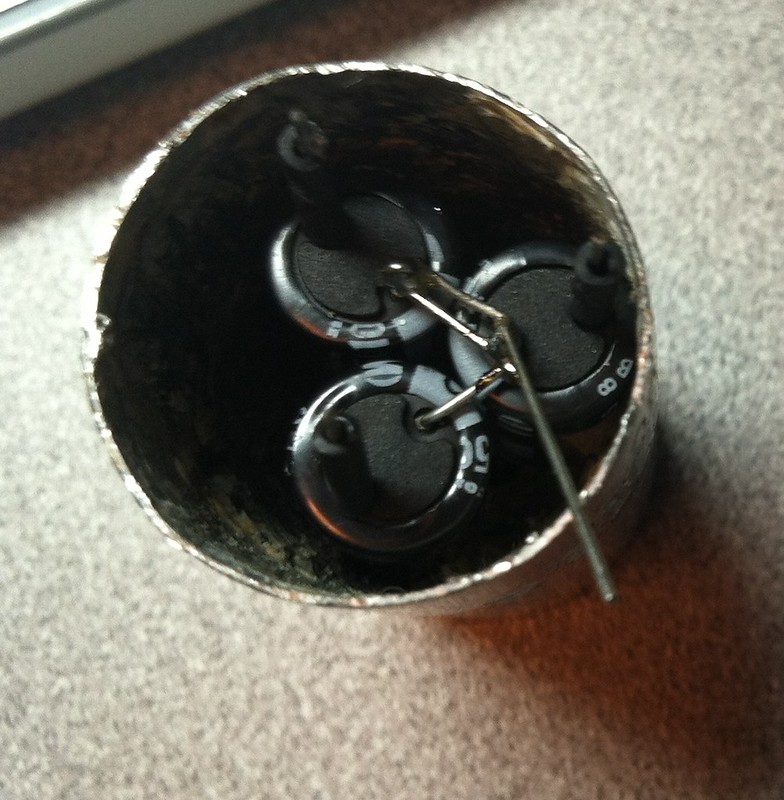
Tie the grounds of the new caps together as needed, insulate as needed.
Mount the new caps and solder the new leads to the original terminals on the circuit side.
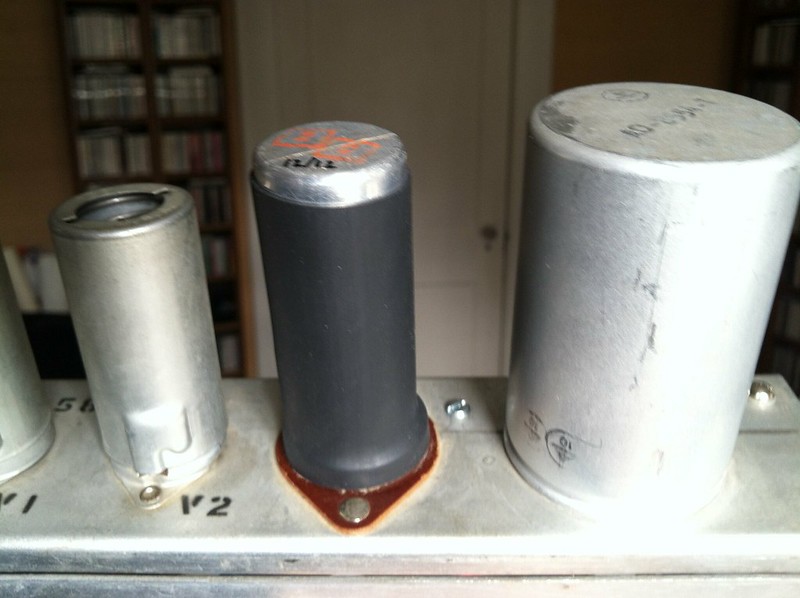
Put the original can over the new caps, and heatshrink the can back to the base.

8292485653_e118617afa_c.jpg


8292486493_1247b8b81b_c.jpg


8293540160_d483a92883_c.jpg


8293540302_a39a6c64ee_c.jpg


8292487041_f529815bb7_c.jpg


8462491650_261c9d86ac_c.jpg
 
Last edited:
I have done this with several pieces of gear for clients who want to keep the original look.
However, many replacement cans are available from Antique Radio Supply.
I recapped the power supply for my RCA console using their newly manufactured multi-section cans.
 
In many cases the values needed are not available. Even when they are available, the work to completely disassemble and replace is astronomical compared to this method. The number of surrounding parts that will likely have to be replaced goes way up, and in this particular example, we have parts that are also affixed directly to old 9 pin tube sockets, which like to break when messed with very much.
 
Last edited:
In rare cases I have even seen a few commercial parts done this way. The modern trend of shrinking size makes similar things possible.

In you case,  ;D  do what works and looks good. I suspect a slight drop in thermal dissipation capability, but the modern parts probably have lower ESR so will make less heat to worry about. 

JR
 
Layered gloves, ventilation, disposable chopsticks, prayer, and big $$$ are the ingredients for this endeavor.

I did that a few times, and it was just way too toxic.  I like to keep the muck in the cans and buried at the bottom of the Hudson River.

I leave the PCB laden can in place for cosmetics, seal the end with epoxy resin, and add the much smaller replacement components underneath the chassis.  The ground lugs are still grist for mounting.

It depends on the client.  Some want cosmetics, so a shrink covered stuffed can is no-go for both of us.  Others could give a sot and just want <insert vintage equipment here> repaired.  Each job is purely up to an agreement between client and tech.

Mike

 
There's no PCB in an electrolytic. (PCB is in large, utility-size, oil caps.)

Electro is mostly boric acid. Mildly irritating. I'm sure that eating a pound will make you very sick. But cleaning an eXploded 3,000u 75V cap, I just washed my hands after.

I'm slightly shocked at hacksaw and shrink-tape. Depends on your goals of course. I have simply run a heavy drill up through the phenolic bottom plate. Ice-pick and forcepts to get the guts out. Assemble cap-bank with long heavy leads, slip in like the ship in a bottle.
 
PRR said:
I'm slightly shocked at hacksaw and shrink-tape. Depends on your goals of course.

Well, I burned out a Dremel on the first one, and the hacksaw really didn't take any longer!

Goal is to not disassemble anything else, especially where it would be problematic and increase work (translate: client bill) 10x, with possibility of other component breakage.  You couldn't run a drill through the bottom of these without destroying 50% of the surrounding circuit, at which point you might as well strip it all the way down and replace every R and wire too. 

Stability is good.  I can pick the entire module up by the shrink-wrapped can.  Should it pop off, it's simply a cover hiding the ugliness of the new tacked in caps. 

Here's another pic showing the interior view.  With the side surround enclosure mounted, everything is within a 2.25" wide space that is 2.25" deep. 

8462977557_30e08d3ecf_c.jpg
 
"However, many replacement cans are available from Antique Radio Supply."

Will someone post a website for "Antique Radio Supply" for the can capacitor replacements?
 
> the interior view

Argh. That's UN-maintainable. Did they think e-caps lived forever?? Shudda thrown the whole console out in 1973.
 
Maybe back then they would think someone would have to be either stupid or nuts (or both) to want to use such old, obsolete technology over the promising tech of the future...

Boy were they right.
 
Well, I burned out a Dremel on the first one, and the hacksaw really didn't take any longer!

Goal is to not disassemble anything else, especially where it would be problematic and increase work (translate: client bill) 10x, with possibility of other component breakage. You couldn't run a drill through the bottom of these without destroying 50% of the surrounding circuit, at which point you might as well strip it all the way down and replace every R and wire too.

Stability is good. I can pick the entire module up by the shrink-wrapped can. Should it pop off, it's simply a cover hiding the ugliness of the new tacked in caps.

Here's another pic showing the interior view. With the side surround enclosure mounted, everything is within a 2.25" wide space that is 2.25" deep.

8462977557_30e08d3ecf_c.jpg


I have two questions.

1) Do you recall the exact size shrink wrap you used? 1" looks like it will be a tight fit and possibly too tight to get it over the entire can without major struggle, esp at the cut where the hacksaw can cause slight jagged protrusions that might need to be filed down.

2) What method worked best for removing the petrified guts? Excess dust creation is a concern

Don’t recall. It shrinks a lot. I used a drill. More of a gummy mess, no dust.
 
Don’t recall. It shrinks a lot. I used a drill. More of a gummy mess, no dust.

Yeah I was looking at some 1" marine grade glue lined shrink that went 3:1 so 1.5" would probably be fine.

First cap I sawed open was pretty much petrified. I tried a corkscrew hoping to get lucky but not gonna happen. Its really stuck tight to the can.
 
Nothing pulled out cleanly, drill just allowed me to chip away more with a sharp pointy thing.
 
You could use clear shrink wrap, clear epoxy or silicone to join the top of the can to the bottom. It would be visually less obtrusive if that matters.
 
I think stuffing a can looks like it's a PITA and difficult to do neatly. Replacements are not cheap but available from CE distribution who supplies Antique Radio and few other boutique suppliers. CE distribution, https://www.cedist.com/, manufactures the cans in the original Mallory cases. Most run $30-40. It's worth it IMVHO.
If you are in the business you can open an account and buy at wholesale, which is about 10-20% less.
New ones look good and are geared to the instrument amplifier market, Ampegs, etc., along with so much else they sell, tubes, sockets. . . So you can get the can off the wafer mount by twisting the tabs until they break off then you can sub another.

I just had to replace 4 in a hand wired Futterman Stax tube electrostatic headphone amp, shown in the photos attached. 600 + volts floating around in there!

In power supplies, get the voltage rating you want, and close to or greater ufd value than the original you probably can find a suitable sub. Bigger rarely causes a problem and may improve bass and punch, and interstage decoupling. Just don't make the input filter cap too large if you have a tube rectifier. Your option to bypass with film caps to keep the hi end sweet.

I also replaced 2 cans which were enclosed in a cardboard tube because the cases were way above ground by cutting up an old PC board into the shape of the wafers, drilling mounting holes and holes for PC mount cans, cut away unneeded traces, soldered the caps to the remaining traces and dropped them in. This, BTW, is somewhat of a PITA, too, but neat. Here they are somewhat hidden and the cans come already shrink wrapped.

If you want to keep the look, you can simply disconnect the hot from an unused can and use a cap in another can, or wire one up under the chassis to take its place.

I hope this will assist someone in the same boat.
 

Attachments

  • 20230303_173454.jpeg
    20230303_173454.jpeg
    1.2 MB · Views: 0
  • 20230102_180457.jpg
    20230102_180457.jpg
    2 MB · Views: 0
  • IMG_20221223_211628017_HDR.jpg
    IMG_20221223_211628017_HDR.jpg
    969.5 KB · Views: 0
Last edited:
sometimes you have no choice.

like the Marantz filter caps i did that had +/- and gnd.

nobody makes those. doing a work around with a pc board and caps was a pain and did not look good.
and you have to butcher the chassis.
 

Latest posts

Back
Top