rainton
Well-known member
Hey folks,
just recently I a fellow GDIY member pointed out that this page is completely out of date.
Before I explain everything in every detail - long story short:
I have my own website and all my projects are available there - most of them have been updated tremendously compared to what you see below. Meaning screen printed backpanels, custom made powder coating - color sampled from vintage units, the Pultecs have a massive 5mm (13/64") thick front panel, the LA2A has a 2-piece back chassis now just like the vintage units, anodized etc.
Check up-to-date information on all projects on: www.analogvibes.com
Thanks
************************************************************************************************************
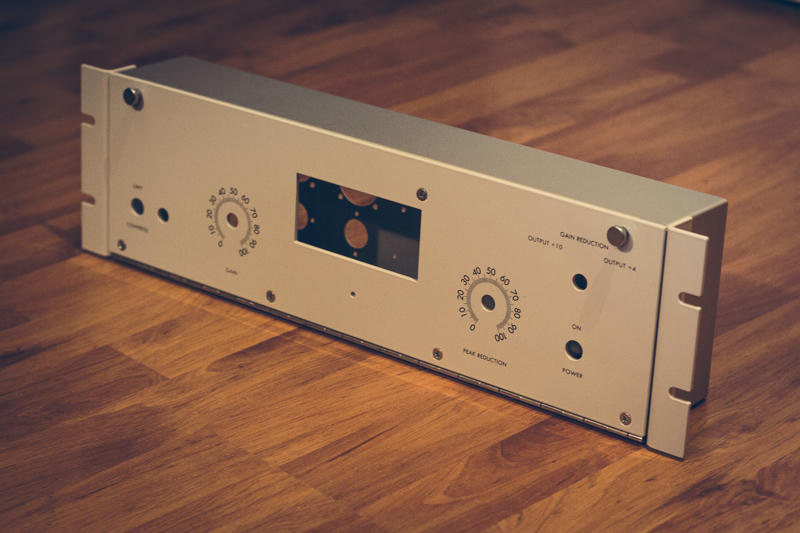
LA2A style P2P chassis V2:
front:
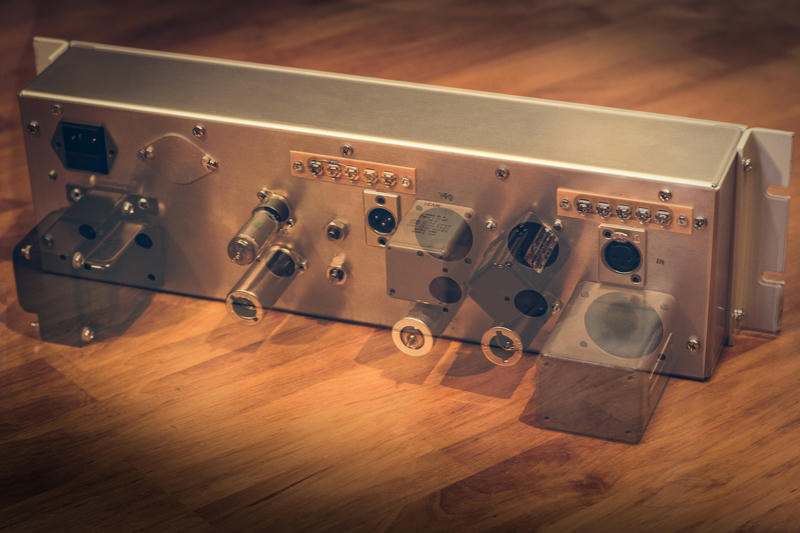
back:
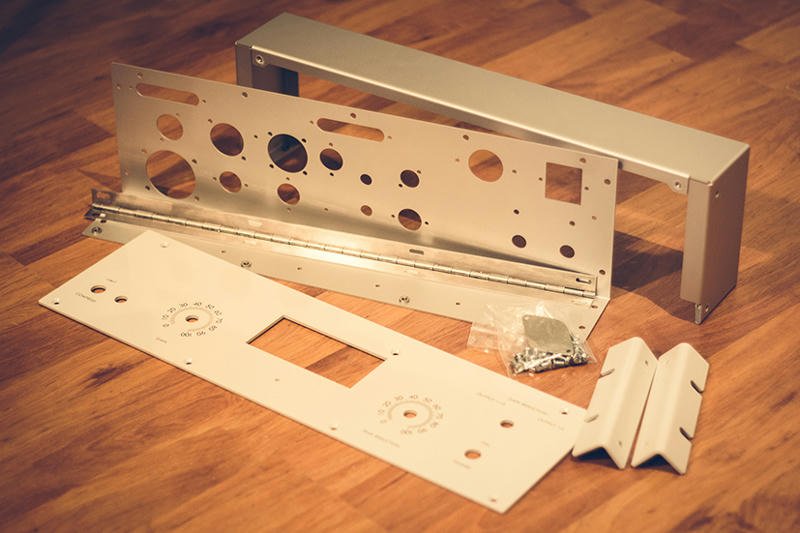
all parts of the kit:
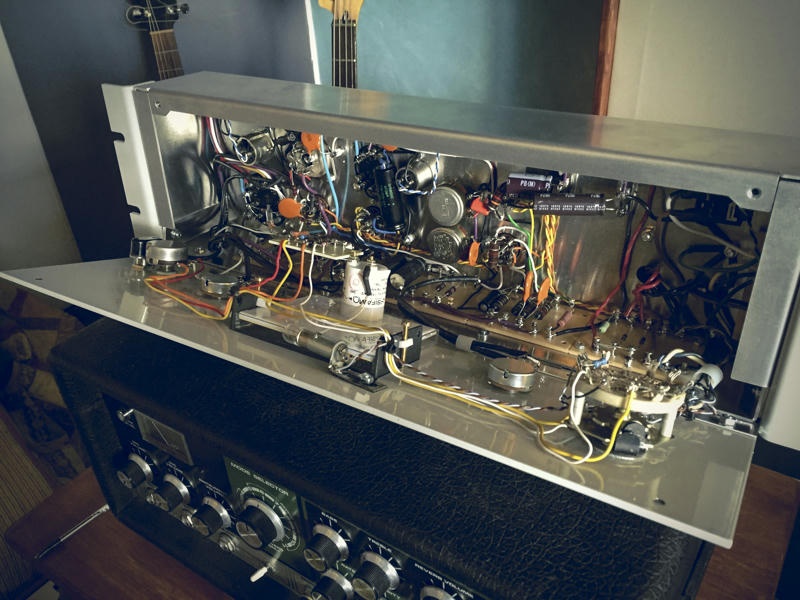
finished unit from the inside:
finished unit in the rack:
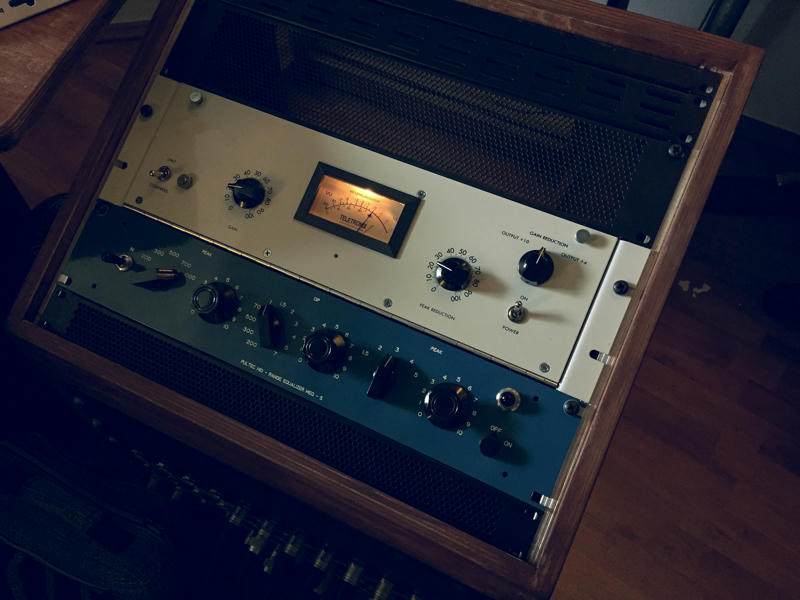
The front of the chassis is powder coated RAL7035 light grey with black silk screening,
the back of this new V2 version consists of a 2 piece aluminum chassis - just like the vintage units.
This make the build much easier because the entire wiring can be done on the open L-frame back&bottom part of the chassis.
It features all holes and cutouts necessary to build an authentic LA2A style compressor without any further modification, drilling etc...
The chassis is designed for the original UTC HA-100x input and UTC A-24 output transformers,
but I also offer adapter plates for UTC A10 input transformer and Sowter in- and output transformers.
The VU-meter cutout fits the Sifam AL39-WF meter as well as the "Teletronix" branded replacement
meter available at don-audio.com in Germany and IMS in the US.
All chassis screw holes are threaded for extremely easy assembling and the chassis also features
vintage style thumb screws for fastening the front panel - just like the vintage units.
The adapter plates are 7.50 EUR each
Here's an extensive package put together by fellow forum member Gambaholic which includes a BOM, an excellent
graphic layout of the components inside the chassis, schematics and HQ pics - it's almost foolproof
http://www.mediafire.com/download/ley4pm3tcam3iam/LA2A_to_Z.zip
chassis discussion over here: http://groupdiy.com/index.php?topic=59538.0
************************************************************************************************************
PULTEC EQP-1A style P2P chassis:
front:
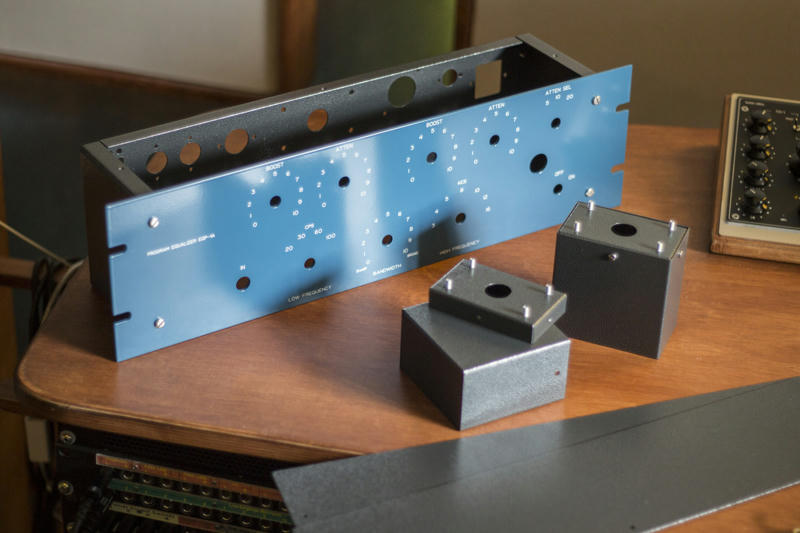
back:
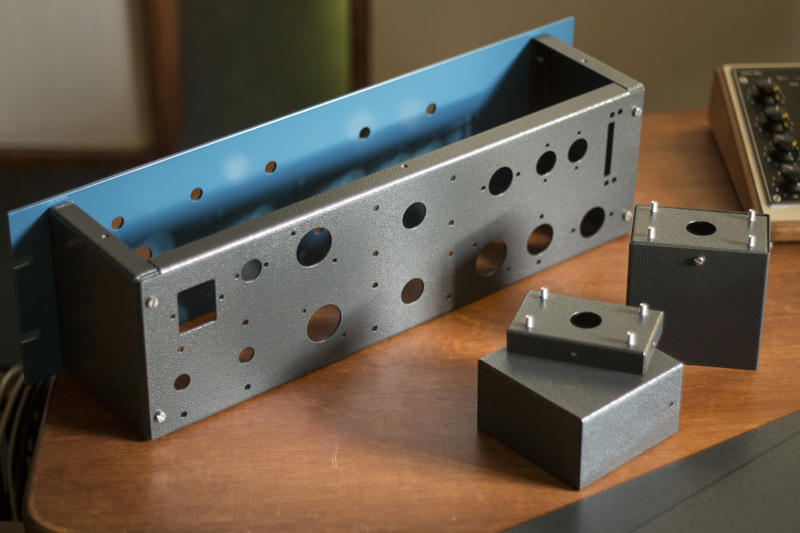
back with mounted filter units:
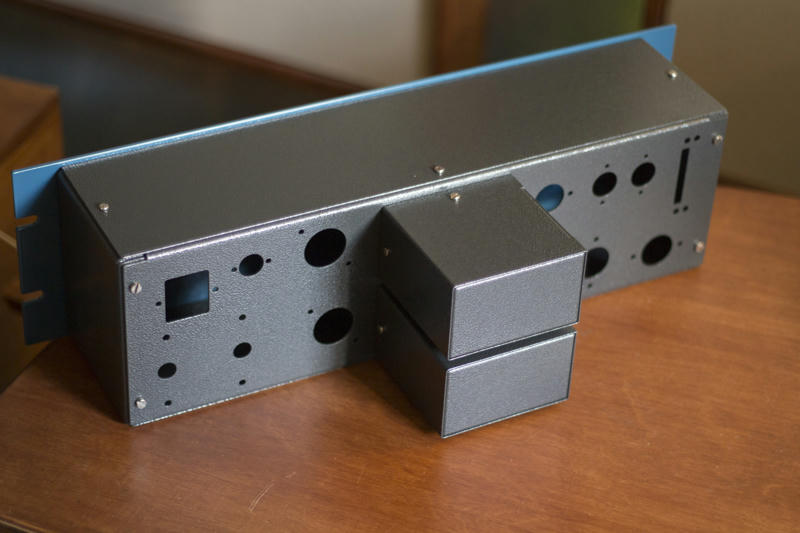
my finished prototype:
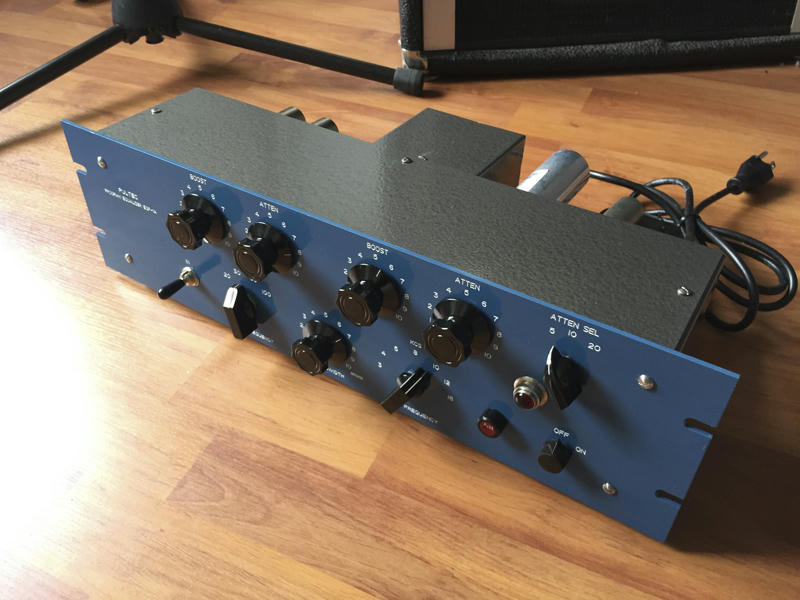
my finished prototype from the back:
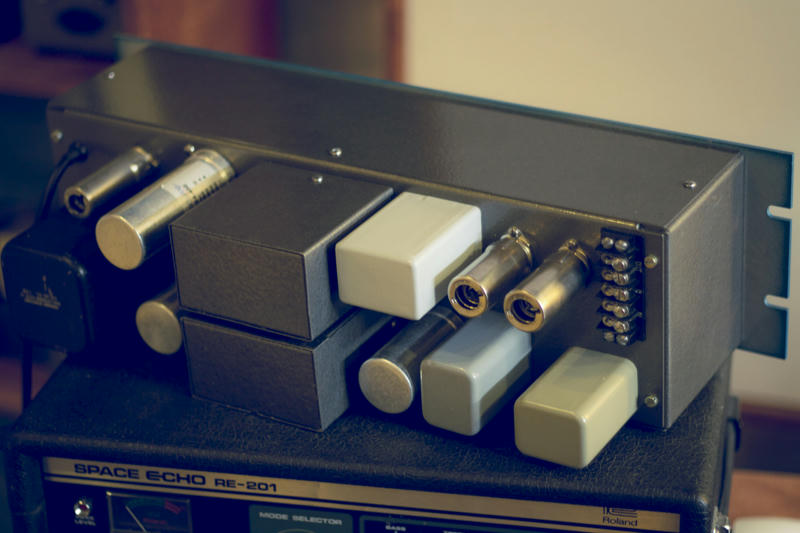
Other than my prototype on the pics the chassis available here feature cutouts for XLR in & out instead
of a screw terminal and also a cutout for a IEC socket (in my prototype the power cable was hardwired
just like in some vintage units)
In addition the main chassis the kit includes 2x filter boxes to be mounted to the back of the main chassis
(as in the original unit) to house the filter sections of the EQP-1A.
The front panel is powder coated blue-grey - very close to the original color and silk screened.
The back and the filter units are powder coated in a rough dark grey color - similar to the hammer finish
of the original units but much more hit and scratch resistant.
Like the LA2A style chassis the EQP-1A style chassis sports all necessary cutouts to build an authentic tube
equalizer without any further drilling or modification. The chassis is designed for the original Triad HS-56 input
and HS-29 interstage transformers and for the newly available Cinemag S-217D (authentic Peerless S-217D replica)
transformers.
However there are adapter plates available for the use of Sowter transformers.
Here's a graphic layout of the components within the chassis and filter units - it shows that building one of these gems
is not really as difficult as it seems
http://www.mediafire.com/file/2b8py0igkenkh7l/Pultec_EQP-1A__layout_rev1_31.pdf
And here's a paper by Chris Preston of vintagewindings.com about "facts and fiction about the Pultec EQ"
Great information about filter caps etc..: http://www.vintagewindings.com/tech%20swag/Pultec-Facts-&-Fiction.pdf
And many people have asked for it - FINALLY a BOM with some additional infos on parts
If you find any mistakes please let me know:
http://www.mediafire.com/file/zfeckxx7jeo1jfg/raintons_Pultec_EQP-1A_Parts_List_rev.1_2.pdf
The price for one complete chassis is 299 EUR (+ VAT if applicable) and includes:
- main chassis
- front panel
- 2x filter boxes
The adapter plates for input, interstage and output transformers are 7.50 EUR ea. (+ VAT if applicable)
discussion over here: http://groupdiy.com/index.php?topic=62061.0
************************************************************************************************************
PULTEC MEQ-5 style P2P chassis:
The chassis is built pretty much the same way as the EQP-1A style enclosure - here's some pics of my finished prototype:
front:
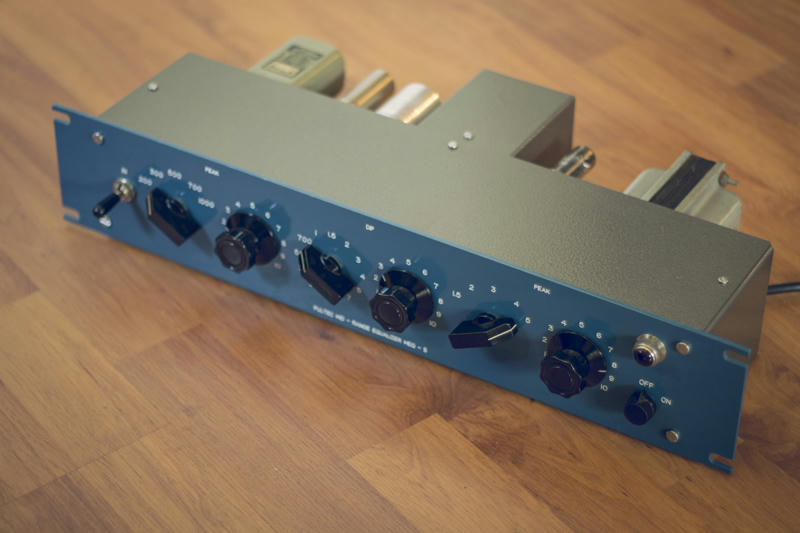
back:
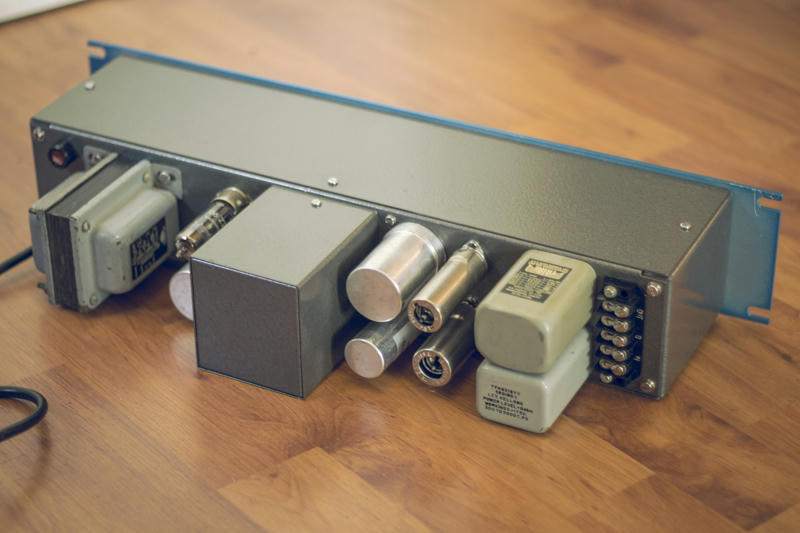
from the other side:
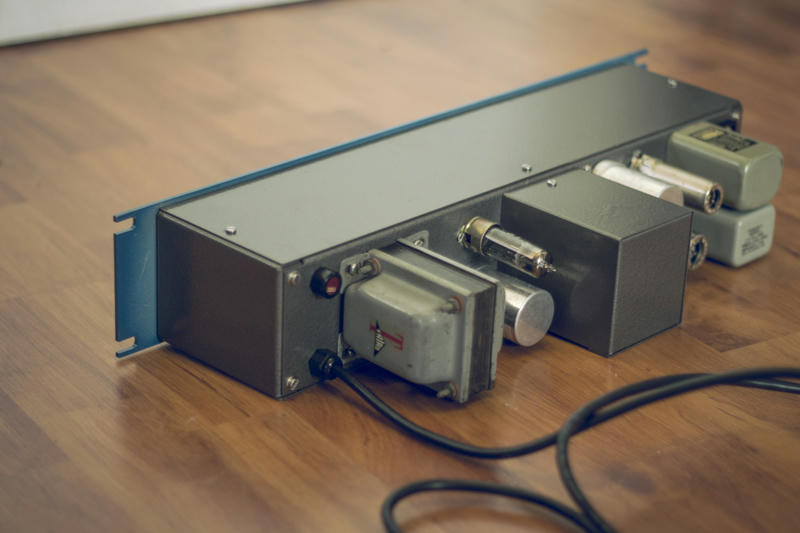
Like the above mentioned chassis this one also sports all necessary cutouts to build an authentic tube
equalizer without any further drilling or modification. The chassis is designed for the original Triad HS-56 input
and HS-50 output transformers.
However there are adapter plates available for the use of Sowter transformers and with little modification other vintage
transformers should fit the Triad HS footprint.
Other than my prototype the chassis available here features cutouts for XLR connectors instead of the terminal strip and a cutout for a modern IEC power connector instead of the hard wired power cord.
Also for the MEQ-5 I made a graphic layout of the components within the chassis and filter units - it shows all connections inside this wonderful piece of gear. If you follow it exactly it shouldn't be too difficult to end up with a wonderful sounding EQ
http://www.mediafire.com/file/cn5t2z828h8n6ax/raintons_MEQ-5_layout_rev1_2.pdf
BOM:
http://www.mediafire.com/file/7bpp4bbu540412h/raintons_Pultec_MEQ-5Parts_List_rev.101.pdf
Again all this is made to my best knowledge, but nobody's perfect - if you find a mistake please let me know and I'll correct it asap.
The price for one complete chassis is 249 EUR (+ VAT if applicable) and includes:
- main chassis
- front panel
- 1x filter boxes
The adapter plates for input, interstage and output transformers are 7.50 EUR ea. (+ VAT if applicable)
discussion over here: https://groupdiy.com/index.php?topic=63443.0
************************************************************************************************************
Ultimate Mic PSU chassis:
blank chassis:


inside:

laser engraved dividing panel that shows the shapes & names of pretty much all tube mic projects available, so you
know where to mount the pcbs :
:

included in the metalwork inside the chassis are integrated mounts for the pots needed to adjust the supply voltage - here's a close up:

There's also cutouts for measuring plugs, so you can tilt the PSU to the side, connect your DMM and
dial in the right supply voltage from the front with a screwdriver as shown in the pics below:


The final chassis also includes the mount + optional cutouts for a second pot needed for some tube mic projects...
finished PSU (for a U47 in this case):


The Mic PSU chassis is made from solid steel, powder coated with a hammer finish and comes with:
- 4x rubber feet
- beautiful and sturdy leather handle
One Mic PSU chassis Kit is 115 EUR (+ VAT if applicable)
here's the discussion thread for the Mic PSU chassis: http://groupdiy.com/index.php?topic=61160.0
For orders please go to:
www.analogvibes.com
and please include your location so I can calculate shipping.
This is my first WM thread, so I if you have any suggestions or questions please let me know
Thanks
Martin
just recently I a fellow GDIY member pointed out that this page is completely out of date.
Before I explain everything in every detail - long story short:
I have my own website and all my projects are available there - most of them have been updated tremendously compared to what you see below. Meaning screen printed backpanels, custom made powder coating - color sampled from vintage units, the Pultecs have a massive 5mm (13/64") thick front panel, the LA2A has a 2-piece back chassis now just like the vintage units, anodized etc.
Check up-to-date information on all projects on: www.analogvibes.com
Thanks
************************************************************************************************************
LA2A style P2P chassis V2:
front:

back:

all parts of the kit:

finished unit from the inside:

finished unit in the rack:

The front of the chassis is powder coated RAL7035 light grey with black silk screening,
the back of this new V2 version consists of a 2 piece aluminum chassis - just like the vintage units.
This make the build much easier because the entire wiring can be done on the open L-frame back&bottom part of the chassis.
It features all holes and cutouts necessary to build an authentic LA2A style compressor without any further modification, drilling etc...
The chassis is designed for the original UTC HA-100x input and UTC A-24 output transformers,
but I also offer adapter plates for UTC A10 input transformer and Sowter in- and output transformers.
The VU-meter cutout fits the Sifam AL39-WF meter as well as the "Teletronix" branded replacement
meter available at don-audio.com in Germany and IMS in the US.
All chassis screw holes are threaded for extremely easy assembling and the chassis also features
vintage style thumb screws for fastening the front panel - just like the vintage units.
The adapter plates are 7.50 EUR each
Here's an extensive package put together by fellow forum member Gambaholic which includes a BOM, an excellent
graphic layout of the components inside the chassis, schematics and HQ pics - it's almost foolproof
http://www.mediafire.com/download/ley4pm3tcam3iam/LA2A_to_Z.zip
chassis discussion over here: http://groupdiy.com/index.php?topic=59538.0
************************************************************************************************************
PULTEC EQP-1A style P2P chassis:
front:

back:

back with mounted filter units:

my finished prototype:

my finished prototype from the back:

Other than my prototype on the pics the chassis available here feature cutouts for XLR in & out instead
of a screw terminal and also a cutout for a IEC socket (in my prototype the power cable was hardwired
just like in some vintage units)
In addition the main chassis the kit includes 2x filter boxes to be mounted to the back of the main chassis
(as in the original unit) to house the filter sections of the EQP-1A.
The front panel is powder coated blue-grey - very close to the original color and silk screened.
The back and the filter units are powder coated in a rough dark grey color - similar to the hammer finish
of the original units but much more hit and scratch resistant.
Like the LA2A style chassis the EQP-1A style chassis sports all necessary cutouts to build an authentic tube
equalizer without any further drilling or modification. The chassis is designed for the original Triad HS-56 input
and HS-29 interstage transformers and for the newly available Cinemag S-217D (authentic Peerless S-217D replica)
transformers.
However there are adapter plates available for the use of Sowter transformers.
Here's a graphic layout of the components within the chassis and filter units - it shows that building one of these gems
is not really as difficult as it seems
http://www.mediafire.com/file/2b8py0igkenkh7l/Pultec_EQP-1A__layout_rev1_31.pdf
And here's a paper by Chris Preston of vintagewindings.com about "facts and fiction about the Pultec EQ"
Great information about filter caps etc..: http://www.vintagewindings.com/tech%20swag/Pultec-Facts-&-Fiction.pdf
And many people have asked for it - FINALLY a BOM with some additional infos on parts
If you find any mistakes please let me know:
http://www.mediafire.com/file/zfeckxx7jeo1jfg/raintons_Pultec_EQP-1A_Parts_List_rev.1_2.pdf
The price for one complete chassis is 299 EUR (+ VAT if applicable) and includes:
- main chassis
- front panel
- 2x filter boxes
The adapter plates for input, interstage and output transformers are 7.50 EUR ea. (+ VAT if applicable)
discussion over here: http://groupdiy.com/index.php?topic=62061.0
************************************************************************************************************
PULTEC MEQ-5 style P2P chassis:
The chassis is built pretty much the same way as the EQP-1A style enclosure - here's some pics of my finished prototype:
front:

back:

from the other side:

Like the above mentioned chassis this one also sports all necessary cutouts to build an authentic tube
equalizer without any further drilling or modification. The chassis is designed for the original Triad HS-56 input
and HS-50 output transformers.
However there are adapter plates available for the use of Sowter transformers and with little modification other vintage
transformers should fit the Triad HS footprint.
Other than my prototype the chassis available here features cutouts for XLR connectors instead of the terminal strip and a cutout for a modern IEC power connector instead of the hard wired power cord.
Also for the MEQ-5 I made a graphic layout of the components within the chassis and filter units - it shows all connections inside this wonderful piece of gear. If you follow it exactly it shouldn't be too difficult to end up with a wonderful sounding EQ
http://www.mediafire.com/file/cn5t2z828h8n6ax/raintons_MEQ-5_layout_rev1_2.pdf
BOM:
http://www.mediafire.com/file/7bpp4bbu540412h/raintons_Pultec_MEQ-5Parts_List_rev.101.pdf
Again all this is made to my best knowledge, but nobody's perfect - if you find a mistake please let me know and I'll correct it asap.
The price for one complete chassis is 249 EUR (+ VAT if applicable) and includes:
- main chassis
- front panel
- 1x filter boxes
The adapter plates for input, interstage and output transformers are 7.50 EUR ea. (+ VAT if applicable)
discussion over here: https://groupdiy.com/index.php?topic=63443.0
************************************************************************************************************
Ultimate Mic PSU chassis:
blank chassis:


inside:

laser engraved dividing panel that shows the shapes & names of pretty much all tube mic projects available, so you
know where to mount the pcbs

included in the metalwork inside the chassis are integrated mounts for the pots needed to adjust the supply voltage - here's a close up:

There's also cutouts for measuring plugs, so you can tilt the PSU to the side, connect your DMM and
dial in the right supply voltage from the front with a screwdriver as shown in the pics below:


The final chassis also includes the mount + optional cutouts for a second pot needed for some tube mic projects...
finished PSU (for a U47 in this case):


The Mic PSU chassis is made from solid steel, powder coated with a hammer finish and comes with:
- 4x rubber feet
- beautiful and sturdy leather handle
One Mic PSU chassis Kit is 115 EUR (+ VAT if applicable)
here's the discussion thread for the Mic PSU chassis: http://groupdiy.com/index.php?topic=61160.0
For orders please go to:
www.analogvibes.com
and please include your location so I can calculate shipping.
This is my first WM thread, so I if you have any suggestions or questions please let me know
Thanks
Martin


