American R331 Ribbon Microphone

GroupDIY Audio Forum

Help Support GroupDIY Audio Forum:

This site may earn a commission from merchant affiliate links, including eBay, Amazon, and others.

ubxf

Well-known member
Joined
Sep 3, 2004
Messages
813
Location
los angeles
Happy New Year to all. I just got one of those American R331 Ribbon Microphone and it doesn't work; so i'd like to open it to see if the ribbon is broken or if a wire is unsoldered but i can't find out how to open it . Does anyone have any tips ?
 
Thanks Pucho, i read that and a couple other pages but there is no indication on how to open it.
 
It's pretty easy...just start removing screws.

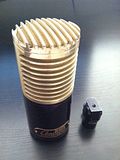
I have yet to find a better mic for tracking rhodes piano through a tube amp. Absolutely stellar!
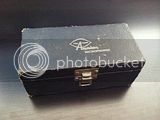
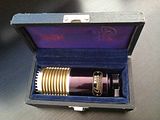
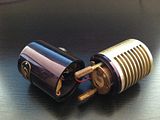
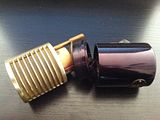
And I love how these mics have turned a rich, purple color over time.
If you can get yours working and sounding anything like mine, you'll have a real winner on your hands.


[ Optional ]
• Remove the 4 flat head screws at the top of the headbasket. You don't have to do this, but it helps for lining up the ribbon motor during re-assembly later.


[ Step 1 ]
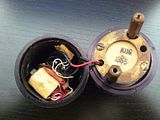
• Remove the 3 phillips screws on the bottom plate.
• Remove bottom plate to reveal two more slotted screws
• Remove the two slotted screws


[ Step 2 ]
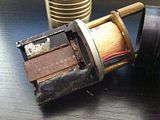
• Separate the headbasket portion from the body...mind the wires that connect to the ribbon element.
• Remove the two slotted screws below the headbasket assembly (optional, but might make the next step easier)
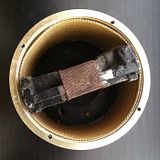
• Remove the four tiny, slotted screws surrounding the perimeter of the headbasket base
• Note the build date, and post photos here!


[ Step 3 ]
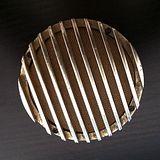
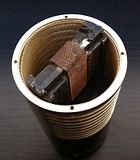
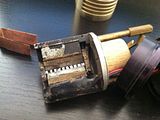
• Separate the headbasket base from the main grille
• Gently pull off the main grille assembly to reveal the ribbon motor
• The copper-looking mesh guard can be removed by hand—it stays in place via magnetism.


HAPPY NEW YEAR!
 
Very nice indeed - thanks for sharing!

Is this the model with the dynamic element too? Looks like it is the element below the ribbon motor, but I could only see two wires going to the transformer etc.

:)

 
Hi Skylar,

What is that white-ish cylinder made of? It looks like just a block of wood to fill the gap and take the date stamp.
You don't see many of these mics on this side of the pond.

Thanks!
 
• Remove bottom plate to reveal two more slotted screws
That's where i was stuck because of the rubber gasket not moving . now i got it open and unfortunately the ribbon looks like it's stretched.
Is there a way to readjust the tension or do i need to change it.
 
From the photos, it does not look like there is a tension adjust mechanism on that one.

Very occasionally, you can remove a ribbon clamp, re-rension the ribbon, and re-clamp. But more often that not the ribbon will be stuck to something, and you will just tear it.

If you were over here I would say send it to me  ;), but in the US, your best bet is to send it to Marik at SAMAR audio design.

http://samaraudiodesign.com/Home.html

Or just look for Marik on this board and send him a PM.

Stewart
 
Hi Stewart,
Thank you for suggestion and i will call Marik , he worked on a couple of my mics in the past and did a great job. But i was just curious to try
to readjust the ribbon on my own first. Right now it looks like it's glued at both ends so even after i unclamped  it is not moving. The ribbon is not torn
and is still corrugated . It is stretched uniformly and bowed .
Thanks
francois
 

Latest posts

Back
Top