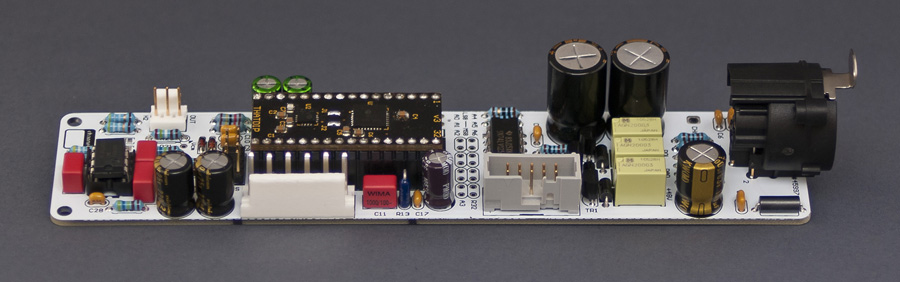
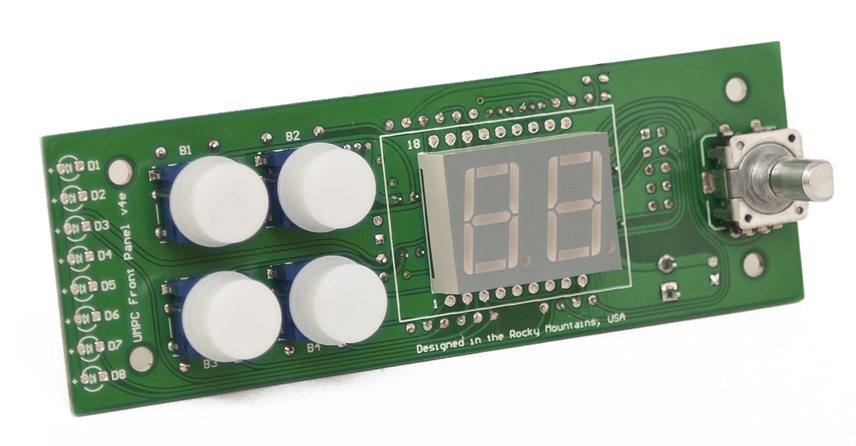
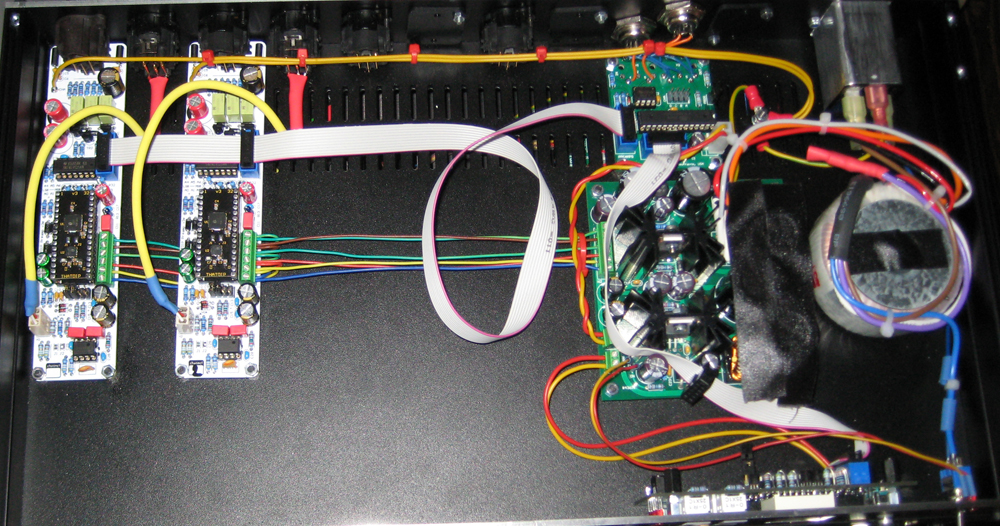
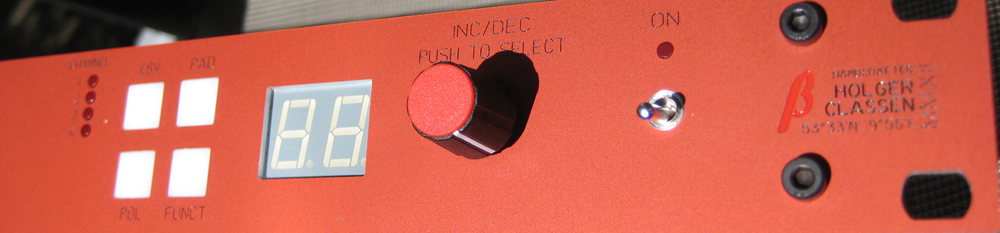
Essential UMPC Front Panel info:
You basically push all four buttons on the front panel, then turn on the unit and hold the buttons until the animation is over (about 2 sec. or so). Then you are in the configuration menu:
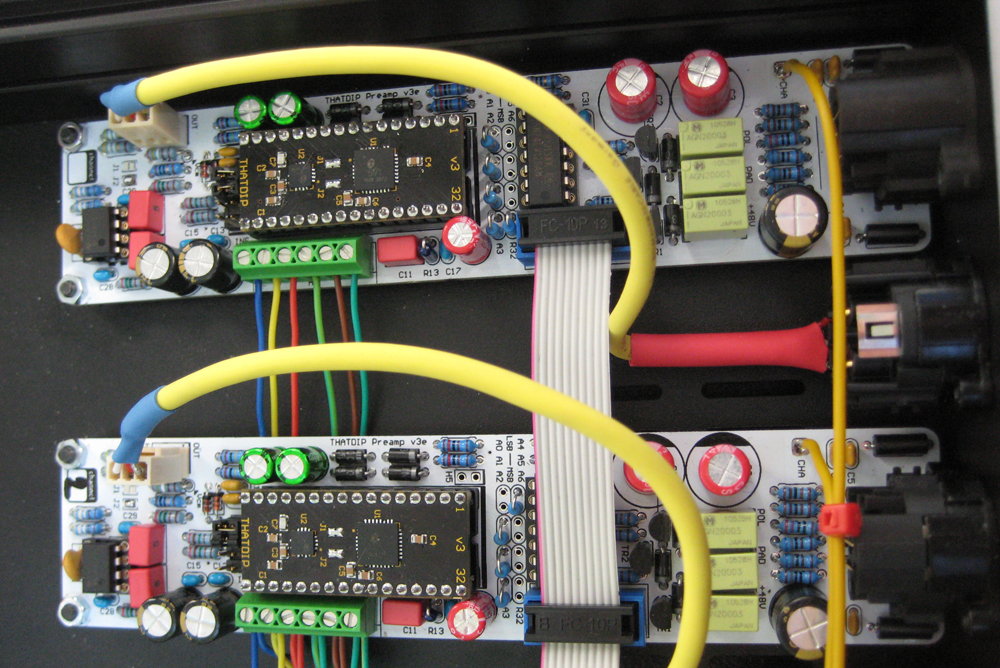
-A: Global mode of the firmware: "TH" means standalone mode for
THAT5171 - use this mode when not using the
MIDI Remote board and controlling the
preamps directly from the
Front Panel.
"FP" means the Front Panel is in slave mode with a remote board attached to it acting as a master. Use this one in conjunction with the MIDI (or the upcoming Ethernet) Remote.
-B: The number of channels in the system + Connectivity Test: When in standalone mode this selects the number of channels in your build (then the firmware knows how to cycle between channels correctly). Also you can "sweep" all of the channels to check for connectivity with the
THAT5171 chip. If your
addressing on the preamp PCBs is done right then each channel # is going to display a
dot "." next to it - this indicates that it sees the chip and can read from and write to it. If there is a
"E" next to the channel # then the firmware can't talk to that chip. Either your addressing is not right, or the channel is simply not there. When the
Front Panel is in Slave Mode ("FP" in menu A) this entire menu B is not available because the
MIDI Remote automatically discovers number of channels
sequentially upon startup. Which means that if you number (via resistor addressing - see
Lucidity docs) your, say, 4 preamps #0, #1, #3, #4 then the
MIDI Remote firmware is only going to discover the first two because when #2 is not responding it stops discovery and works with what it found so far.
-C: Adjustment of the displayed gain: You use this one to set the top gain value offset that your preamps have. Useful if you customized the line driver stage to boost or attenuate gain past the preamp and want the gain to visually represent this change. The bottom limit of the gain is calculated automatically by subtracting 55 steps from the top value.
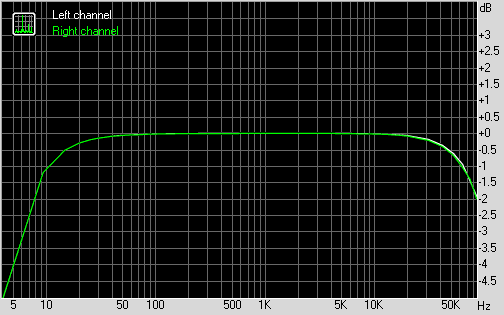
THAT5171 actual gain range is 13-68. If you used the values for the line driver from the
schematic you set the menu C to either 70 or 75 (because the line driver has either +1.4 or +6.4 dB of gain past the preamp stage) and it is then accounted for in the UI. This is a global setting - you cannot have channel based adjustments for this one.
-D: Recall preamp state upon startup: If set to
"Y" the firmware will recall all of the settings for each channel (gain, GPIO, last selected channel) when powered up. When set to
"N" it will load default values (no GPIO, gain set to minimum, channel #1 is selected).
-E: Exclude GPIO from being recalled: Use actual GPIO buttons to set up a filter of which GPIO to skip recalling upon startup. Say, if you wanted to recall everything BUT the Phantom Power state (because you don't want to damage your mics on power on) just push the Phantom button and it will recall everything else but this function.
This menu doesn't work if "N" is selected in menu D.
-F: Firmware version: a simple way to check the version number of
UMPC Front Panel firmware.
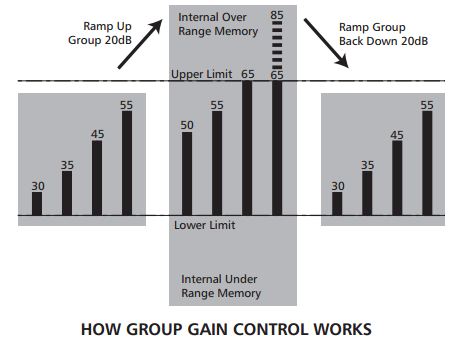
-G: Group button behavior: When
"G3" is selected the GROUP button (bottom right on the PCB) switches GPIO3 output of
THAT5171. Use header H5 on the preamp PCB to utilize this function to switch custom things like an insert, etc. When
"GP" is selected the GROUP button groups channel GAINS together. GPIO functions remain separate. The grouping behavior is what I call "Soft Grouping".
Aphex 1788 user manual does a good job of describing this on page 33:
"..computes the modified individual channel gains in an invisible workspace that can retain over- and under-range values. This allows the unit to be able to restore the channels’ gain relationships if you reverse the direction of group gain shift after one or more channels have limited out."
To exit the config menu you reboot the unit. Hope this can get people started. Good luck! =) Questions - ask away here! =)
PS: There are a couple of known bugs in the UMPC Firmware so far. I'm waiting on more feedback on what to fix, what to improve, what to add, and they will be fixed in the next revision. Thanks!