B9A tube right angle mounts

GroupDIY Audio Forum

Help Support GroupDIY Audio Forum:

This site may earn a commission from merchant affiliate links, including eBay, Amazon, and others.
spreemusik said:
Why not simply bend a thin strip of sheet metal to shape? Tubes are not that heavy.

Like this?


alybracket.jpg


This says all there is to say about my metalworking skills  ;D

Cheers

Ian
 
And fitted to a single EuroCard size prototype board. I reckon that there's easily space for two tall tubes plus an input transformer and some front panel controls.


SingleEuroBracket.jpg


Cheers

Ian
 
spreemusik said:
Why not simply bend a thin strip of sheet metal to shape? Tubes are not that heavy.

it's not the weight that matters here, but swapping tubes can be a real pain when the thin sheet metal mount starts flexing and bending. thicker aluminum would be preferable here.
 
Gemini86 is right.  I did these, and they are hard to swap. Luckily they are on removable pluggable cards, so I can get a good grip and prevent bending them.  But if I did it again, I would make them sturdier.

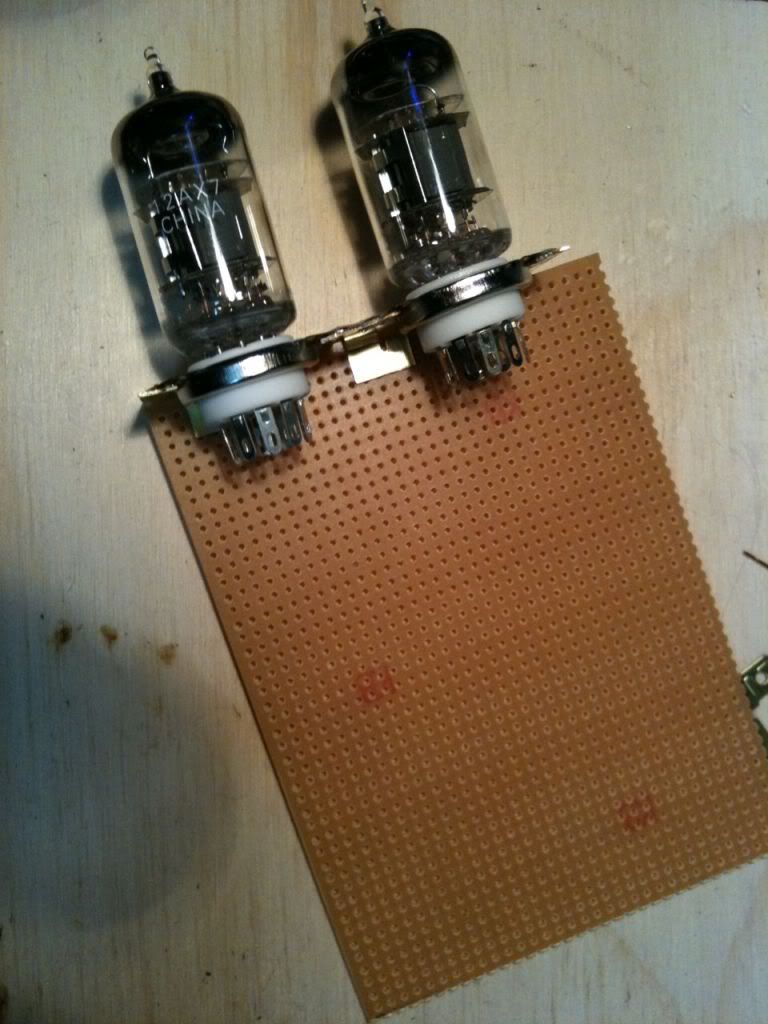
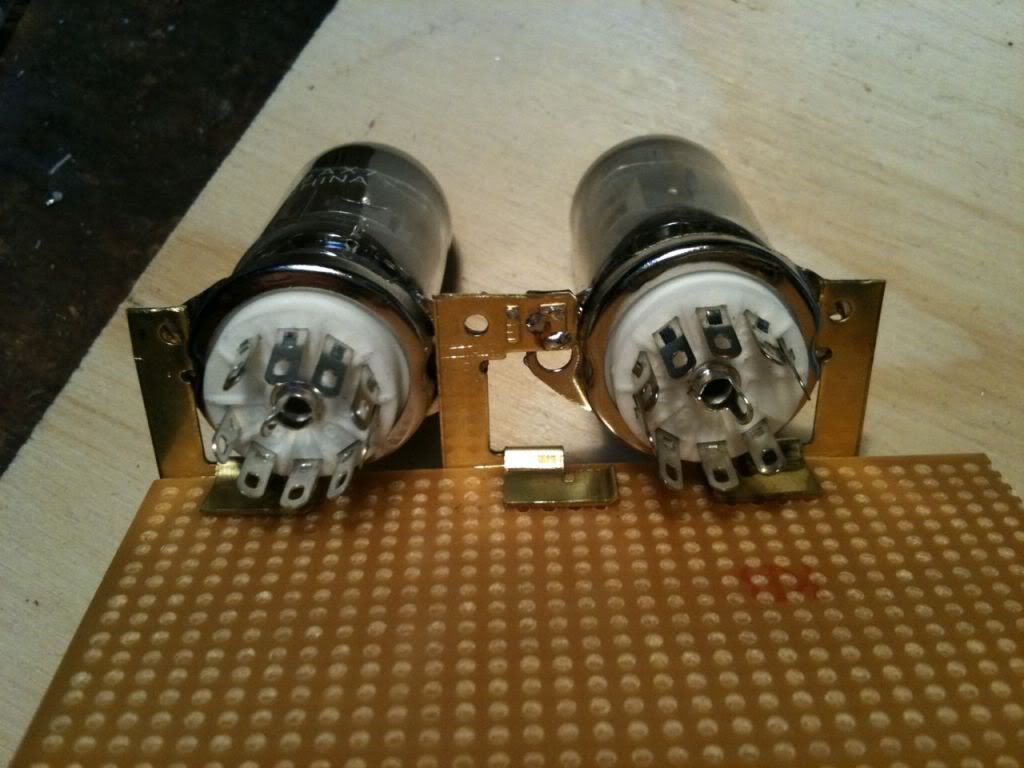
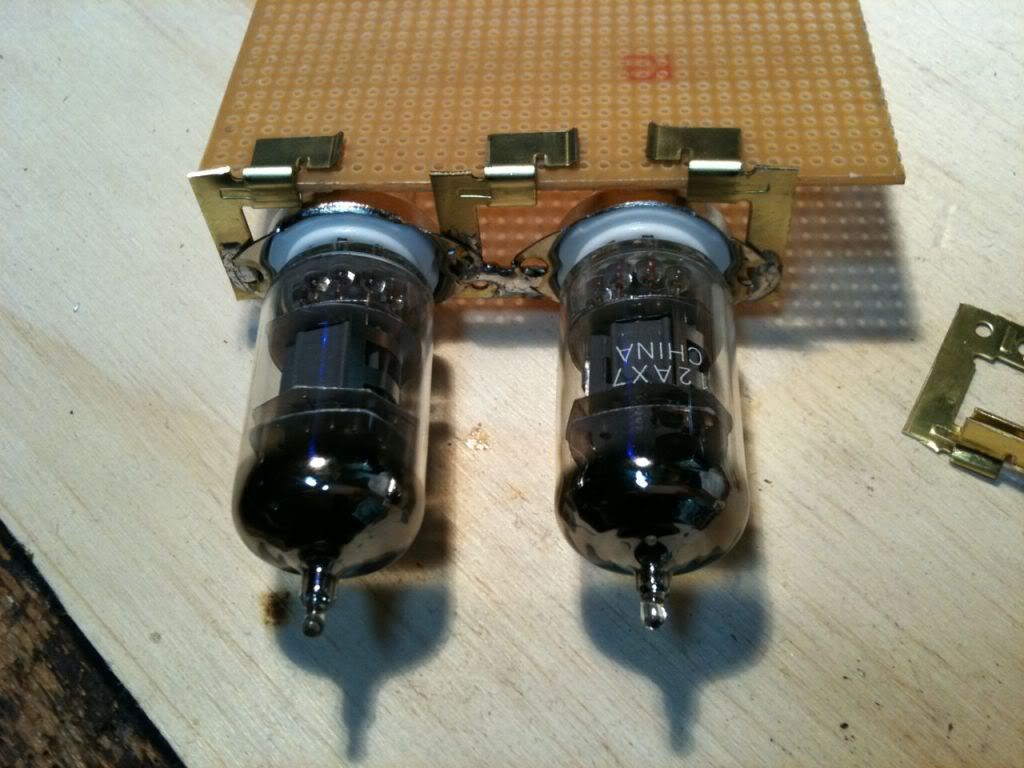
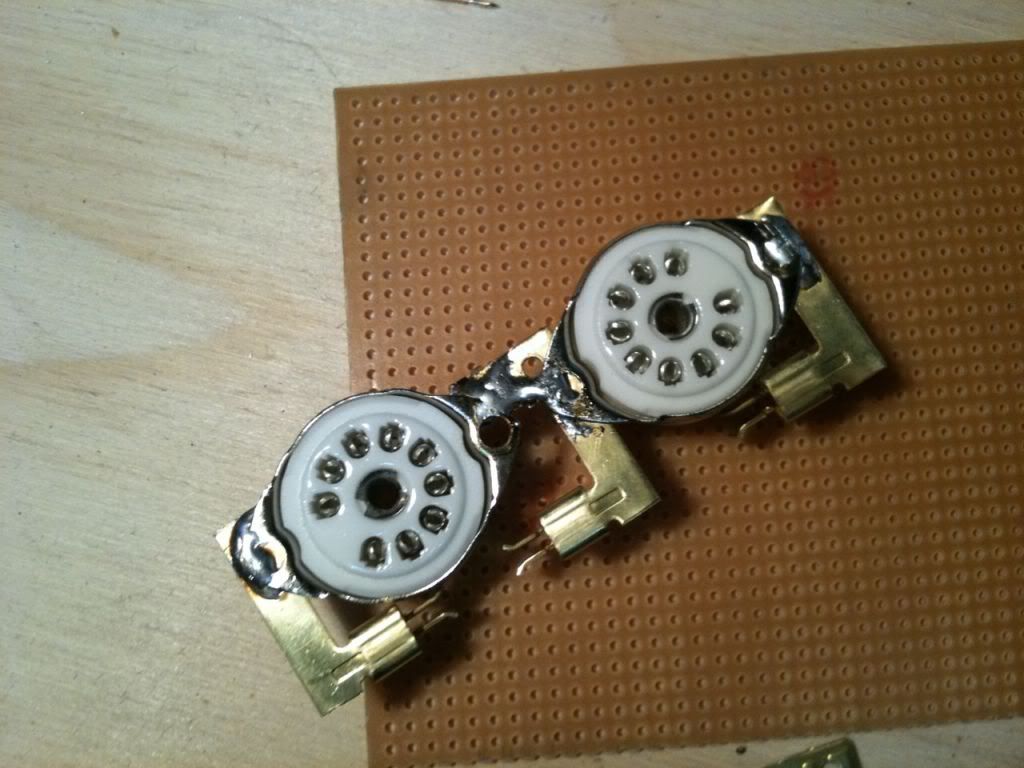
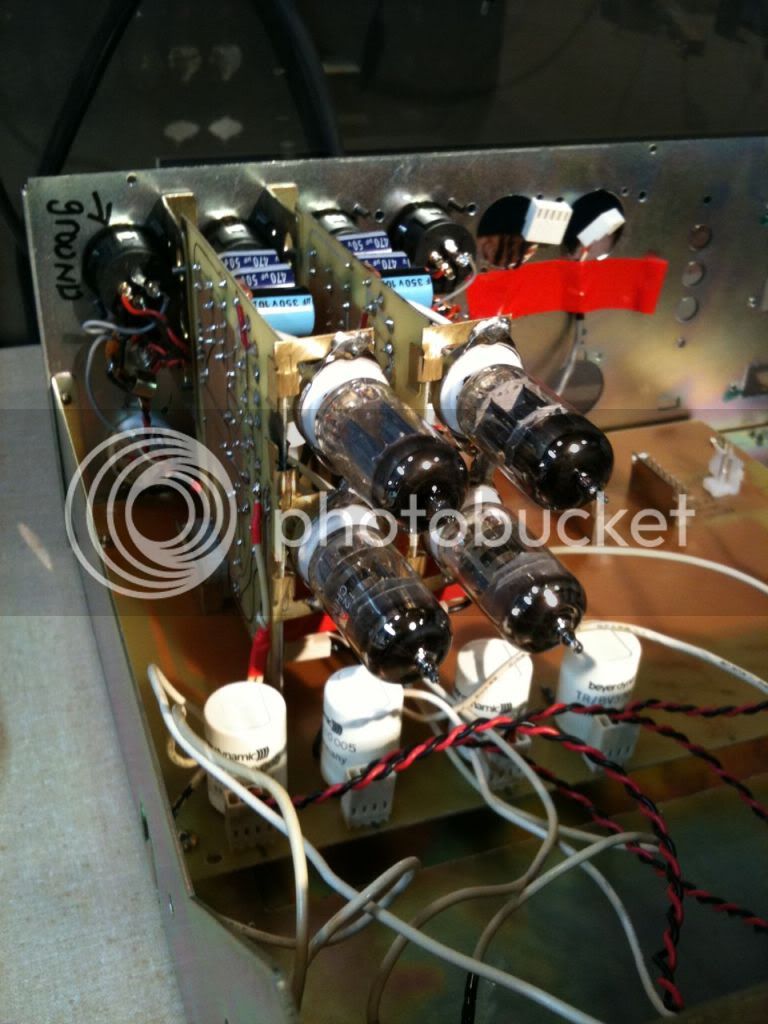
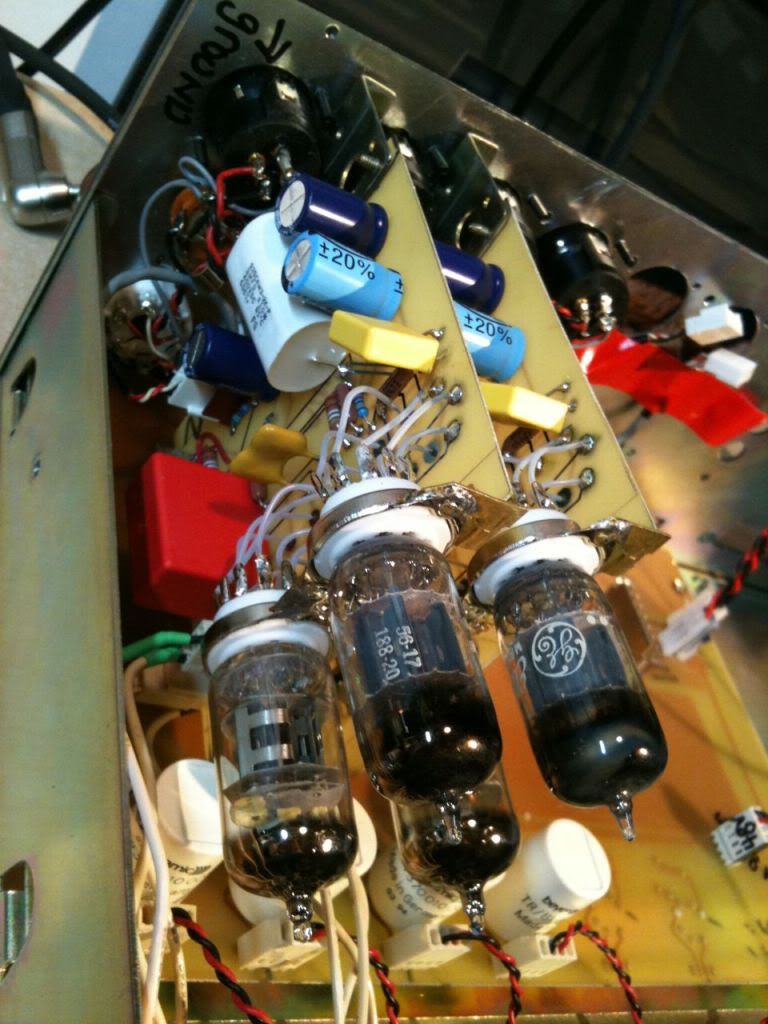
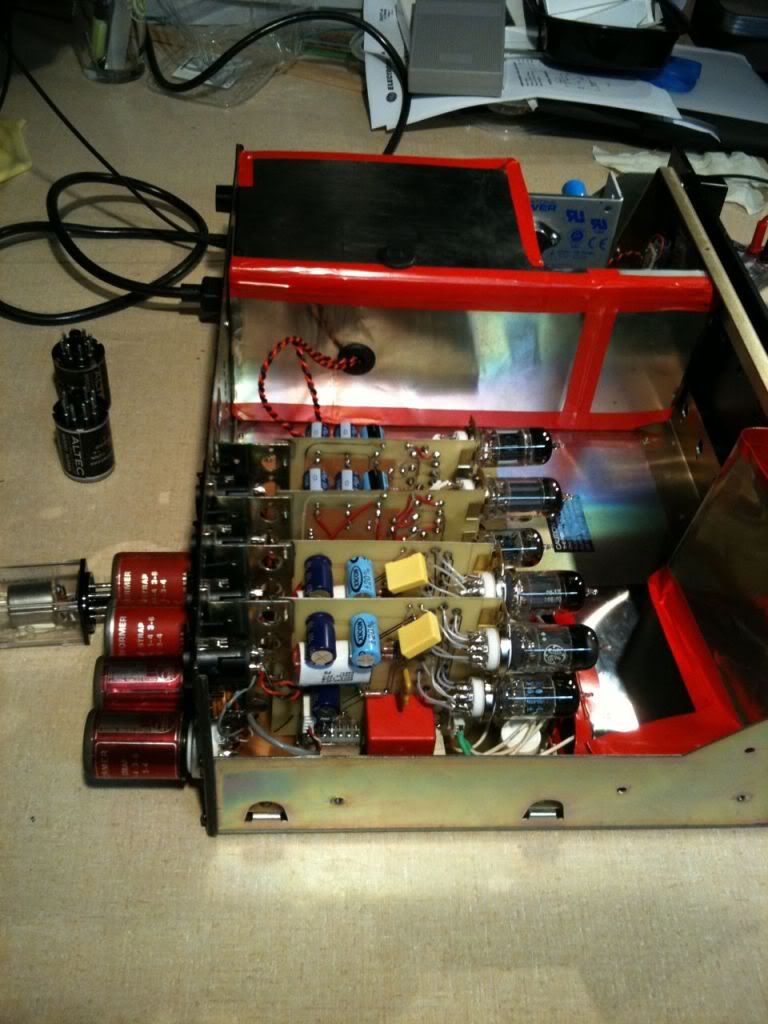
These were made out of an old Surge Protector that fried.  The contacts for the 110V plugs made nice little circuit board clips, that let me attach them to the end of a board.  A little clamp and solder, and voila.  But they take FOREVER to solder.  A much better solution would be the VERY hard to find (I have looked) proper right angle mounts.   They did exist, I have a couple, but they were not all pinned out the same.

Anyway... my attempt is as follows...

IMG_0430.jpg

IMG_0431.jpg

IMG_0432.jpg

IMG_0433.jpg


Now you might wonder what I did these for...

I wanted to stop making cases for my projects, and try out a few different Preamp architectures without having to make a new case.  So I wanted a "pluggable" architecture for a tube preamp.  But in the end, I like the result so much, that I just use it...and  I have never built any other card for the box. 

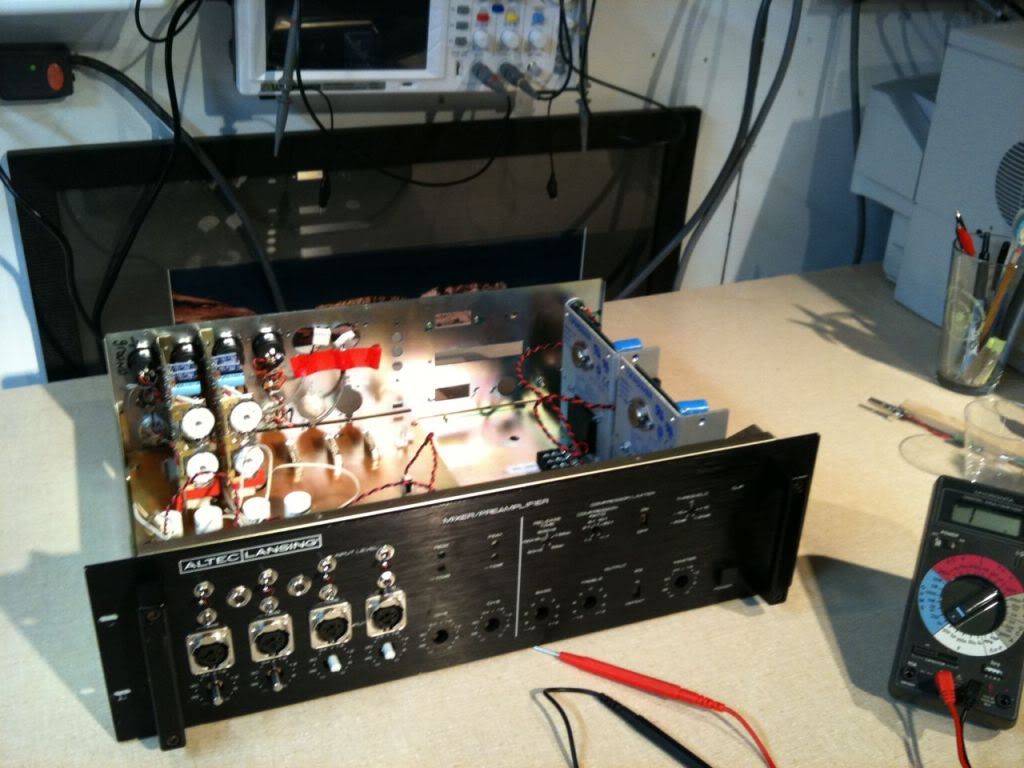
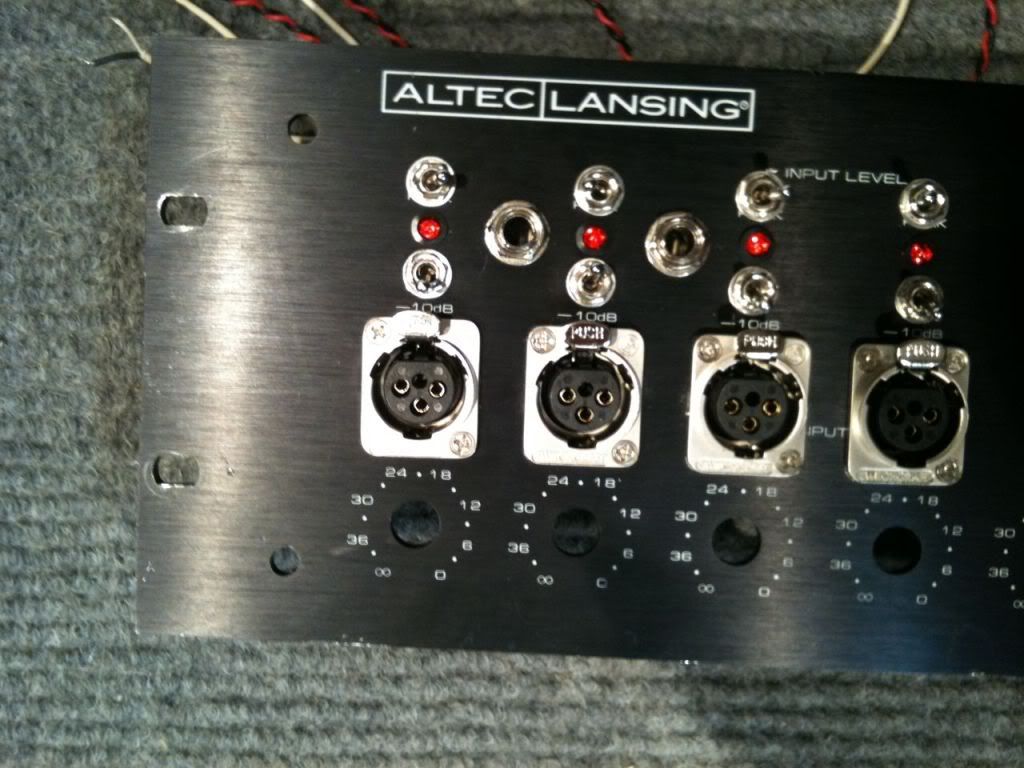
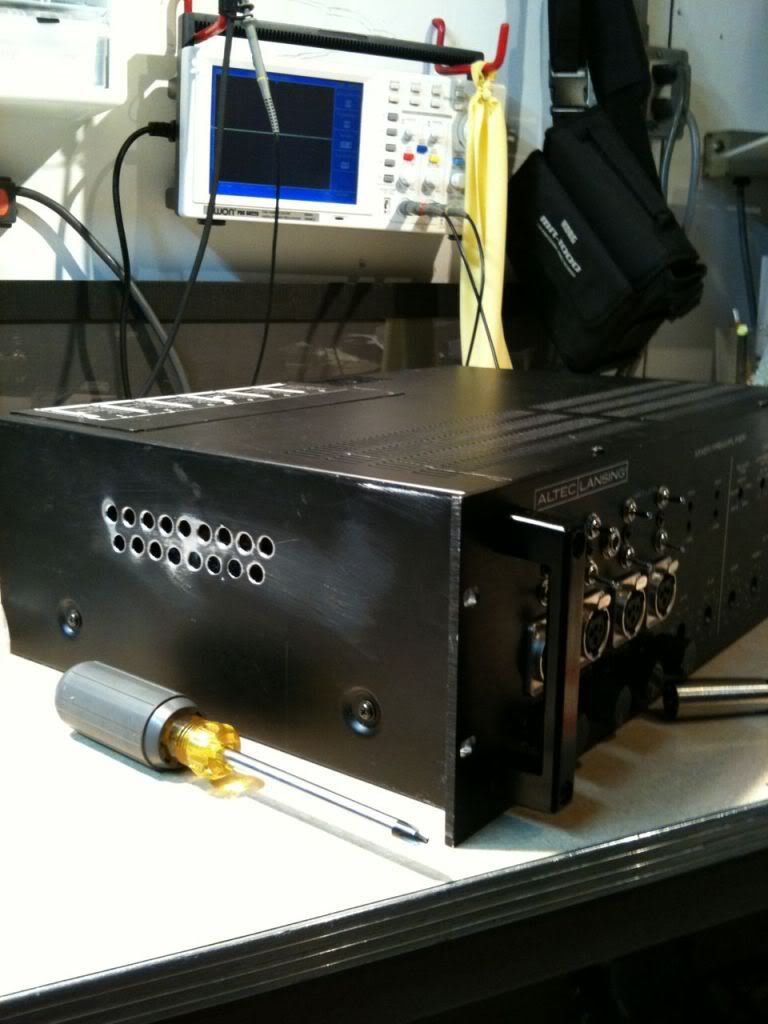
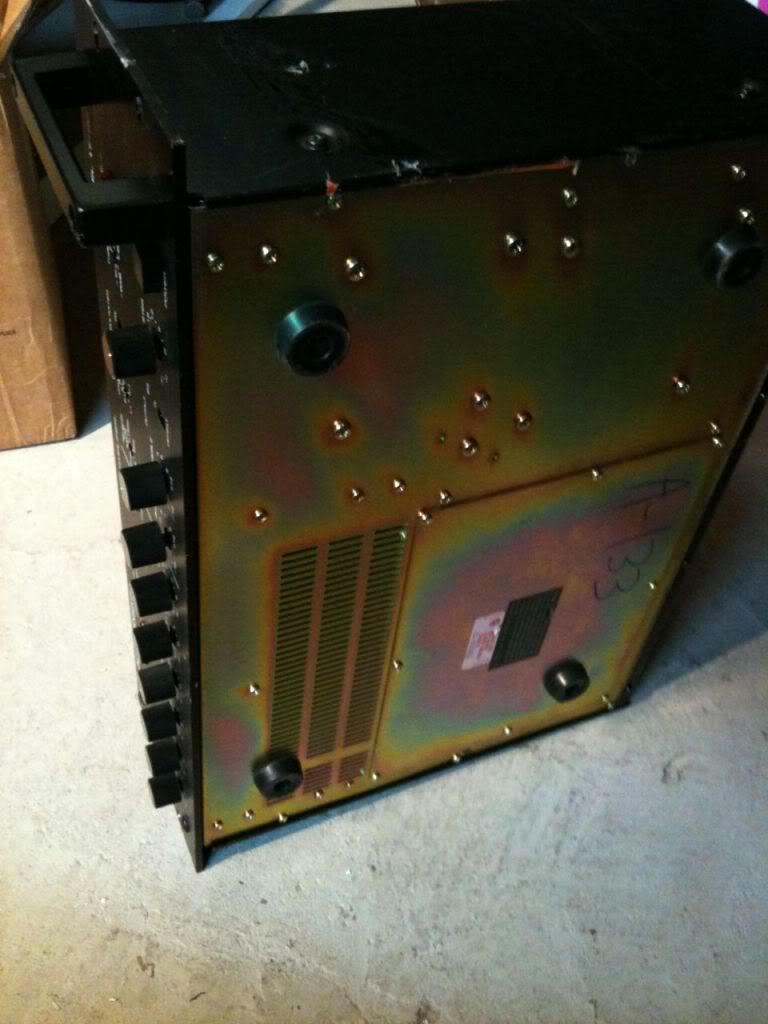
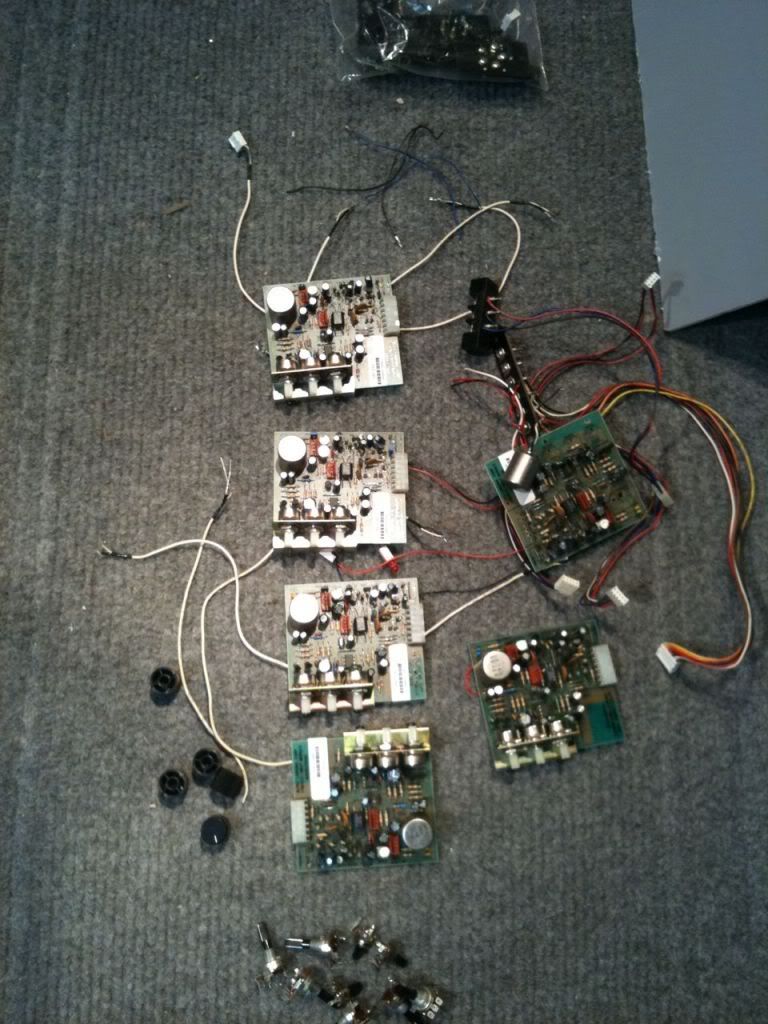
I took an old Altec Lansing 1700B preamp/mixer that I bought for parts (they are cheap on ebay, I bought three that failed with bad caps, which are easy to fix) mainly because a lot of them have 6 little mic input transformers with ok specs.  And I wanted to reuse the case.  They 1700 is a pluggable module system, and I decided to use an old TapeOp article by Scott Hampton and put together a 4 channel tube preamp (I think they call them LCMP over at the hamptone site).  

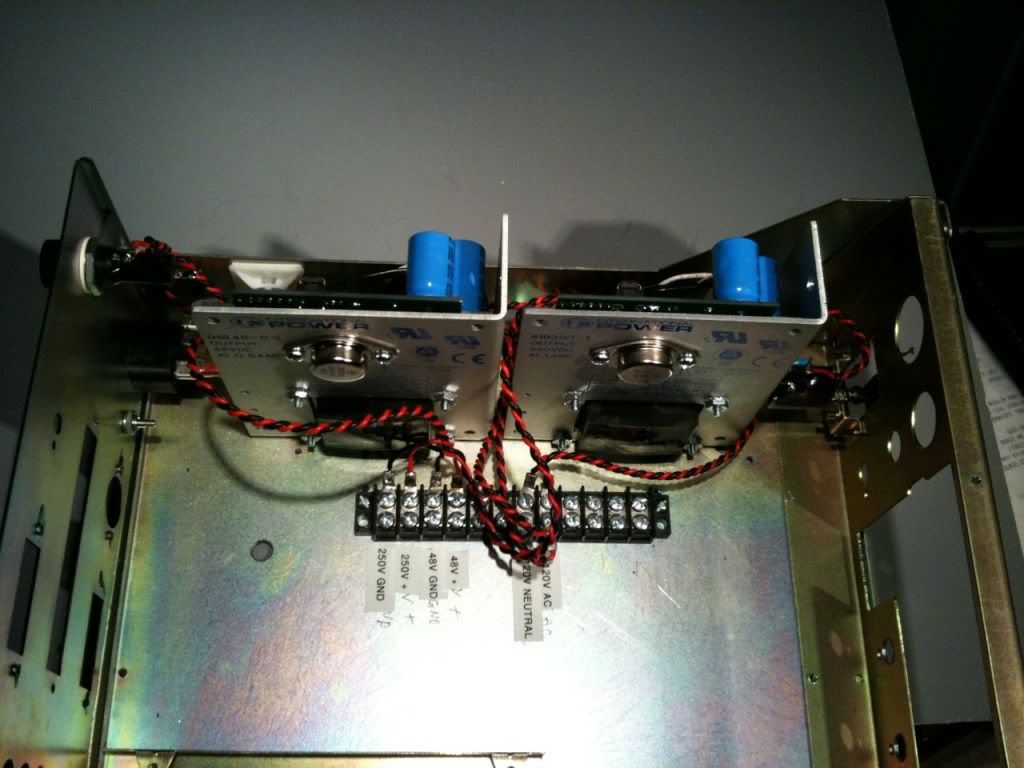
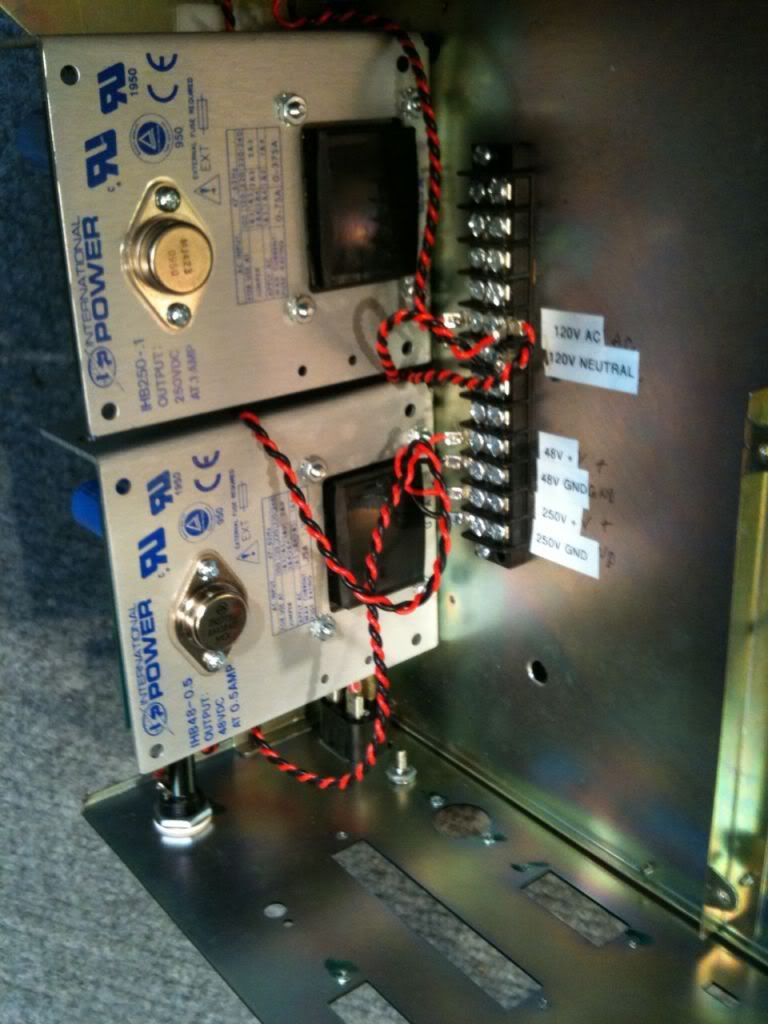
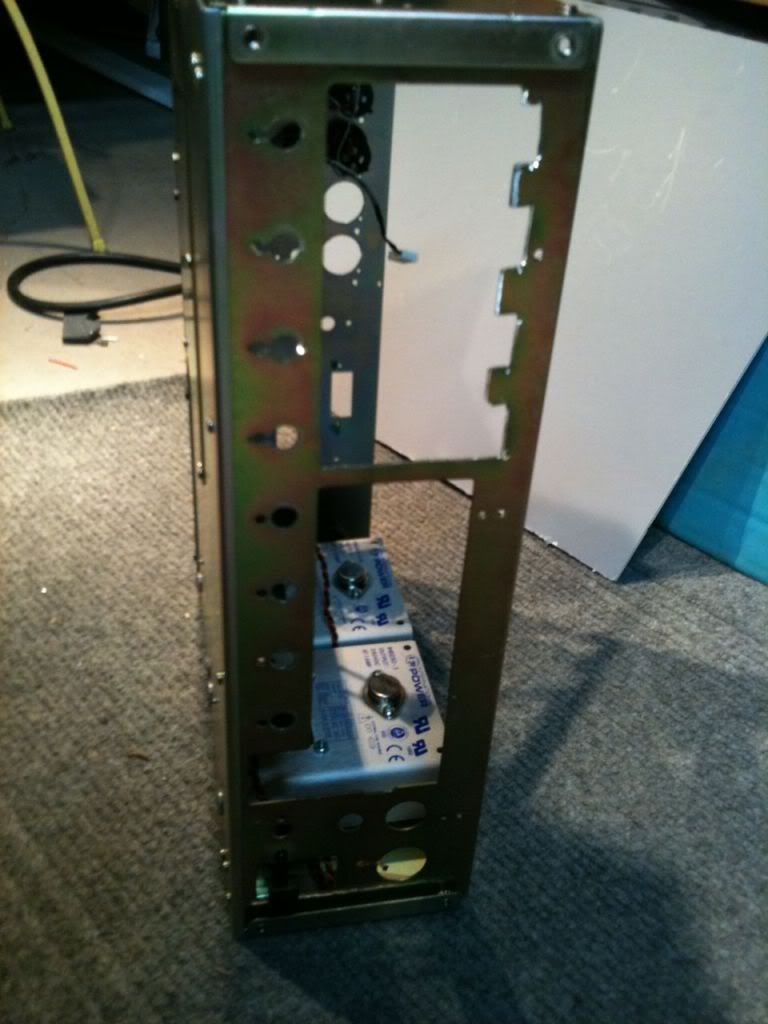
48 Volt  500MA for tube heaters (4 at a whack) and Phantom.  250V for B+.

IMG_0503.jpg

IMG_0556.jpg


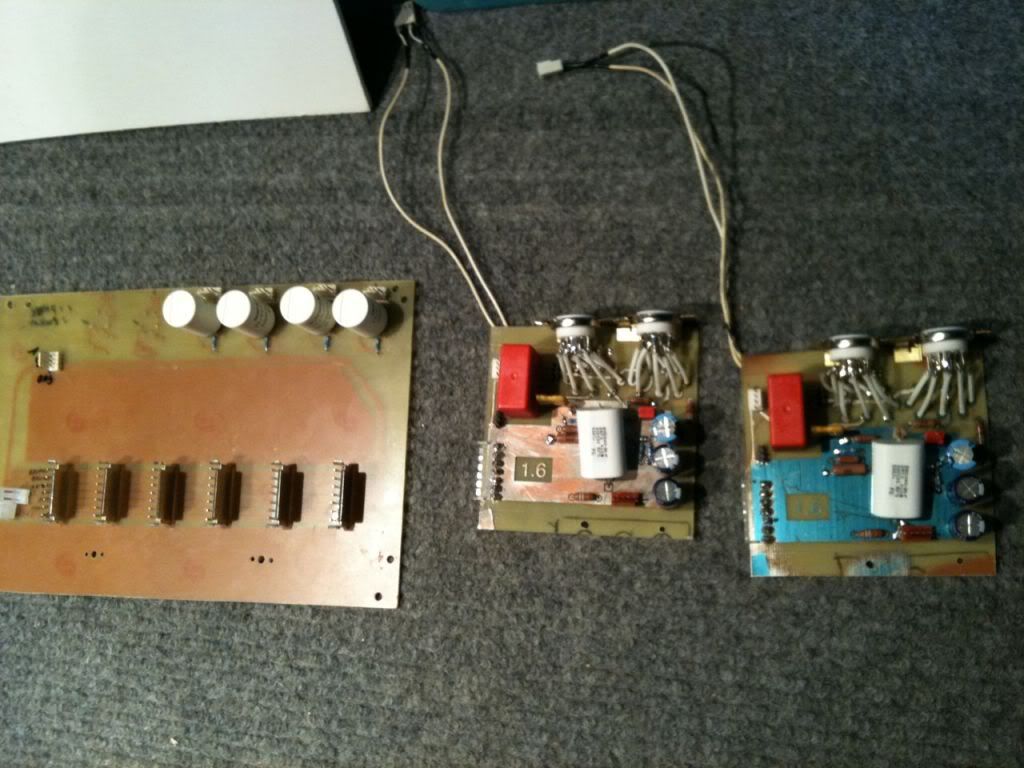
Little home etched circuit boards mostly following Scott's schematic.  But installed on cards with the molex plugs I unsoldered from the old Altec Cards (I like to recycle).  These are where I used the right angle mounts.

IMG_0544.jpg


I made the output transformers pluggable, and fit altec transformers which are suggested running secondary as primary by the TapeOp article.  And so I get a 5 to 1 stepdown and push the tubes a bit, but if i want it clean with no tube "sound/compression", I can drop in a lower stepdown trafo... it makes the output levels higher but the tubes run well under saturation (if that is the right word).

IMG_0558.jpg


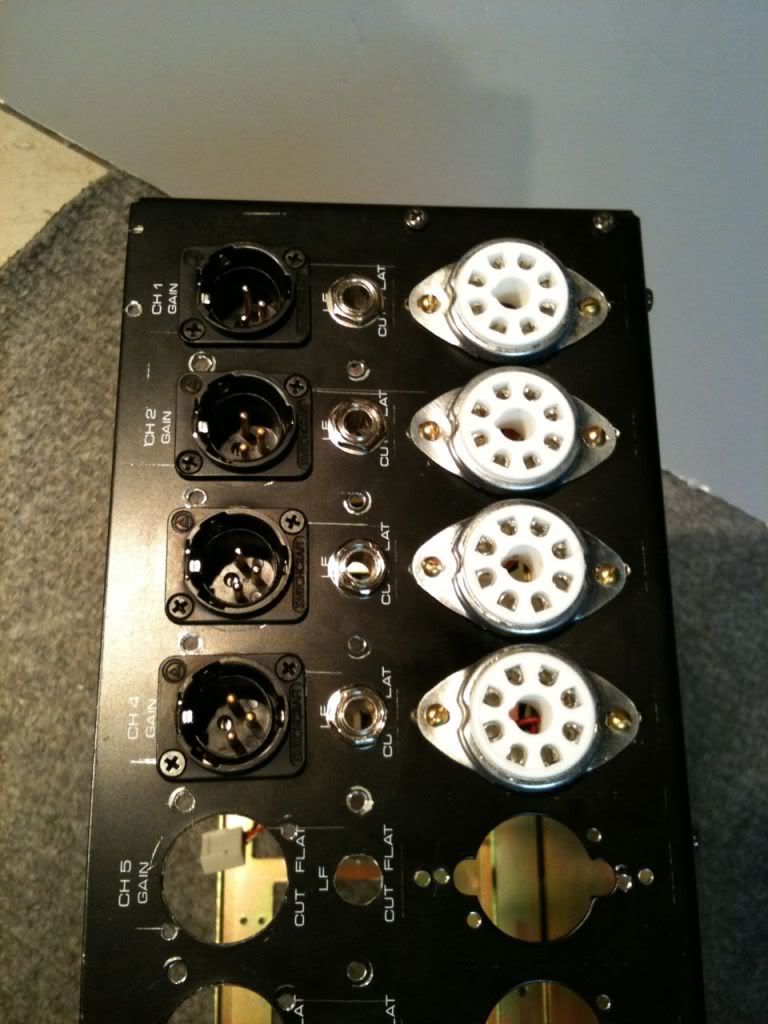
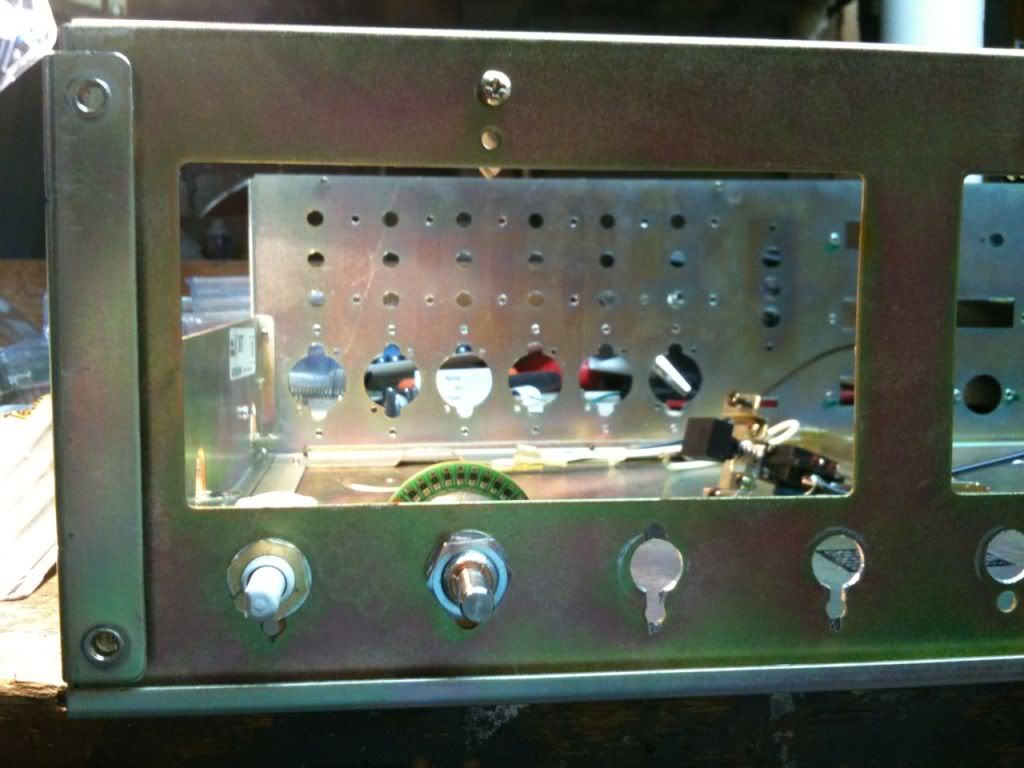
Front of case needed slots for the attenuators and room for the front panel switches, so I HACKED it up a bit with a dremel (I need a drill press).  Thus I call this an "AltHack" preamp.

IMG_0487.jpg

IMG_0559.jpg


You can see it will fit the goldpoint attenuators, or cheap chinese one.  I tried both, I really like the goldpoint better (the 23 point chinese ones make a LOT of noise (not electrical noise, real noise) and I tried a 12 point switch but I could stand the steps being different between the 4 switches.  So I am going all goldpoint.  But next time I might go 12 step, because they are cheaper, and 3db steps are not that bad.  I like the goldpoint but they are expensive.  The dog likes em too.

IMG_0564.jpg


Cards installed in case

IMG_0576.jpg

IMG_0605.jpg


Assembled with no power supply shield.  The power supplies are pretty far from the audio circuits (Distance is Natures MU metal).

IMG_0575.jpg


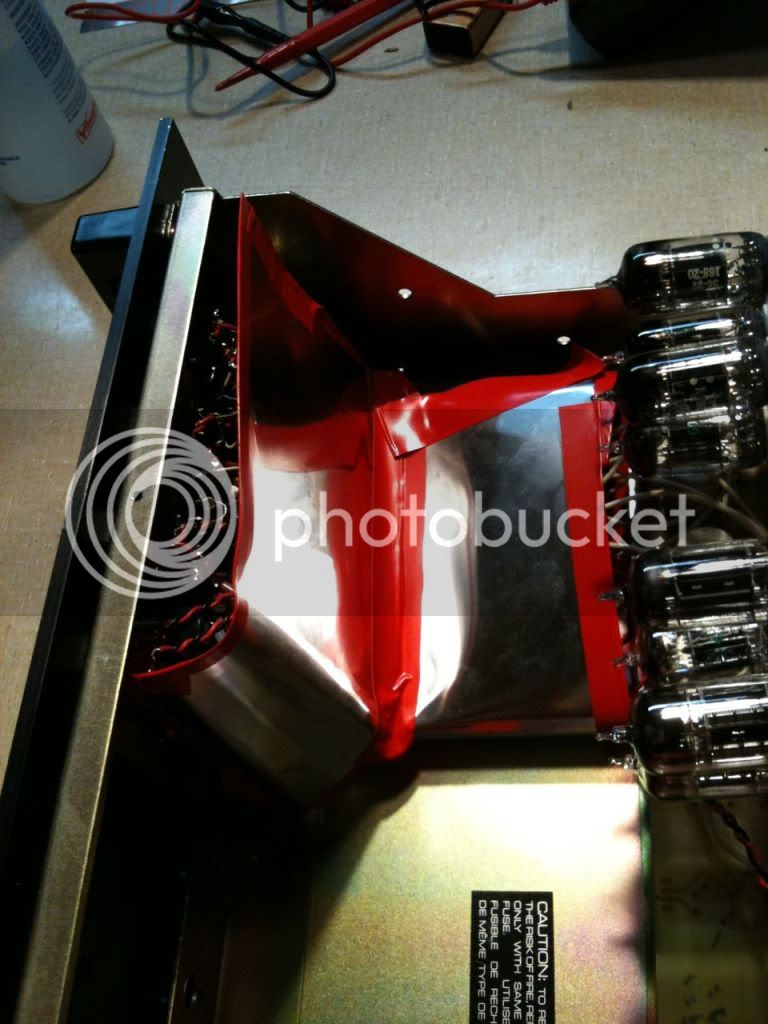
But MU metal is natures MU metal too... so I added a steel shield and taped a layer of MU metal foil over it.  And wrapped the leads for attenuators and DI inputs in an extra layer of shield (they were already shielded cables.)

IMG_0609.jpg

IMG_0611.jpg


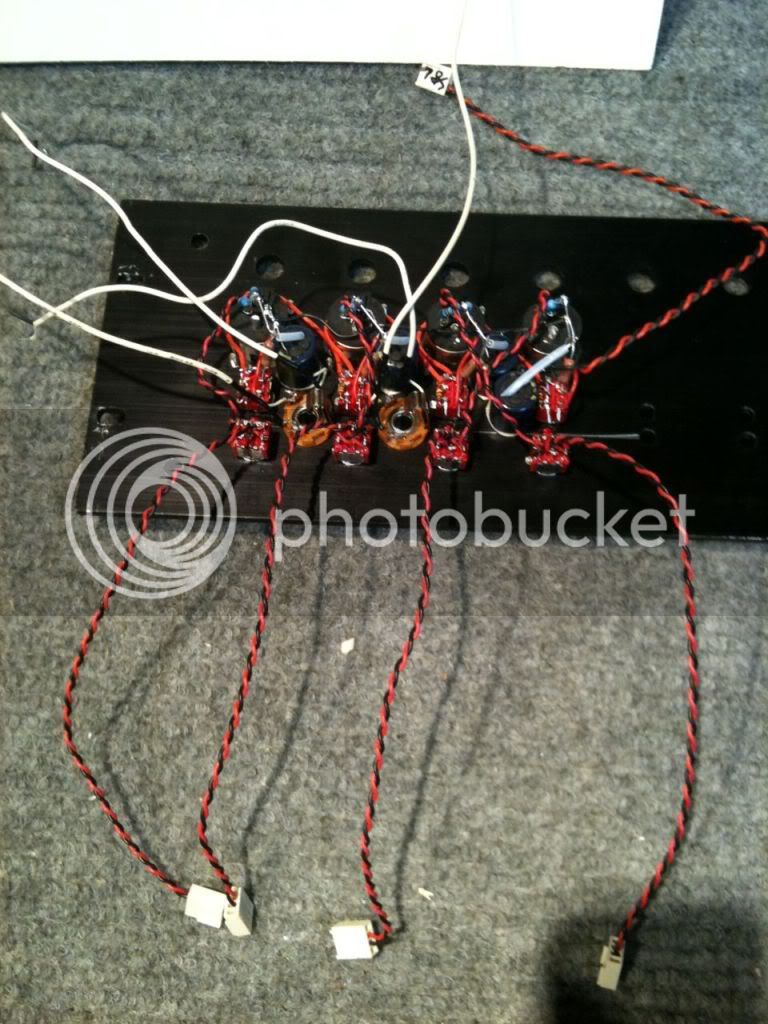
The back of the front panel... kind of messy.

IMG_0539.jpg


The front.  Inputs on the front, I use this in on location work, and front panel inputs are good.  Also phase and phantom on each channel. First two channels have a DI input (and the DI cable run makes a discernable difference in noise floor, or it could be that my second rev of cards was quieter).
IMG_0543.jpg


Needed a drill press... or a different case.  I added some ventilation.
IMG_0614.jpg


If I did it again, I would use a 1715 Altec Amp case, which has much better ventilation ( but costs a fortune to ship).  I bought this one for $9, but it cost me like $45 to ship!

IMG_0615.jpg


Lots of left over parts, for more recycling.  I have used these transformers in a couple of projects.

IMG_0565.jpg


Anyway... I still have to make some changes to this thing, but it sounds really great, and like all good tube gear, it even sounds ok when you get the levels wrong.

And thank you Scott Hampton for writing that nice article, which got me into this hobby.
And if this post is too long or inappropriate for this thread, I will move it somewhere else.  

 
This is the way I like to do it (not my picture). For less tubes, I'd probably use single mounting angles, hardware/home improvement store should have everything you need. I really can't see the adavantage of mounting it to a board, chassis is way more stable. And IMHO high voltage and perfboard are two things that shouldn't go together at any time, but your mileage may vary.

Since the original post was about using a pcb: the mounting angle approach works very nicely there as well of course.


edit: just saw all of your pictures Bruce, for such a build with higher integration it's obvious why you would want to mount to the board. Nothing I've ever done, your build looks great. Although I might use thicker material I think.
 
I've done a few 9-pin-tubes-in-a-1RU-box projects, and have used the small PCB daughter board method mentioned earlier.  I would suggest if you go this route that you do not rely on the right angle pin header to provide the only mechanical support to the daughter board.  Repeated removal and insertion of tubes will cause the solder joints to fracture, or worse still, the PCB pads/traces to delaminate from applying lateral stress to the daughter board.  I usually make the tube daughter board about 20mm wider than it needs to be and fit right angle brackets at either side of the tube(s) that support the board rigidly enough so that no strain is placed on the electrical connections.

The ones in the photo below are made from 3mm thick, 30mm x 12mm right angle aluminium extrusion cut down to size. 

P4030135.jpg
 
bruce0 said:
Anyway... I still have to make some changes to this thing, but it sounds really great, and like all good tube gear, it even sounds ok when you get the levels wrong.

And thank you Scott Hampton for writing that nice article, which got me into this hobby.
And if this post is too long or inappropriate for this thread, I will move it somewhere else. 

Great project. Very impressive.

Cheers

Ian
 
ruffrecords said:
bruce0 said:
Anyway... I still have to make some changes to this thing, but it sounds really great, and like all good tube gear, it even sounds ok when you get the levels wrong.

And thank you Scott Hampton for writing that nice article, which got me into this hobby.
And if this post is too long or inappropriate for this thread, I will move it somewhere else. 

Great project. Very impressive.

Cheers

Ian

+1
 
pucho812 said:
bruc0 what is the part numbers on those psu's your using. really curious  on that 250 V one....

I got it at Mouser, part number came from the original "Build your own two channel vacuum tube mic preamp" by Scott Hampton, it was in TapeOp magazine.

I think the company may have changed names in the mean-time, but it is still at Mouser - International Power (I can't remember if that is the old or the new name) open frame linear supply

The ones you are looking at in the picture are the "B" size open frame supplies.

250V 100ma
IHB250-0.1
http://www.mouser.com/ProductDetail/International-Power/IHB250-01/?qs=0xCm9DOQnC5apaiylMDitA%3d%3d

48V 500ma
IHB48-0.5
http://www.mouser.com/ProductDetail/International-Power/IHB48-05/?qs=sGAEpiMZZMu0oxGuRuNKH8MNxSrv1EW6zs1mSMsOndg%3d

There is also a bigger version of the 48V available 1.5Amp, but Mouser doesn't list it.

It is a nice quiet supply even though it doesn't have a toroidal transformer.  I have 4 of them ( I got a lot of 4 used on Ebay because I was thinking of making another box.  I wanted to make a version with an external power supply box, and with 6 or 8 channels.  I have the power supplies, and the tubes, just need the time.  (also... I have started building API rack gear, and there are only so many input channels I need)).  PM me if you want one - maybe we could trade something,  but they are pretty cheap on Mouser both around $45 each.

The way that Scott powers the tube heaters is clever, he runs the power supply at 50.4V, and runs 4 tubes in series (2 channels) at 12.6V per tube, then filters the power a bit for the phantom, which lowers the voltage to 48V.  When I actually measured the voltage across the tubes each is a little different but the current is the same of course.


Rob Flinn said:
Ian

If you want to shock mount the valve, just use a pair of grommets to mount each valve base to the B&Q angle aluminium.  Easy & cheap  !!

I have tried that and unfortunately it does not work as well as I would have expected. The problem seems to be that the grommets that will fit in a B9A valve holder fixing hole are unavoidably small and hence relatively stiff. Now if someone made a B9A socket with larger wings with big fat fixing holes I reckon it would work a treat.

Cheers

Ian
 
bruce0 said:
pucho812 said:
bruc0 what is the part numbers on those psu's your using. really curious  on that 250 V one....

I got it at Mouser, part number came from the original "Build your own two channel vacuum tube mic preamp" by Scott Hampton, it was in TapeOp magazine.

I think the company may have changed names in the mean-time, but it is still at Mouser - International Power (I can't remember if that is the old or the new name) open frame linear supply

That is amazing. I had no idea anyone was still making regulated HT power supplies. Absolutely brilliant for a bench PSU and the price is reasonable too.

Cheers

Ian
 
bruce0 said:
Ian: just to be clear.  These are not really bench top things.... These are open frame power supplies, set up for a fixed voltage output and not in an enclosure.  No fuse, no IEC connector... just an open frame, solder lugs to configure 110/220 output lug and a voltage adjust (and maybe current limiter adjust).

Yes, I had realised that. I should have been more clear. I meant for building into a bench power supply project inside a nice box, possibly with an HT voltage meter etc.

Cheers

Ian
 
Back
Top