


TheWolfman
Well-known member
- Joined
- Nov 1, 2011
- Messages
- 69
Hi Mnats,
Thanks for getting back to me my man.
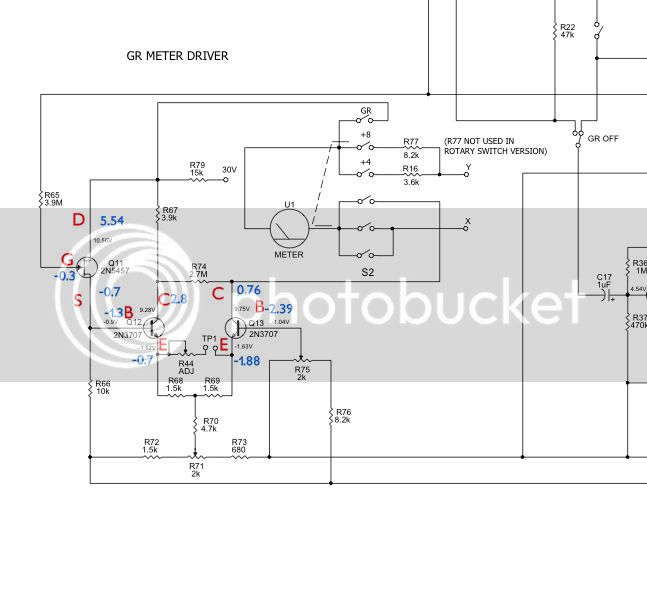
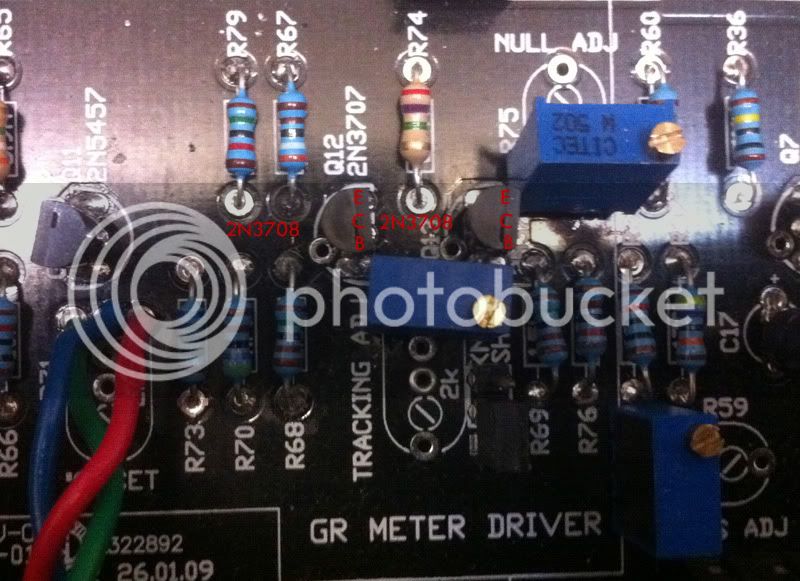
As I stated before all the voltages appear to be reading correctly and my transistors are definitely orientated correctly as I checked the data sheets for them.
It's late over here now in the UK but I will endeavor to open up my unit and re-check voltages etc as soon as I can.It took a considerable amount of time to put the video together...as you probably well know from your own forays into video production!
The unit it terms of compression seems to function exactly as expected and does indeed sound absolutely wonderful.I did notice however that the threshold/knee doesn't seem to respond quite like any 1176 I've used before in that you aren't able to 'push it' quite as far as I would expect.Compression seems to taper off after about the '12' position on input.Could this be the nature of the input pot or that the level going into the compression circuit has too much resistance to be pushed fully?
Once again thanks for such a rapid response and I'll try to provide some more technical info a.s.a.p.
Thanks for getting back to me my man.
As I stated before all the voltages appear to be reading correctly and my transistors are definitely orientated correctly as I checked the data sheets for them.
It's late over here now in the UK but I will endeavor to open up my unit and re-check voltages etc as soon as I can.It took a considerable amount of time to put the video together...as you probably well know from your own forays into video production!
The unit it terms of compression seems to function exactly as expected and does indeed sound absolutely wonderful.I did notice however that the threshold/knee doesn't seem to respond quite like any 1176 I've used before in that you aren't able to 'push it' quite as far as I would expect.Compression seems to taper off after about the '12' position on input.Could this be the nature of the input pot or that the level going into the compression circuit has too much resistance to be pushed fully?
Once again thanks for such a rapid response and I'll try to provide some more technical info a.s.a.p.


![Soldering Iron Kit, 120W LED Digital Advanced Solder Iron Soldering Gun kit, 110V Welding Tools, Smart Temperature Control [356℉-932℉], Extra 5pcs Tips, Auto Sleep, Temp Calibration, Orange](https://m.media-amazon.com/images/I/51sFKu9SdeL._SL500_.jpg)


