[BUILD] CAPI VP312DI~500/51x Series~Preamp + Direct Inject~Official Support Thread

GroupDIY Audio Forum

Help Support GroupDIY Audio Forum:

This site may earn a commission from merchant affiliate links, including eBay, Amazon, and others.
Good news, congrats and thanks for the update.

Lotta work trying to do 3 new modules at once and still move forward on the console stuff. Unfortunately, everything suffers, especially the console stuff.
 
A day of woes! on my VP312DI biuld

I soldered the wrong TPAD, I did not realise I had more than one type in teh package. ****! desoldered and resoldered the right one.

I also now have led working fine on the phantom power switch.

Still no sound the. The OPAMP is getting very HOT quickly.

I am not sure whether the rear relay is working. Would this cause the circuit to 'back up' and get hot?

the jack inserted, hear click no problem, switch 2622 hear click no problem.

But no sound still.

I have checked and rechecked all my solders. Does this sound like a the dreaded relay problem again?

I want more VP312DI's because they are superb on synths. I want another pair, but ****, ever time I build one I get problems.

any ideas guys?
 
Well, like I said, there will probably be no magic bullet or smoking gun fix. When having trouble like this the "pot shot" approach to finding and fixing will most times never work. The only way to find and solve is systematic and methodical.

First, common sense things with the opamp. Is it a known good solidly built opamp? Who built it? Has it been verified good in another working device? Is the voltage switch set incorrectly for the opamp installed? I never test a freshly built preamp with a freshly built opamp. Too many variables.

From there, you will need to follow the schematic like a road map. You can follow signal from the input up to the opamp with no opamp installed. When in mic mode, does injected signal get to the first relay board? Does it get past it? Keep following all the way to the opamp.

When inserting a 1/4" jack, the rear relay will switch to DI mode. Follow the signal throughout the DI signal path as well.

This may seem like a frustrating time, but the rewards when you can systematically follow signal thru an entire device and find the culprit will be very rewarding. It will only make you a better builder as well.

Best of luck and keep us posted.

Cheers, Jeff
 
Matt

So what was the finding on swapping the opamp? You need to first do this to rule out DOA issues. If you have done this and the problem stays with the preamp, then we know to look elsewhere on the pre.

All of the things I am about to post can be deciphered by looking at, reading or following the schematic. This will become a necessity with the amount of kits you build if it's not already. Good troubleshooting skills will out weight good build skills any day. No matter how good a builder one may be, there will always come a time when you need to sort out an issue.

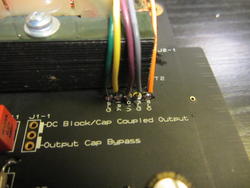
So, think it may be the t-pad? Easy. Let's bypass it and see what happens. By looking at the skiz we can see that the t-pad follows the 2503 output transformer. Desolder the Blue and Orange leads from the 2503. Temporarily solder them to an XLR or whatever means you need to monitor the output. Again from the skiz, Blue will be + and Orange will be -.

What are the results? Same issues? No sound and opamp heating up? I think we have ruled out the t-pad.

In a general studying of the 312 schematic, what would happen if the 2503 is bad? What if the primaries are shorted within the x-fo? Very rare but **** does happen. Again, in following the skiz, the DOA's output would be directly shorted to ground. Not good. Would probably cause a very fast over heating of the opamp. Maybe next you should desolder all the leads from the 2503 and measure DCR to see.

What is DCR between the following: (again, that damn schematic is the key!)
Red to brown?
Blue to green?
Yellow to orange?
Violet to gray?

Make sure your DMM is set to properly measure resistance under 100 ohms. Let us know what you find.

Last thing to mention, before I would have gotten to the above, I would have injected signal and followed it all the way thru the preamp. Where it stops would be the area to look. If the above holds true, things would be fine up to the DOA's input. Would be a great help to yourself if you could verify this. You will be thanking me for it one day down the road.

Best, Jeff
 
Jeff...

I soldered a NEW 2503 into my VP312DI and it worked straight off the bat!

Here are the readings of what the 2503 I took out.

Red to Brown 8.3
Blue to Green 8.3
Yellow to Orange 8.3
Violet to Gray 8.3

Which would seem to imply there is nothing wrong with the 2503 right?

If this is so, then I will test this 2503 in one of my new vp312s now. If it works, then I can only say it must have been a cold solder joint.

Would be unusual for me, but I guess it happens. I'll get back to you.

Matt
 
Matt

Those readings are normal and correct.

The other thing you should look for is a direct short. Start with one color, and measure against all the others. These should all have no reading on your DMM, except the sets above.
 
:D

Its in the other VP312 without any bother Jeff.

I must have cold soldered. Sorry to waste everyone's time.

Still, learned a little about the 2503 in the process

Matt
 
Problem:  I'm getting 8.2k ohms resistance between V+ and C on the DOA sockets.  (All other tests between other op amp sockets have resistance greater than 200k ohms).  This is without any DI boards installed.  With a DI board installed the resistance falls to 4.87k Ohms.  It's still 8.2k Ohms without a DI board installed.

Extra info:

•Slightly burned the "body" of C2 on Sub-DI.1
•I did install all of the "optional" resistors and capacitors.  I wasn't even sure of pros and cons of this.
•This is a 500-VPR mod version.
•Previously I was 100% on these builds--four VP26s and six op amps built correctly the first time.
•I don't have "any" electronics knowledge or troubleshooting skills.
•I don't have desoldering equipment.
•To my eye, everything looks good.  I don't see any solder bridges.


Any ideas?  I would sincerely appreciate any help.  If there is nothing new (that already hasn't been stated on this board), would someone recommend a book or website that will teach me how to troubleshoot and repair electronics?

Thanks,
Grant
 
Grant, this is normal for a VP312DI board. It is due to the relay PCB's and holdup resistors. So, continue on.

If you mean the 150k R, that is a load R that will slightly decrease the input Z when in mic mode. Leaving it out will tend to give a slightly more "open" sound, typically.
 
WHAT A RELIEF!! THANK YOU!!

Yes, I did mean the 150k R but also C10 and C11--everything labeled with one asterisk on the BOM. 

By "open," do you mean that it will have more high frequencies?  If so, I might just remove it (after a good listen).

Thanks again for your prompt reply.
 
I just unpacked my vp312DI kit [Rev C.1, VPR 500 series version] and have two questions.

A)  It did not include resistor R19 [10R .5W 5% CF].  The BOM does not list it as optional, but I do see on the schematic that it lies in between the LED and the ground.  Is the intention to simply short those pads instead of putting a low-ohmage resistor there?  Or should I get ahold of one of those resistors?
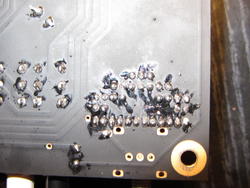
B) When cutting the wire-lengths for the output transformer, is it crucial for the sound quality that they are cut as short as possible?  Or is the purpose of cutting them tightly so that they are nice and snug?
 
twitme said:
I just unpacked my vp312DI kit [Rev C.1, VPR 500 series version] and have two questions.

A)  It did not include resistor R19 [10R .5W 5% CF].  The BOM does not list it as optional, but I do see on the schematic that it lies in between the LED and the ground.  Is the intention to simply short those pads instead of putting a low-ohmage resistor there?  Or should I get ahold of one of those resistors?
That is the larger brown bodied resistor. I pack the kits in groups. I just checked the others I have here and they all have that R in them. My guess is, it is in your kit to. If not, I will gladly drop one in an envelope for you. I do not recommend a hard jumper as it will throw the star ground and isolation between CHA and GND in your rack out the window.

B) When cutting the wire-lengths for the output transformer, is it crucial for the sound quality that they are cut as short as possible?  Or is the purpose of cutting them tightly so that they are nice and snug?
Just try to keep them short for neatness as much as anything. Many inches long is not a good idea but an extra 1/2 inch will not hurt anything.
 
I've just finished building and testing my vp26 and vp312di preamps (one of each).  Mostly things are working.  However the DI on the 312di is giving me a super high-output low frequency oscillation not related to the instrument when I plug an instrument into it.  (sounds like "wub wub wub", and I'm not a fan of dubstep.)  Everything else is functioning perfectly.  The DI I've built is the HiZ-IC1-rev01.  I do not have another DI module or DI pre to test with at the moment.

Although everything else is functional, doing the opamp socket tests found in the vp2* assembly guide I did end up with some weird results.  I'll post those below for both the vp312DI and the vp26.

unpowered DOA socket test:
vp312di:

-V / +V = no reading
-V / C = no reading
C / +V = 9.6 kOhm
C / O = 375 kOhm
+V / O = 386 kOhm
-V / O = no reading

powered DOA socket test:
vp312di:

+V / C = no reading
-V / C = .32 volts


And for the vp26:

-V / +V = shows 300 kOhm and continuously rising as I hold the test terminals on
-V / C = no reading
C / +V = no reading
C / O = no reading
+V / O = no reading
-V / O = no reading

powered DOA socket test:
vp26:

+V / C = .25 volts
-V / C = .26 volts

Things sound great though.  *shrug*.  Bad DMM?
 
Sorry to waste your time Jeff.  I reseated the DI plugin and the op amp in the 312DI and it's working perfectly now.  Also the low voltage readings were a result of my ****** test-jig that I put together.  I tried using the preamp with mic and DI using the test jig into my backplane and I got no sound at all.  Remove the test jig and all works perfectly.

I'm still slightly concerned about the 9.6kOhm reading in the above unpowered test, but otherwise things are working great! 
 
twitme said:
....I'm still slightly concerned about the 9.6kOhm reading in the above unpowered test, but otherwise things are working great!
This is perfectly normal and exactly as expected for a VP312DI. It's due to the hold up resistors for the relay boards.
 
Well, i finished my VP312DI (stepped). It's my first project ever so i was expecting a problem, which happened :D. The module powers, nothing funny, phantom engages on and off (tho the led slowly fades away when i turn it off, it takes some seconds). When i plug a microphone i get nothing, i got barely something through the pre to a console, but nothing from the pre to a speaker, just noise (a lot of it when i crank the gain). DI seems to work better, i get an acceptable guitar tone, but it distorts fast at low gain, which i dont think is normal either.


=(

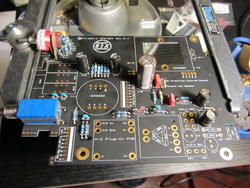
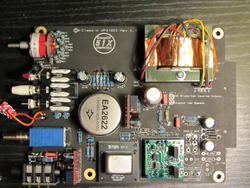
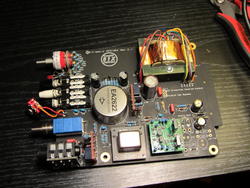
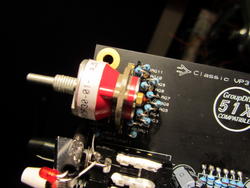
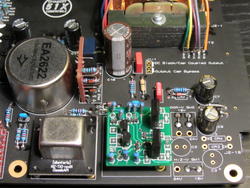
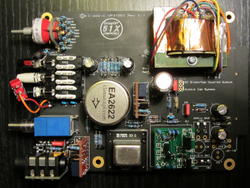
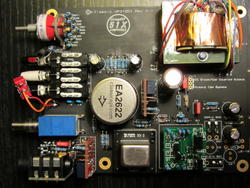
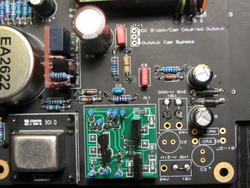
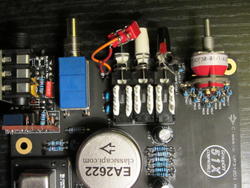
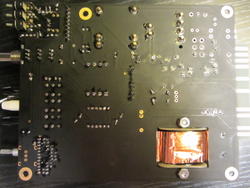
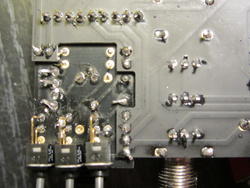
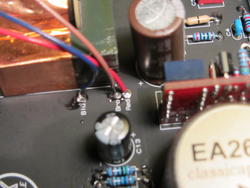
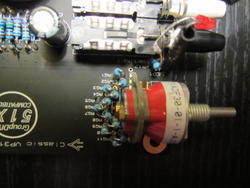
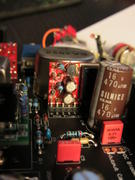
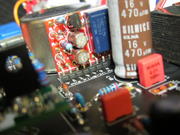
pics here, hope its something obvious and visible :D


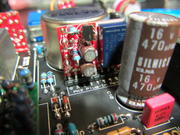
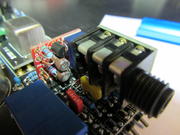
The biggest trouble folks have with this build is the small relay PCB's. If the zener diode gets put in the wrong place, the circuit will never function properly. I can only see the side of the PK2 board but in the pics, it sure looks like there is a 1N914 where the zener should be.

I also notice the 3-pin option jumper is not installed. Without it, the coupling caps between the opamp and 2503 are always in the circuit. This is the safest way to have the module set up so you can surely leave it as is with no worries. Just wanted to point that out. You are good just like you have it......missing.  ;)

Check out those relay boards.
 
hard to photograph those little buddies... Its gonna be a bitch if i need to desolder... i only have wick and a solder-sucker


Well, I guess I was also asking you if you for sure identified the 4V3 zener diodes and made positive they went in the right location. If you say no, then you have a 33.33% chance they are right.  :-\

I am pretty certain PK2 is done wrong. I can't really see the part label for CR2 in the pics. The angle is not good. Maybe you can figure this out. Go back and verify what the label should be by viewing 'Chunger's build thread. Your pics are clear enough when I zoom in but the angle is not the best.
 

Latest posts

Back
Top