DIY rotary DJ mixer

GroupDIY Audio Forum

Help Support GroupDIY Audio Forum:

This site may earn a commission from merchant affiliate links, including eBay, Amazon, and others.
Also, I've been thinking about the preamps.. if they become unavailable I can probably fit new components and IC's but in general, how questionable it is to copy/reverse-engineer a PCB/schematic? Or would it be better to come up with a design and roll my own? I feel I haven't really DIY'd anything.. (edit : same goes for the EQ too, although I never really paid attention to filter design.. I'm not looking to sell these though, I'll be lucky to get it working in the first place.. maybe make another prototype with faders or something)
 
Cleaned the HP amp PCB a bit.. it's got jumper wires etc. I was thinking of getting rid of the whole thing (edit : I think it doesn't make much of a difference for home use, my PM-90 has about 1/5 useable range in the HP vol)
 
efinque said:
Also, I've been thinking about the preamps.. if they become unavailable I can probably fit new components and IC's but in general, how questionable it is to copy/reverse-engineer a PCB/schematic?

Anywhere from questionably ethical to downright illegal.

As anyone can buy it, it is in the public domain. Therefore you can copy it unless the owner has copyrighted it (by simply placing a copyright notice on it) or by registering the design in which cases it is illegal.

Cheers

Ian
 
Took out the HP amp.. no sound whatsoever, I thought the line preamps alone would've sufficed (edit : for home use)

The problem with that in the long run could be the impedance; the headphones I've been using for testing are 55ohm (most DJ headphones are in that range)

EDIT : I'm also trying to get rid of pops in the master when switching the PFL source.. I remember reading a (shunt?) capacitor somewhere solves the problem.

EDIT 2 : some of the copper traces peeled off during soldering (I think it's because I had my iron at 450C), maybe rebuild it on perfboard?
 
Was just about to flag the previous post ,but it vanished , proper place for it in the bin , I hope no one clicked the links .
 
Stuff that's been changed :

-all the channel preamps (incl. master) now use 10-pin bus connectors except the mic channel (ie. they can be replaced with jumpers or another compatible module, line preamps have breakout wiring to the trim controls)
-stereo to mono summing where needed uses 10kOhm resistors
-HP out is now modified to use a cue/pgm blend (the grey pot next to cue select)

IMG-20200919-123211.jpg


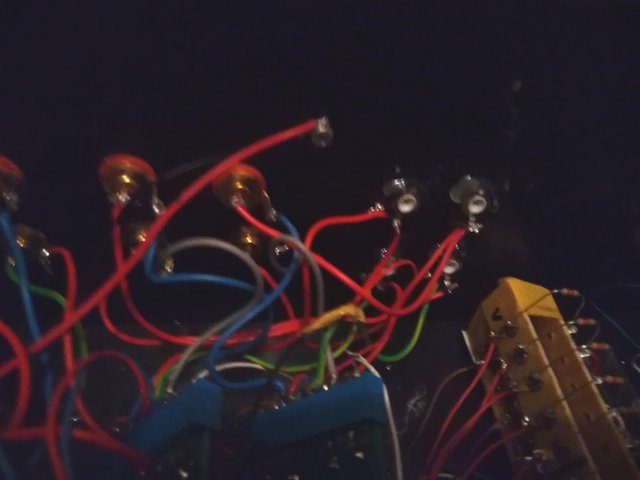
EDIT : here's what it looks on the inside:

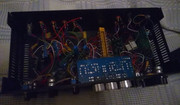
IMG-20200919-193305.jpg


The modules on the left are input channels (the blue things are the bus connectors, not the two which are in the front panel, they're mic on/off and EQ bypass switches).. the yellow "bar" in the middle is the summing bus. The master output preamp is next to it on the right as are the output transformers (the aluminium boxes), the PSU is the green PCB on the far right. The EQ is the blue PCB attached to the front panel.

EDIT 2 : I also bought some shrink tube which I was thinking of using for the PSU/mains wiring etc.. they're mostly hot glued for now. There's a bit of other mechanical stuff to tackle as well like securing wires, PCBs etc
 
Here's a close-up of the modified monitoring/master section :

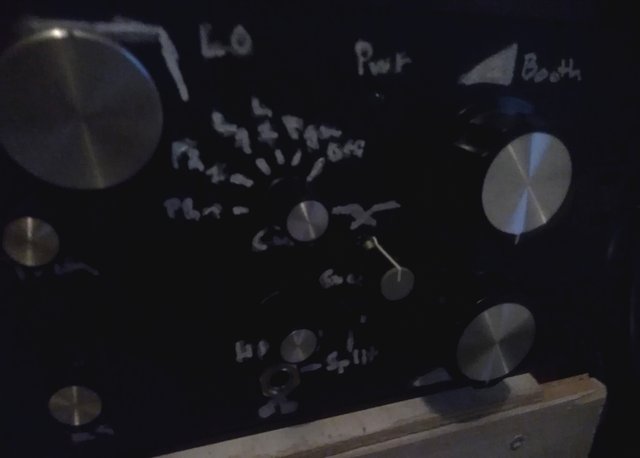
IMG-20200921-173455.jpg


It now has split cue function, the cue select feeds the left channel (tip) of the HP out and the master feeds the right channel (ring).. with split enabled the channels are separate (you hear cue on the left and pgm on the right, the cue/pgm adjusts the balance between the two), with split off the tip and ring (L/R) are summed so you hear them from both cups.

To use it the way it was turn cue/pgm to cue and disable the split cue.

EDIT : the changes made to master section are only cosmetic as I had to make space for the monitoring modifications apart from connecting a ground wire that was loose.. I also put the headphone amp back in, it's kind of crowded in there though.
 
Modified the power supply rail into a screw terminal bus that uses 12 connectors (it'd need 14 actually as there are 7 modules in total but I wired the EQ and master preamp in parallel from the same terminal)

I'd imagine it makes modifying and servicing easier in the long run as each input module now has it's own power supply terminal similar to the summing bus (earlier they were all just twisted together as +/-), also noticed a few wires had become loose/unsoldered so there's a bit of minor fixing to do.
 
The smaller 2ch mixer I built earlier from leftover parts and then scrapped to build the xover had me thinking so I rebuilt it with some modifications.

First I assembled a roughly 6-7RU (300mm) slanted 19" case from an amplifier project. The bottom is hardboard, sides are 18mm thick pine and the top panel is plywood.

I then attached a transformer and a power supply board (from an old tape deck), along with the mains AC wire which runs to the back panel via a screw terminal in case it needs to be modified to fit inside a rack. I also drilled a hole for the power button.

Then I wired a 12-pin screw terminal bus in parallel (stereo configuration) so there's 4 left, 4 right and 4 ground with L/R/gnd terminals which forms the summing bus (the L&R ground signals are summed). These are connected into preamplifier inputs via a bus connector. The preamp is a now discontinued Velleman K2572 universal stereo preamplifier kit I built earlier.

The preamplifier output is split into 2-track out and a 100kOhm stereo potentiometer which feeds two 6,3mm unbalanced master outs. The 2-track in/out uses a two pair RCA terminal, the input is connected to the summing bus.

The input channel section is passive, with a mono channel and 2 stereo channels. The mono channel uses a 6,3mm mono jack, the stereo channels have RCA connectors.

These are also connected to the summing bus, the mono channel uses an Y-split to L/R with 1kOhm resistors to maintain stereo separation between channels. The channel strips have 100kOhm potentiometers as volume control.

The PSU provides 30VDC for the preamp and 9VDC for the power on LED via ballast resistors.

The build is missing knobs atm, I'm also looking to add a headphone monitor section with PFL/master cue (this requires per-channel trim pots, a 2-pole 4-pos rotary switch, level pot and output jack) and possibly balance controls.

It could benefit from per-channel HPF/EQ and -20dB pad switch too, and metering.

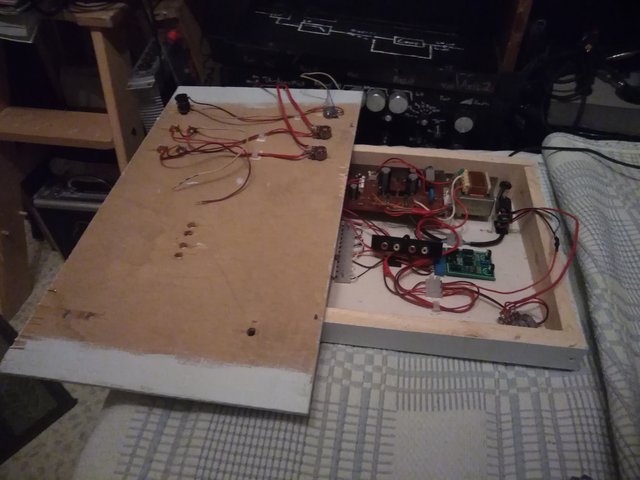
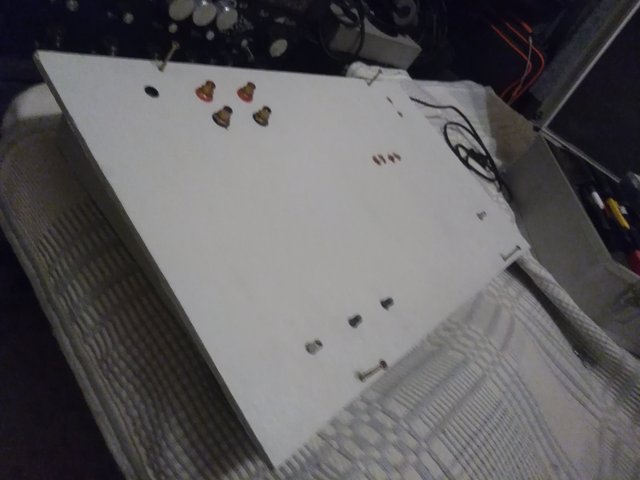
Here's a pic of the internals with the PSU and summing bus/master section visible (you can also see the channel configuration wiring on the front panel) :

IMG-20210210-202950.jpg


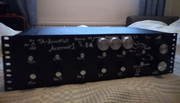
And a pic of the front panel in place :

IMG-20210210-203737.jpg


Stuff I've added since is the power on LED (in the front panel) and panel markings etc.
 
Regarding the 3RU mixer; I added a L/R input trim in the line channels which is basically a 1kOhm trimmer with a through-chassis hole around the back panel so it can be adjusted with a flat-head screwdriver.

This is to serve as a "dummy load" between the input and the preamp to prevent the channel from clipping/distortion since I noticed a lot of tape/CD players (esp. ones for DJing) have different output levels and usually no output volume control (my initial assumption was that the input sources are often low-gain as such and there is no need for one but I added it regardless)

Another advantage is L/R balance as some input sources may have different L/R output levels due to their output circuitry and cables etc.

In the latest 3ch mixer on the other hand I added a switch to mute Ch1 (I assume I'd use it as a microphone channel as it's mono and all microphones don't have an on/off switch) and rubber feet for tabletop operation.

EDIT : here's a pic of the input trim mod from the inside :

IMG-20210228-181322.jpg


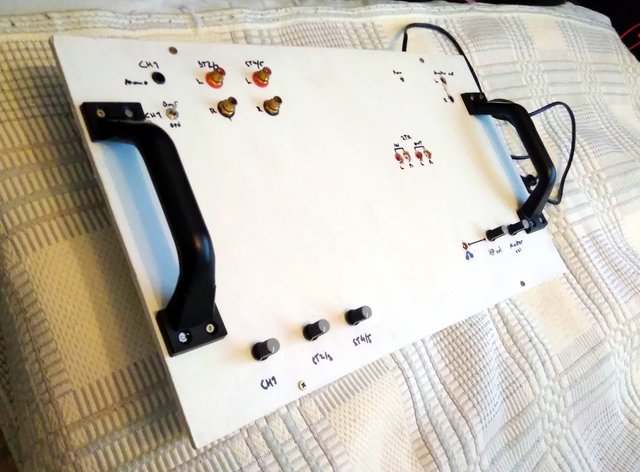
and a front panel pic of the tabletop mixer build (also added a 220kOhm trim to adjust supply voltage to preamp, a 3,5mm headphone out with volume control and handles) :

IMG-20210305-125017.jpg
 
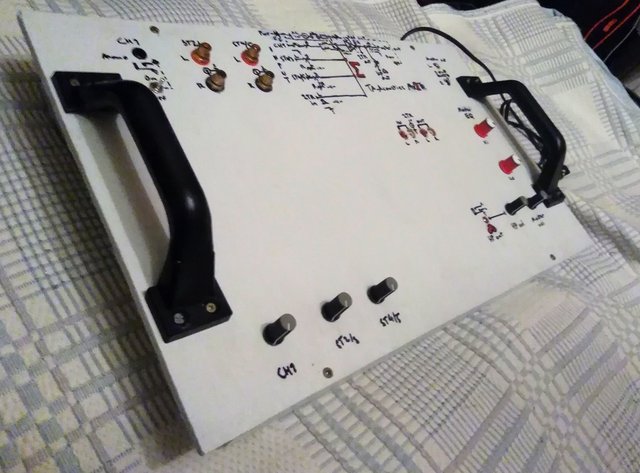
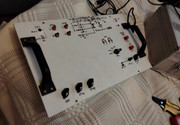
Added a 2-band master EQ, cleaned the wiring a bit and updated the front panel with a functional block/circuit diagram.

IMG-20210307-194959.jpg


The EQ sounds surprisingly good (I didn't listen through the channels yet, I tapped into the master out post-preamp) given that it's made from junk/spare components like the rest of the device.

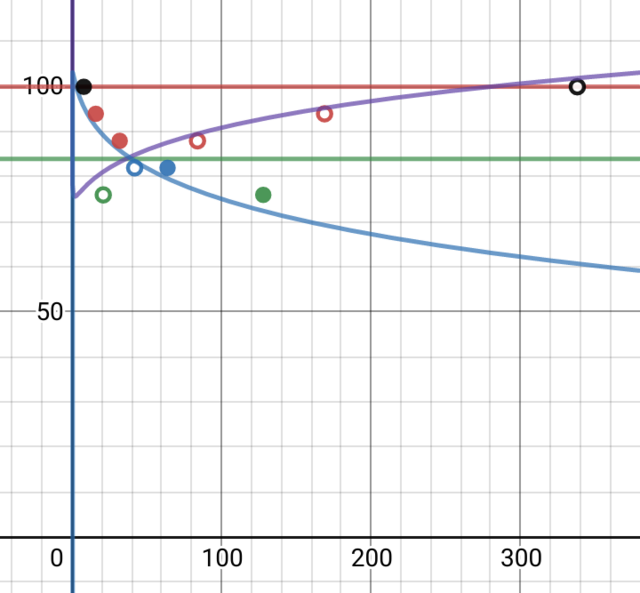
EDIT : I used an online function graph calculator to plot the EQ slopes (it's over ten years since I used a function calculator, last time in high school so it's a bit crude) :

IMG-20210309-142429.png


The blue line denotes the LF, the purple line is the HF. The dots mark the "ideal" LF filter slope, the hollow ones are the HF (1st order -6dB/oct or when the frequency is multiplied by two the dB is decreased by 6 in LF, frequency divided by 2 the dB is decreased by 6 in HF)

The functions I used to plot the graph were:

HF : ln(x/2)^2-√a=(y-6)-b
LF : -ln(x•2)^2+√a=(y-6)-b

where a is the center frequency (in Hz), b is the loudness (in dB).

X-axis is the frequency and Y-axis is the loudness in dB. The green horizontal line is where the passbands intersect (ie. the frequency response is "flat"), the red line is loudness (at 0dBu) which I set at 100dB (I first had it at 40dB which is the preamp gain I'm using)
 
Hey guys,

Does anyone know where to buy a PCB for a rotary mixer project?

I have been building recording audio gear (mic pre, eqs, compressors, Mics and all) for ages but now I was looking for a DIY friendly rotary mixer project. I've contacted some people such as Mario Viola and Oudin Cien who used to supply PCBs for the Pathos rotary mixer project.

I'm looking for a pro rotary mixer project build but doing it without a PCB to start seems impossible.
The Pathos project became open source and the gerber files and front panel are all at the download link in the link below -

https://fabricastronautblog.wordpress.com/2017/09/26/pathos-mixer-the-end/
I’m building one in parallel with a friend for his first project and plan on selling mine (assuming it works) since I already have a Condesa. Just finished the power supply last night so testing will begin shortly.

you should be able to upload the gerbers to any pcb manufacturing site and they’ll produce them. I had PCB Way do mine and they came out great.

I’ve got a ton of extra transistors for this project that I’d be willing to sell as well.
 
Ordered some new parts, they arrived today.

Stuff that's been updated is new knobs and a cue system (I've yet to ground it properly)

IMG-20220420-174632-01.jpg


I accidentally received/ordered a mono fader instead of stereo (to have a crossfader) so I'll have to look into it on the near future.

Another thing still missing is the mono channel preamp (which I ordered as a module, it's LM386 iirc)
 
Last edited:
crossfader
check out the Schematics of the Company "Rane" and their legacy products.

they used a magnetic sensor thing to crossfade in combination with VCA's and software(mcu) to create PWM signals (SSM2164 or the currently clone by Behringer V2164 from cool audio or some THAT VCA) and no physical resistance, easy trowing.
V2164M, V2164D

You could use a mono fader to control VCA's and never have any distortion caused by pots(wear) while operating the "faders".
the clue now is how analyze the position of a thing with the knob sliding on a shaft and adjust the VCA's by PWM.

Microchip has some Touch ic with enable you to create pcb sliders.
 
crossfader
Magnetic Rotary Position Sensors

ASM's PRAS21 series of magnetic non-contact rotary sensors uses an external position magnet to provide an absolute output signal over a 0 to 360 degree measurement range. Thanks to this external magnet this sensor provides continuously wear-free operation. Its standard measurement range is 360 degrees. Smaller measurement ranges can be ordered in 15 degree increments. The sensor output is an analog voltage signal, 0.5 V to 4.5 V. The heigth of its IP60 rated housing is less than 6.35 mm. Its fully potted circuit board has a high level of shock and vibration resistance. The resolution is rated at 0.03 % of full scale (60…360°) and 0.1 % full scale (15…45°), the repeatability is ±0.03 % (60…360°); ±0.1 % (15…45°) and linearity is ±0.5% full scale. The sensor can be installed with M3 screws.
 
check out the Schematics of the Company "Rane" and their legacy products.

they used a magnetic sensor thing to crossfade in combination with VCA's and software(mcu) to create PWM signals (SSM2164 or the currently clone by Behringer V2164 from cool audio or some THAT VCA) and no physical resistance, easy trowing.
V2164M, V2164D

You could use a mono fader to control VCA's and never have any distortion caused by pots(wear) while operating the "faders".
the clue now is how analyze the position of a thing with the knob sliding on a shaft and adjust the VCA's by PWM.

Microchip has some Touch ic with enable you to create pcb sliders.
I didn't know how crossfaders work but now I have a hunch.

It was an experiment anyway.. it would've had a simple 30mm dual linear fader to switch between the stereo channels (to keep the hip-hop DJs happy, I don't personally use it or very rarely although my current mixer has one.. even the worlds first DJ mixer had one)

EDIT : I almost have parts for a 3rd mixer now.. one thing that makes modding difficult is that I hot glued everything in place
 
Last edited:
I didn't know how crossfaders work but now I have a hunch.

It was an experiment anyway.. it would've had a simple 30mm dual linear fader to switch between the stereo channels (to keep the hip-hop DJs happy, I don't personally use it or very rarely although my current mixer has one.. even the worlds first DJ mixer had one)

EDIT : I almost have parts for a 3rd mixer now.. one thing that makes modding difficult is that I hot glued everything in place
that's why i said, check "Rane" legay product schematic vault.

you could use a ASM's PRAS21 Magnetic Rotary Position Sensor, feed this 0 - 4,5 Volt signal into Microchop PIC with 2 PWM outputs, read that signal with the onboard 10 bit ADC (most Microchip pic's have), shift that value 2 places to the left to have a 8 bit value and copy that to the PWM register and a inverted value to the other PWM register to create the counter part.

in one of the Rane schematics you find a circuit to convert a PWM signal into a control voltage for the VCA, easy peasy, just copy and paste
You open 2 stereo VCA chips and close 2 other VCA chips at the same time.

Use something like Autodesk Eagle or Kicad 6 to create a pcb and upload that to OSHpark, a PCB pool, 5us$ / inch².

the people on the Microchip forum will help you select a suitable MCU and with the code it with the Microchip MPLAB compiler, but you need a Microchip starter pickit3 or microchip ICD3/4 programmer and socket.

using pots to manipulate audio will result in headaches after a while, scratching noises when you move them, you should use VCA's.
That 2180 VCA, £5.72 (Excl. VAT), THAT 2180 datasheets

Sound Semiconductor IC SSI2164 – Quad-VCA Chip (SOP/SOIC-16 SMD), £3.99 (Excl. VAT), datasheet

 
Back
Top