Drip EQ1 Gen 4 - 60hz Hum / Buzz

GroupDIY Audio Forum

Help Support GroupDIY Audio Forum:

This site may earn a commission from merchant affiliate links, including eBay, Amazon, and others.
Vangetti said:
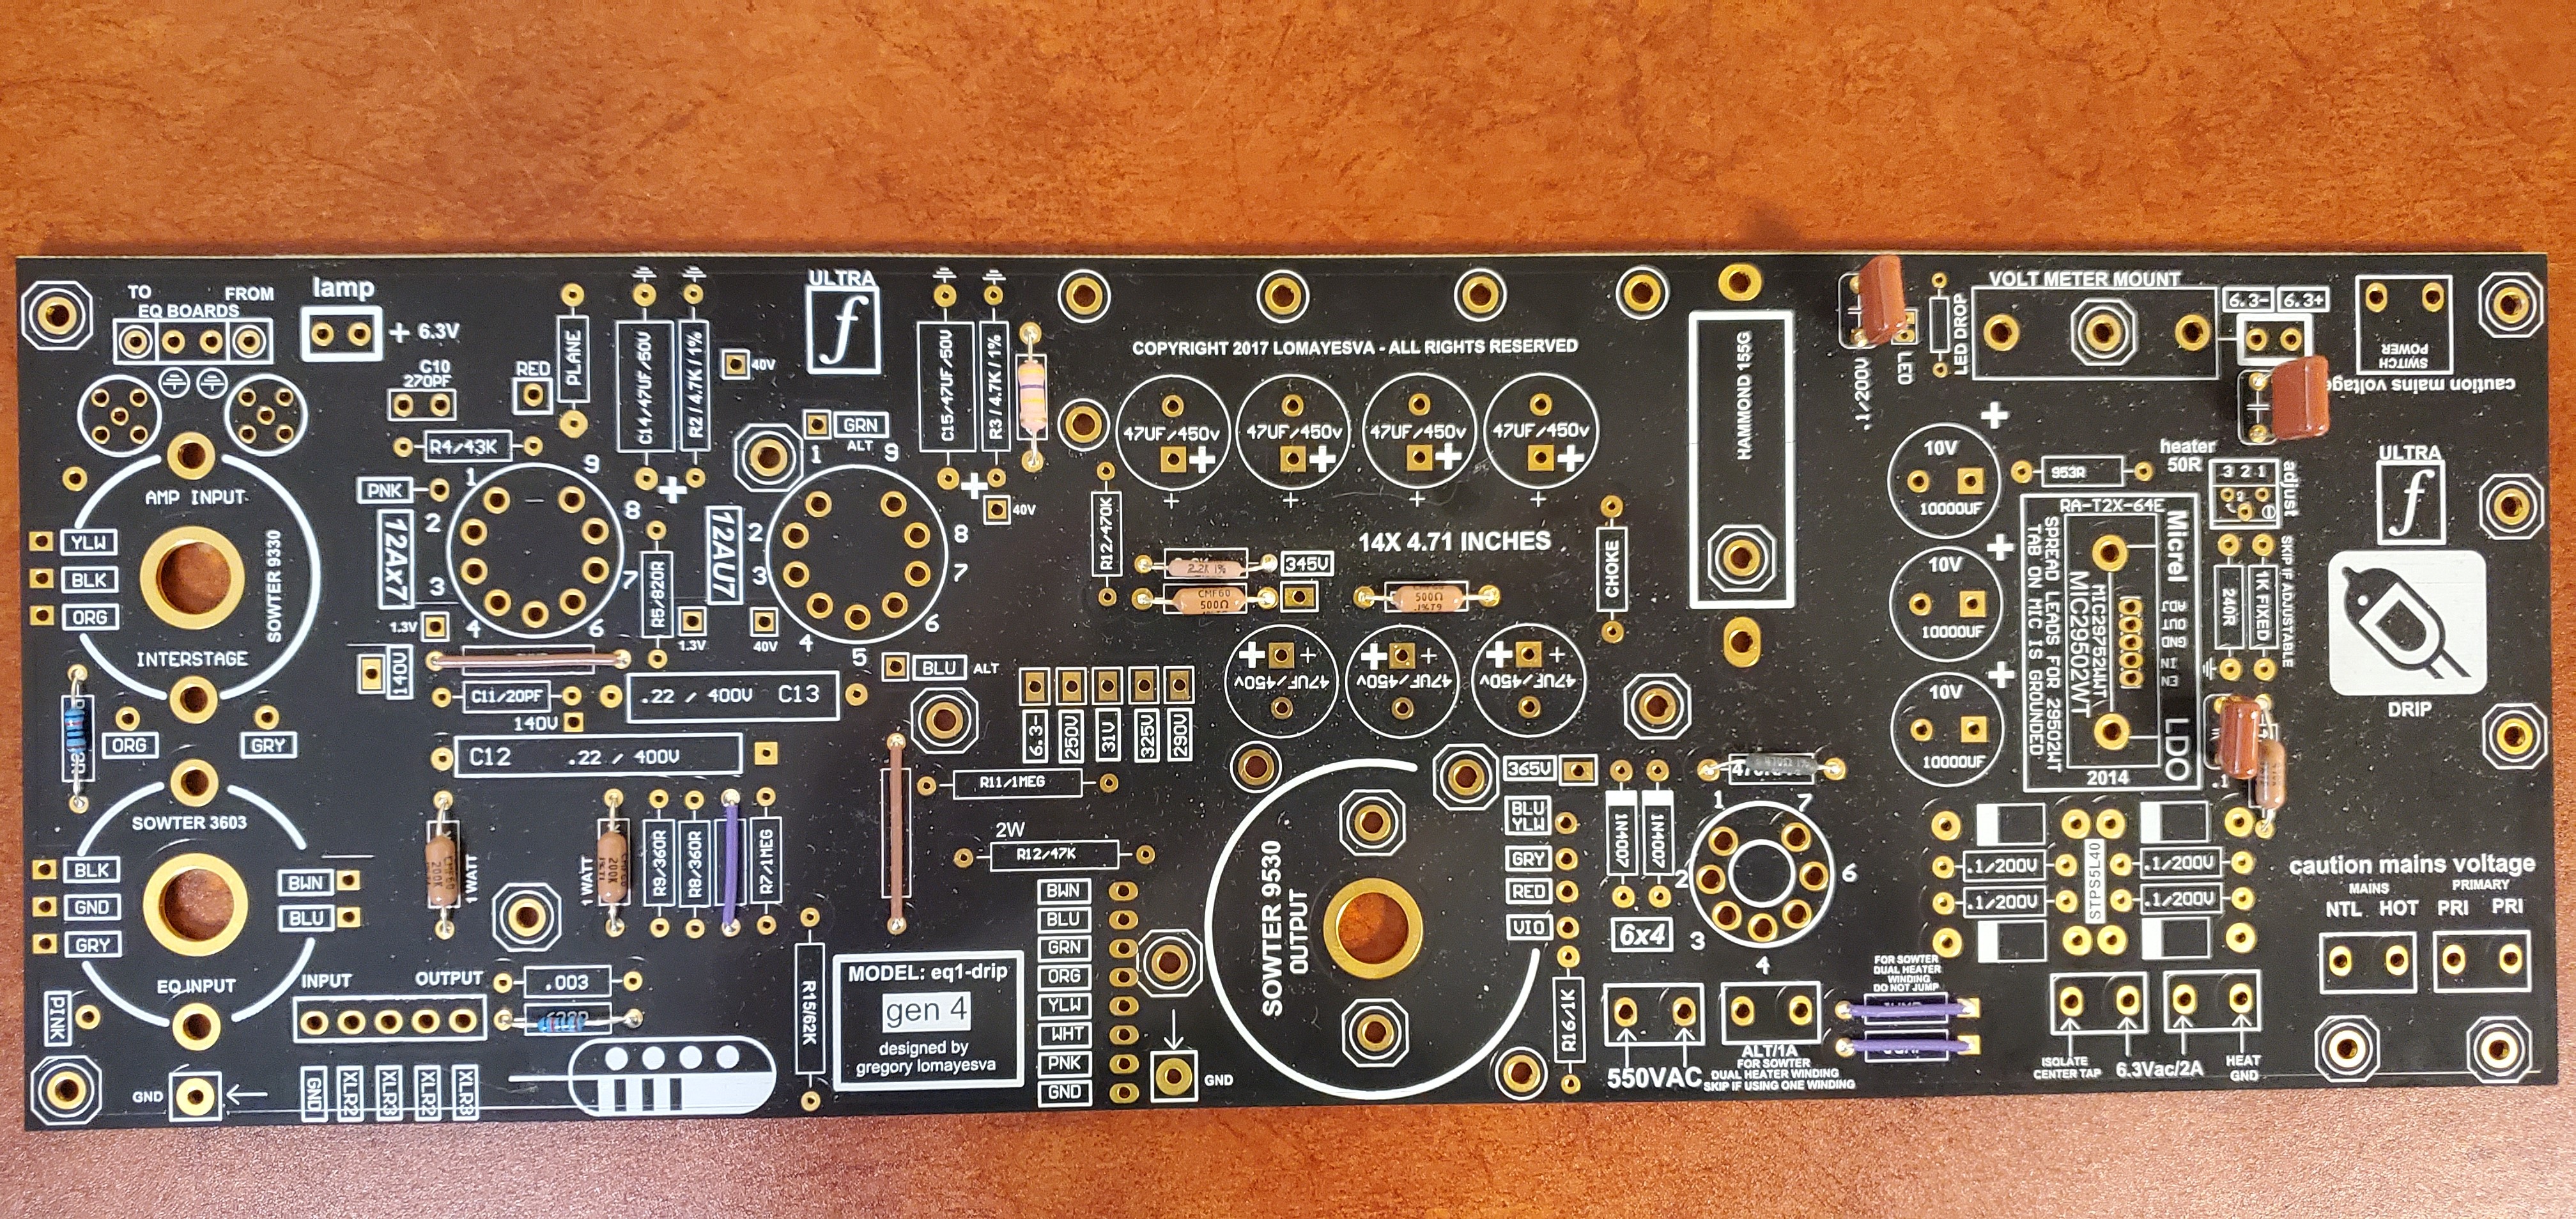
I don't understand why on the PCB silkscreen has  .1/220V capacitors in the 6.3 power section,  but on the finished builds on drip's website, they're not there? Do you think I should put them in and test it out?

Just guessing without knowing where they connect but probably not necessary if they're just extra caps for the bridge......here's some discussion on this....

https://electronics.stackexchange.com/questions/14250/what-are-the-advantages-of-full-wave-bridge-rectifier-with-capacitors-parallel-t

Vangetti said:
Also, would it be better to use the 6x4 rectifier tube instead of the 1N4007 diodes?

Shouldn't matter.... I guess that's subjective but it does the same thing....

Vangetti said:
I ran into the same scenario. I would google the drip eq1 and found older documentation. The schematics that are uploaded on the drip website are the original Pultec schematics.

I was referring to this back panel guide....

https://ws.onehub.com/workspaces/894291/files/2343174797

attached PDF

Just in case .....


has to be something ....You'll figure it out.....


Attachments

  • PULTEC BACK PANEL INSTRUCTIONS.pdf
    924.7 KB
I think you're completely right about the capacitors in the 6.3V heater section.

I'm really starting to think that I'm getting all this buzz/humm because my 6.3v heater is not grounded. With the transformer I was using, there doesn't seem to be a CT for the 6.3v 2A  section. Do you think I should add an additional to connect HEAT GND on the pcb to the main power star ground?

Eq1-pcb.jpg
 
I wouldn't. It's already set up for your transformer without CT......I'm not sure what the deal is with the different options....Maybe for AC heaters too..... ?? But IDK.....

I did read some Pin 1 issues on some Pultec builds....

Have you tried reaching out to Gregory at Drip for some direction???

 
scott2000 said:
I wouldn't. It's already set up for your transformer without CT......I'm not sure what the deal is with the different options....Maybe for AC heaters too..... ?? But IDK.....

I did read some Pin 1 issues on some Pultec builds....

Have you tried reaching out to Gregory at Drip for some direction???

Unfortunately, it's really difficult to get in contact with Greg. I've sent him a few e-mails, but I haven't heard anything back.

Could you elaborate on the Pin 1 issue?

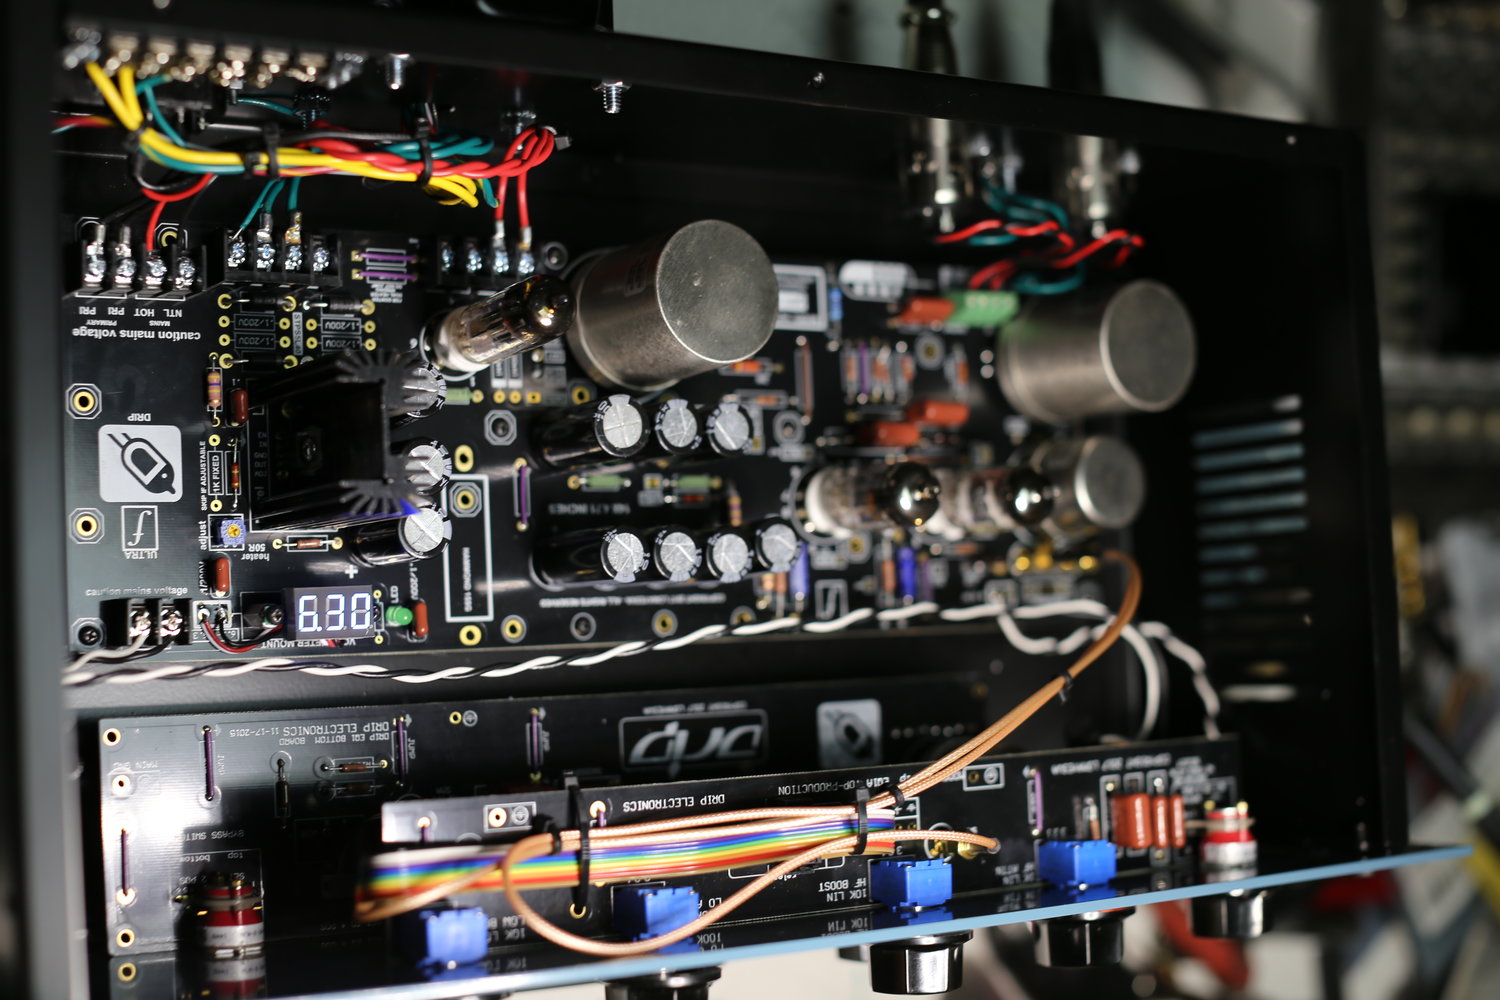
After looking at the pictures on the Drip website, I can see that there is a wire going from heater GND to something... It could be the star ground, but it's really hard to tell.  I looked at the traces on the back of the PCB and it looks like the 6.3V - does not discharge to earth ground without that Heater GND connection as it should from the original Pultec schematic.

There was a video where Greg mentioned that the star ground should consist of the PCB ground, mains ground and the CT, but wouldn't the PCB already be grounded by the aluminum standoffs used to mount the board to the enclosure? Maybe he was possibly referring to the heater ground?

IMG_7730.JPG
 
Interesting...... Yeah I think that may have been what I noticed was different between his and yours a bit back...
....And yours has the one pcb ground spot connected where his doesn't......

The original Pultec schematic has ac heaters so, it's different but, ...... I really don't know how this is set up.....Is there continuity on the pcb from those two grounds on the pcb??? Guess it makes sense with no center tap///??


Oh... Pin 1 issue////
Pin1 of input xlr.....Lifting it to see if it helps.....Grounding it directly to the chassis there I think was a solution to  some of those issues..... Different builds but it's all relevant to some degree....Or not........

I have to admit, looking at some of the info, I think I would be confused about many things as well without a bit more documentation...

Like those unused caps by the diodes...do they have something to do with regulation???...etc..... ....

I'd personally feel better with a point to point.....lol....

But I really haven't looked too close..... Sure is sweet.....
 
I tried the Pin 1 fix, but unfortunately, it didn't work. I also tried grounding the heater, but no luck. This is a real mystery to me. I'm stumped... When measuring my voltages, I'm about 20 volts away from the target on multiple test points.
 
I took a look at the components that I put into the board, but everything looks correct. Do you think I should try fitting the .1/220V capacitors in the 6.3 power section?
 
These are all the parts on the main board.

TRIMMER 100 OHM 0.5W PC PIN TOP
RES 2.2K OHM 1W 1% AXIAL
RES 1.00K OHM 1/2W 1% AXIAL
RES 4.7K OHM 0.6W 1% AXIAL x 2
RES 1.00M OHM 1/2W 1% AXIAL x 2
Resistors - Through Hole 1W 500ohms .1% x 2
Resistors - Through Hole 1/2W 365ohms 1%
Resistors - Through Hole 1watt 240ohms 1%
Resistors - Through Hole 2watts 62Kohms 1%
Resistors - Through Hole 1/2W 200Kohms 1%
Resistors - Through Hole 360ohms 1% 50PPM x 2
Resistors - Through Hole 1W 200Kohms 1% x 2
Resistors - Through Hole 620 OHM 1/2W 1% x 2
Resistors - Through Hole 43Kohms 1% 50PPM
RES 953 OHM 1/2W 1% AXIAL x 1
DIODE SCHOTTKY 40V 5A DO201AD X 4
DIODE GEN PURP 1KV 1A DO41 x 2
IC REG LINEAR POS ADJ 5A TO220-5
CAP MICA 270PF 5% 500V RADIAL
CAP ALUM 47UF 20% 450V RADIAL x 7
CAP ALUM 10000UF 20% 10V RADIAL x 3
CAP ALUM 47UF 20% 50V AXIAL x 2
CAP MICA 20PF 5% 500V RADIAL
Film Capacitors 0.003uF 1.0kV 3% MPP L/S=15mm
Film Capacitors 400VDC 0.1uF 5% MPET L/S=10mm x 3
Film Capacitors .22uF 630V 3% MPP L/S=15mm

I just double checked it and it looks like it's all correct.

I removed the PCB ground wire, but I still had the issue. I also tried the heater ground connection, but it didn't do anything as well. I don't know why my voltages would be off. I used the highest tolerance capacitors and resistors I could find. It's possible that the original was built for 5% resistors, so my values are off.

Could it be the wires that I used to hook up the IEC? They are the super thin eco wire with not much insulation. I also applied heat shrink tubing to the transformer. Do you think that the heat gun might have loosened up some plates in the power transformer?
 
scott2000 said:
Have you seen this video?

https://vimeo.com/277697075

Is it relevant to your build
??

I just watched it again. He said that the 3rd ground wire connects to the PCB power supply? I'm not sure exactly what that means. I'm assuming it's the hole labeled power ground on the PCB, but I already had a wire there.
 
yes....I think you already have it..... but I think he may have used the heater ground instead.......??? maybe less of a ground loop???idk though... ......

Do those two pads show continuity???

But you already tried that spot anyhow didn't you??

you could try twisting up your ac wires a bit more.....those coming from the iec for example (seem to be kinda just lying around and could be shorter maybe??) .....maybe wouldn't hurt to twist the yellow 5v lines........ your xlr lines etc.....

I guess chopsticking the wires around may be able to tell you if anything changes too....

is that lamp circuit AC???


Vangetti,

Did you find the issue?  I just finished building a pair of them and getting what sounds like the same type of hum. 
 
These drip boards are pure genius but horribly documented. I hope y'all can figure out the issue. Gregory has been better at communicating over the last few months although he may not answer your question very well. In my experience, keep questions short and concise and he will usually answer. If you type too much I think he gets overwhelmed.

On the Dual Sta, one of the unused output transformer PCB terminals are supposed to go to star ground or else you get a 60hz hum. Completely different builds but it may be a reoccurring concept for Gregory. Maybe see where those terminals go. I haven't looked at the documentation for the Pultec clone.


Ryan
 

Latest posts

Back
Top