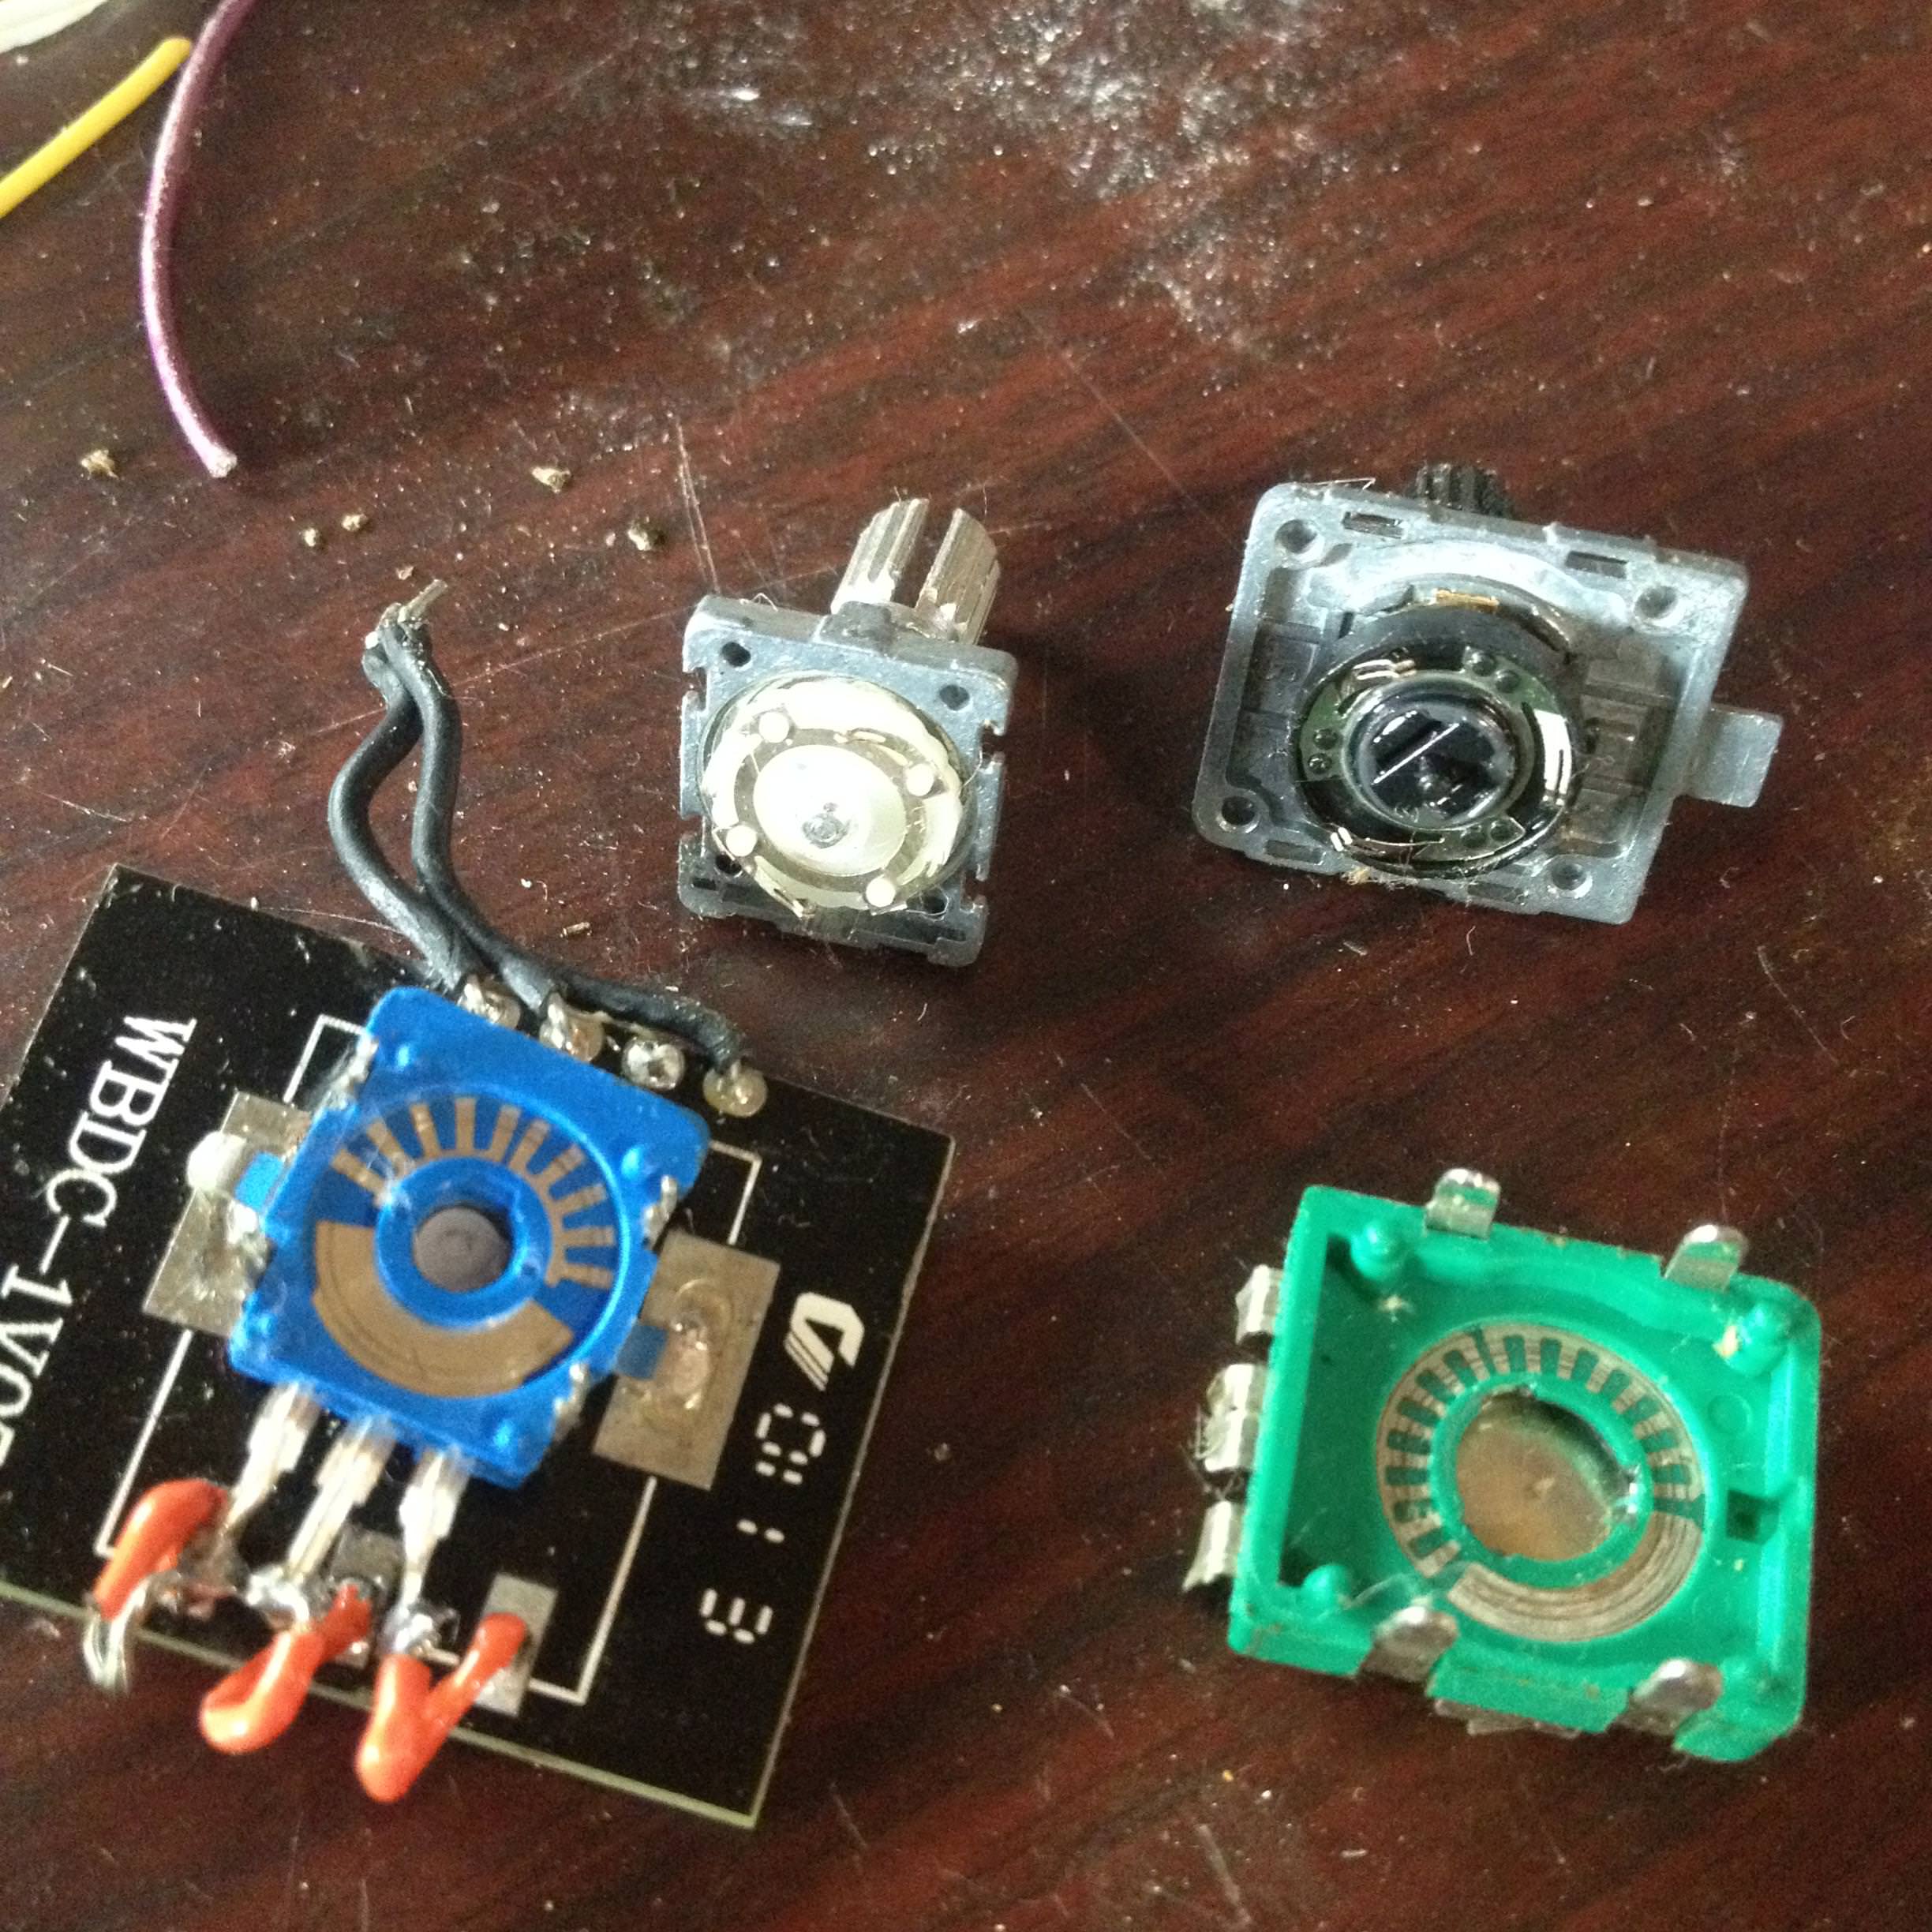
This is the volume encoder from my Emotiva DC-1. It's a hot item for me because if I need to fix the DC-1 so I can sell it and meet some other studio needs. Better DACs have come out since this was releasaed and I already have a few of them.
On the right (GREEN) you will see the original part from Emotiva. Inside it has 3 wipers, and a different number of "notches" on the tracks.
One the left (BLUE) is my replacement part from eBay that doesn't work the same. It's got four wipers (hard to see in my photo) and a smaller number of "notches" in the tracks.
They "turn" in roughly the same amount of turns but I haven't counted how many total.
The push button funcion does work on the bad replacement part. However the turning does not do anything. If I crank it really hard and fast I can get small changes in volume on the DC-1.
The Green encoder has a plastic shaft that has worn down and become loose over time, resulting in intermittent function, which is why I'm trying to replace it, and ideally replace it with a metal shaft part since I assume that will be more durable over time.
My question is how can I go shopping for a proper replacement for the green encoder on the right? Clearly I'm not looking at the right specifications or data sheet details. I need to find out what I need to know so I can order the right part next time without another mixup. The blue ones will just go in a spare parts bag or something. I understand potentiometers fine but encoders are new to me.
I'm not too worried about the footprint as I am able to do offboard wiring inside the DC-1 rather than use that horrid/junky black PCB you see I've butchered here. I wouldn't be able to use it without a real desoldering tool which I don't have right now. That lead bearing solder is really staying in those through holes.
Thanks so much for the help, here is the image: (sorry it is so large)
Here is a link to open the image in a new tab or download: https://i.imgur.com/XobsVsf.jpg


