Neumann TLM193 circuit help?

GroupDIY Audio Forum

Help Support GroupDIY Audio Forum:

This site may earn a commission from merchant affiliate links, including eBay, Amazon, and others.

Moby

www.mobytransformers.com BV.8, Bv.11, Bv.12, T14/1
GDIY Supporter
Joined
Jun 3, 2004
Messages
2,129
Location
Serbia
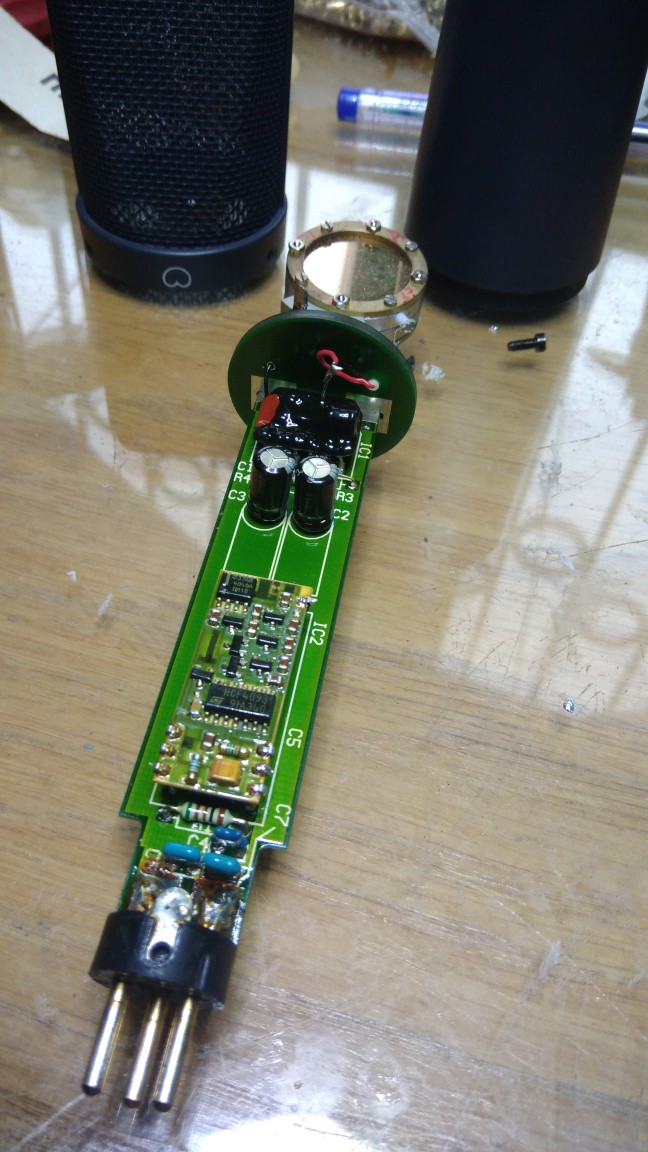
Hey guys, I have this guy on my bench. No sound at all. Looks like missing capsule polarisation voltage, but I'm not  sure because I have no schematics. I wonder does aomeone has schemo or experience with this little *******?
P_20170702_174244-648x1152.jpg

 
I have not worked on one,however looking at the picture I would

1) check pins 2 and 3 voltages using pin 1 as ground when plugged in and phantom is turned on, If the microphone uses 3mA (6.8k x 1.5mA = 10.2VDC , 48VDC -10VDC = about 38VDC at pins 2 and 3 )Then check voltages at C2, C3 and R4, R3(guessing they are the output resistors to pins 2 and 3).

2) the board with the CMOS 4093 looks to be the DC to DC board.  Check for voltages If you can get a probe through the conformal coating or test the pins going to the large board. I would check for something like 15VDC at pin 14 at the CMOS 4093.

More pictures would help
 
Hey Gus, thx for tips. Yes, I checked phantom, it looks.Ok inside the mic. Also, it seems that audio impedance converter works ok, but I dont measure any polarization voltage.  If nobody has this. circuit I will try to reverse draw it but wierdest thing is that backplate is terminated to GND with 510ohm. Maybe I didnt trace it correctly but it looks like that, and I dont measure any voltage there... still confused.
 
Moby said:
....but I dont measure any polarization voltage....
Most likely you have problem with DC-DC converter. Try to measure output voltage at the converter's output directly,  you can't measure polarization voltages at capsule because this voltage bias is set via very high-ohmic resistors.
Some clues how the schematic looks  like you can find here:
http://www.neumann.com/forums/view.php?bn=neumann_mictec&key=1359951125&v=f
 
Hey Moamps, thx for the link. Yes, it looks great to see topology  even like this. Btw, I.have hiZ tube voltmeter for measuring polarisation voltages at backplate but im totally confused with this one.  I have both voltages (-48 and 9.7v )from mh660 but i still cant figure  out how they polarized the capsule?? I see its terminated to GND via 49.9ohm!  In my version.of the  mic it's 510ohm , but anyways....
 
Guys, I extracted the schemo so u can see it withouth opening the pdf. I really dont understand how the one did capsule polarisation. Must be that I miss something. Do you see what i miss?
 

Attachments

  • TLM193sch.jpg
    TLM193sch.jpg
    682.9 KB
I would look for -50VDC on pin 6 and 7 of IC1
I would guess one of the  backplates is at -50VDC and the other backplate is grounded with 1gig it is a multpattern capsule used as a cardiod
The outside is grounded
check for the -50VDC and +10VDC at IC2
 
Gus said:
I would look for -50VDC on pin 6 and 7 of IC1
I would guess one of the  backplates is at -50VDC and the other backplate is grounded with 1gig it is a multpattern capsule used as a cardiod
The outside is grounded
check for the -50VDC and +10VDC at IC2
Thx. I think that I checked already but hey, double check cant do harm. Btw, I still dont understand (from the circuit) how they connected -50v to the backplate :(
 
Moby said:
...., I still dont understand (from the circuit) how they connected -50v to the backplate ....
Imagine a resistor inside hybrid IC1 MH101 connected from pin 6 to pin 7.  There are now two possibilities: Capsule is shorted or MH101 is dead. You can check MH101 by injecting a signal via 50pF capacitor to pin 7 and observing the output (when capsule is disconnected).
 
moamps said:
Imagine a resistor inside hybrid IC1 MH101 connected from pin 6 to pin 7.  There are now two possibilities: Capsule is shorted or MH101 is dead. You can check MH101 by injecting a signal via 50pF capacitor to pin 7 and observing the output (when capsule is disconnected).
Aha, u want to say that polarisation is achieved form the  membrane side, right?
 
Hey guys, all voltages seems to.be ok from MH660 , capsule is ok, so  it looks like MH102 is faulty. The only source i.found is this.http://spares.sennheiser.co.uk/neumann/tlm193/neumann-tlm193-hybrid-mh102-060274.html
Do you have some  better ideas?
 
In the meantime owner of the mic decided not to buy replacement mh102 because of the price. He gave me the approval to hack the module. Now, there is the issue with black conformal coating. Does anybody here has experience with this ?
 
I suppose it will be an epoxy resin that is very hard to remove without destroying what's 'inside'.
On the internet I saw people dismatling integrated circuits, to have a closer look at the chip itself.
But as far as I remember, they used pretty dangerous chemicals.  (High concentrated nitric acid etc.)

https://www.youtube.com/watch?v=mT1FStxAVz4
 
gyraf said:
Epoxy is removed with a heat gun and a sharp knife....

Jakob E.
yep, thx. Same approach recomended me my local colleague. Right now I'm on vacation and surgery will start at the end of this month ;) of course I will share the results here
 
Hey guys. It took me some time to remove this nasty coating, but here it is. Some of the parts just felt with the coating but topology is visible. To be honest, It looks unknown to me, except I see that Jfet (PF5101) is bootstrapped and that has some feedback for probably distortion cancellation. Right now, I'm really short with the spare time so  I will be not able to examine any deeper.  Red mark on the PCB is probably diode, but it was already dead so I was not able to measure polarity :(
 

Attachments

  • TLM193RONT.jpg
    TLM193RONT.jpg
    966.7 KB
Hey guys. I tried to trace the circuit but some details still confuse me. Anyways, I give a try with TLM103 front end(Thx to Dale). And yes, it works great. This marriage sounds really good, and the best thing is that  one day if someone decide to bring it back to original, its 15min of job ;) here is the pic. Cheers
 

Attachments

  • P_20170823_211002_HDR-648x1152.jpg
    P_20170823_211002_HDR-648x1152.jpg
    189.4 KB

Latest posts

Back
Top