Ribbon Mic Dissection Pictures

GroupDIY Audio Forum

Help Support GroupDIY Audio Forum:

This site may earn a commission from merchant affiliate links, including eBay, Amazon, and others.
Can i open this one ?

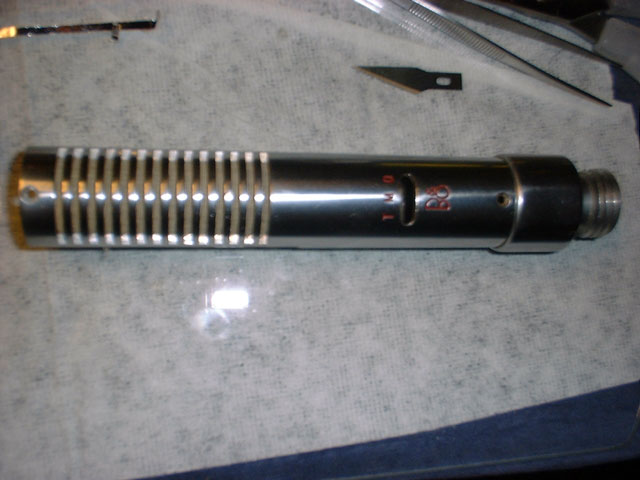
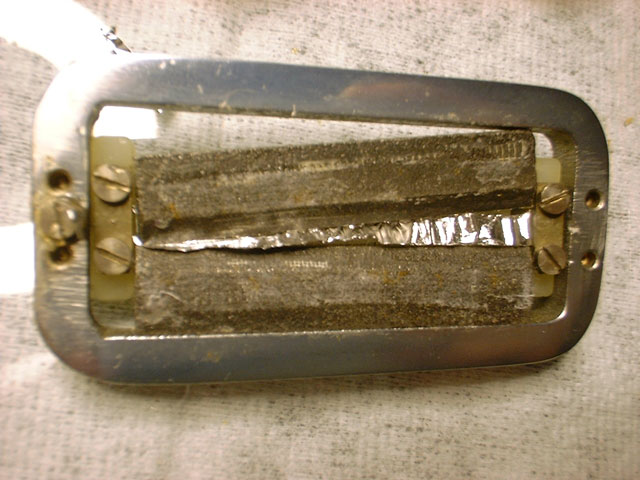
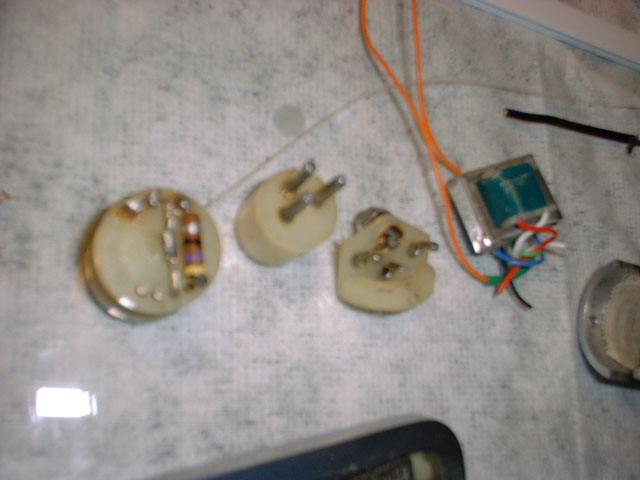
I'm a newbee here , and so happy to find other ribbon mics freaks on this planet ! I'm "hélas" living in France ... and ... ummm ... i love those melodiums 42b !! I've four of them in a great shape and i'm using them ... daily on almost everything ! I'll post pics of the guts when i find my cam ...
melodium42b.jpg
 
[quote author="gar-p"]Can i open this one ?
http://colourbox.free.fr/melodium 42b.jpg [/quote]

Yep, It should look a little like this: :wink:

melodium42b6pm.jpg


melodium42bsecond7dm.jpg
 
Hey ! not bad at all ! Seriously Rodabod, is there a ribbon mic you don't have ? :wink:
i've been told that the grille (form of cross) in front of the ribbon acts like resonator to increase HF response ... is it true ? I've 3 different versions of this mike ... the earlier doesn't have the grille ... and some have a huge square transformer ... did you test it ? what do you think of it ?
 
I actually don't own this ribbon mic - the pictures were stolen from the internet!

i've been told that the grille (form of cross) in front of the ribbon acts like resonator to increase HF response ... is it true ?

That sounds right - read the BBC monograph on ribbon microphones which is in the "drawing board" or just search for BBC monograph.

This explains the design of the STC 4038 which uses baffles and resonators in order to provide its smooth and extended response. The Melodium looks like a very nice design! I've heard people compre them to RCAs in quality and I can see why (although I've never heard one).

I've got quite a collection of ribbons - I should post some more pictures soon.
 
Sh*t ! I hoped someone else here knew something about these babies ...
i've several ribbon mics in my studio and the 42b is one of the best i've ever heard ! But i'll stay alone to claim it ! :cry: I have :
bm5 b&o
4038 coles
44 rca
beyer 160/500
ev1
reslo
french "industrielle des telephones" 143a
i'm planning a RCA77 and some chinese ones, i'm producer/ingeneer just in love with the fab sound of ribbon mics ! Finally , in this thread i don't feel alone ! If you want particular close up of the guts , i can do it !
here is another "tubular" very early model naked:
melodium42b2.jpeg
 
[quote author="gar-p"]Sh*t ! I hoped someone else here knew something about these babies ...[/quote]

Cool! Thanks to Zebra50 who started the thread. I love ribbon mics. There are plenty of people here who know a lot about ribbon mics.

bm5 b&o
4038 coles
beyer 160
reslo

I have these too. I also have;

Various Reslos
Lustraphones
Tannoys
Film Industries Mics
Cadenzas
Beyer M260s
STC 4113
Grundig GBM
Coles Commentator's mic.......

My favourite is the Beyer M160, but I have never had a 4038...

If you want particular close up of the guts , i can do it !

Cool! This helps us learn a lot about ribbon microphones!

here is another "tubular" very early model naked:
melodium42b2.jpg

I have this photo too! Did you take it?
 
no no ! This one went (too high !) on the Bay ... i'm just too lazy to run after my digicam ... will post new ones when i got it !
 
In tonights episode of "Ribbon Mic Dissection", we present a Beyer M160 (came in for repair, so this ones for you Rodabod! =)), which answers the age old question "I wonder what this microphone will sound like on snare drum?" :green:

This is a dual ribbon microphone, with a hypercardiod pattern

First off, a size comparison, as this mic is tiny
M160full.jpg


Here's a view of the top, this kinda plasticy thing is taped over the ribbon, and has a mesh attatched to it:
M160top.jpg


Once you remove the tape, this comes off, exposing the ribbons (note, these ones are fully ripped to shreds), an interesting thing is the corrugation is perpendicular to the magnets on the ends, and parallel to the magnet structure in the center, as opposed to perpendicular the full length, like a lot of other ribbon mics
M160rib.jpg


So there are two ribbons, one on top of the other in this beastie, here's a side view of the clamping system, essentially 4 screws on each side, so each ribbon is clamped separately, with a brass piece between them.
M160clamp.jpg


That's all for now.

I have a different ribbon mic to dissect next, but I'll get this one back on it's feet first, which will include fabricating new ribbons, tensioning said ribbons, and reworking the top grill (someone dropped it and put a nice crater in it).

Regards

ju
 
Good stuff, Fum!

[quote author="fum"]
Here's a view of the top, this kinda plasticy thing is taped over the ribbon, and has a mesh attatched to it...[/quote]

This is the treble-resonator which extends the high-end and keeps it sounding bright.

an interesting thing is the corrugation is perpendicular to the magnets on the ends, and parallel to the magnet structure in the center, as opposed to perpendicular the full length, like a lot of other ribbon mics

Yes, this is a piston type ribbon. It is to reduce resonance in the ribbon since it is so short. The parallel ridges along the ribbon are there to stiffen it; they do not stretch. There are two standard corrugations at each end of the ribbons though.

I have a different ribbon mic to dissect next, but I'll get this one back on it's feet first, which will include fabricating new ribbons, tensioning said ribbons, and reworking the top grill (someone dropped it and put a nice crater in it).

Make sure you have a lot of patience whe you come to re-ribbon it. The Beyers are an absolute fu**er to fit!

Do you know roughly what the distance is between the two ribbons? You may have to make two very identical ribbons by corrugating them together.

Let us know how you get on!

Roddy
 
[quote author="rodabodadingdong"]Do you know roughly what the distance is between the two ribbons? You may have to make two very identical ribbons by corrugating them together. [/quote]

Less than 1mm, so yes, I'm thinking the ribbons will have to be identical.

I don't think you get into doing this kind of thing without a bucket of patience handy.

Regards

ju
 
In tonights episode, we have up for dis-assembly, one B&O BM4. This microphone came in not working, and pretty much completely disassembled (although it was all in the body). None of the switches in place.

So, here's what we have.

First off, a body shot, this has got to be one of the most beautifully machined microphones I've ever seen. Heavy as hell, like a terminator:

body.jpg


So the first problem, once I got the motor removed, became subtley apparent. See if you can spot the problem :grin: :

motor.jpg


I'm surprised that the user was noticing that the high end seemed a little rolled off :green:

Once I got the motor out, I turned the microphone upside-down, and out came this:

guts.jpg


All in all, will take a some work to get back up and running.

First up, epoxy the magnet back to the motor. Then rewire the circuit, and reinstall all that back into the body (no small feat, that body is not going to be easy to work inside).

Once that's all done, a new ribbon to be fab'd and tensioned.

I'll be sure to post a follow up once she's beautifull again =)

Regards

ju
 
[quote author="fum"]

motor.jpg


I'm surprised that the user was noticing that the high end seemed a little rolled off :green:
[/quote]

Thanks!

A lot of us hear have been waiting for someone to post internal pics of the B&O ribbons.

I have a BM5, but I'm too scared to open it up.

Out of interest, is there a plastic ribbon assembly which is seperate from the magnet assembly a la Reslo? I can't see what is behind the mesh. This makes makes it quick and easy to replace.

Some of these older designs were designed for easy repair whereas some others are a pain!
 
This one was re-ribboned, so it may not be all original. This had a gauze glued over the ribbon itself, and then there is more gauze on the inside of the body, so no plastic assembly in the motor (other than the clamps).

Regards

ju
 
hah rbod fum interesting as usuall .. sorry i've been away ..

lots of new updates to this thread .. my favorite one ! :grin:

Rbod plz post the repaired B&O and more frame naked pics.

thanks
ts

ps i'll have another sound clip for you to host .. verry soon .. :grin:
PM me .. i get that .. easier .. :)
 
For a long time there were no new mics in this thread. Here is a Grundig mic I just re-ribboned:

GrundigReribbon.JPG


and internal structure of Oktava ML52 ready for re-ribboning:

OktavaMotor.JPG
 
[quote author="Marik"]For a long time there were no new mics in this thread. Here is a Grundig mic I just re-ribboned:

GrundigReribbon.JPG
[/quote]

Ahhh! Excellent, Marik! I have re-ribboned these too. The tension adjuster is very handy - you can re-ribbon loosely and finely adjust tension later. I like this design.

and internal structure of Oktava ML52 ready for re-ribboning:

OktavaMotor.JPG

I just bought a faulty EH ribbon mic for £20 which is the same as an Oktava mic. I wonder if it is the same as this one. I still think it looks a bit crude, but I have not heard one yet...

I will post some more ribbons soon. I have lots and lots and lots!!
 
CrowleyTripp Naked Eye ribbon exposed!

Well, nearly, I'm not going to take the grill off.

I have had an association from afar with these guys from early on.

Recently I bought one of their "Naked Eye" ribbons. Robert Crowley has patents on all manner of magic boxes not the least of which are of a medical nature (ultrasound etc..) Much scientific application and not a lot of guess work has culminated in this new range of ribbon mics from CrowleyTripp. I know that sounds like a "sell" on my part but I have, as I say seen these guys through this from pretty much the early stages. We are in different countries so while I had an idea of what they were up to I hadn't had the opportunity to see or try one of their mics until now.

Long story cut short, in with my order was the gift of one of their early prototype models unassembled, (cos Bob is a nice guy and knew I would want to "look under the hood").
So here we have a CrowleyTripp "Naked Eye" prototype unassembled on the left with an assembly line model on the right. I am proud to add I have the serial number "LK1" added to the prototype.

I did seek approval to post this, these mics are hard to pull apart so this is a rare opportunity to look inside. For the record I gladly paid full price for the mic I ordered, the included prototype was a genuine suprise, and I will admit I had been dying to see what was going on inside one of these.

I have yet to do some serious tests but upon first plugging it in I was immediatly taken by a good strong level (hadn't changed input setting from a Neumann TLM103 except to turn off the phantom power), and obviously plenty of tops. I look foward to giving these mics a run, clearly at the top end of available ribbons without a doubt.

NakedEye_CrowleyTripp_LK1.jpg

NakedEye_CrowleyTripp_LK1_close.jpg


Larry
 
[quote author="SilverhammerNZ"]
NakedEye_CrowleyTripp_LK1_close.jpg

[/quote]

Excellent! I've wanted to see one of their mics for ages....

So, is most of the metal we see there Neodimium? I assume the little bars are an MRC?

Great stuff.
 
Yes it looks Neodimium, while I have known about the mics for a while I haven't been privy to any design theory. How they get the mic to run so hot is something I would like to know, the bars have something to do with it, I know that much.

Larry
 
[quote author="rodabod"]
The tension adjuster is very handy - you can re-ribbon loosely and finely adjust tension later. I like this design.
[/quote]

I usually set the tensioner in the middle range, and then re-ribbon it where it "feels right", fine tuning later with option of going both ways. This way there is less chance of the ribbon getting off center, should any play in the adjuster occur.

I just bought a faulty EH ribbon mic for £20 which is the same as an Oktava mic. I wonder if it is the same as this one.

Good price! They should be the same.
If you look carefully you will see that ribbon holding plates and pole pieces are not perfectly aligned, which can create problems when you re-ribbon it with tight clearance. On the top and bottom there are screws going into the pole pieces, with which you could somewhat improve the alignement. You might need to re-drill holes for mounting screws on the outer plates. After that make sure you did not short pole pieces to the plates. There is nothing worse than to install the ribbons and perfectly match them, just to realize you have to take the damn thing apart to fix that. :twisted:
I did it... once :evil: It was enough to remember every time.

[quote author="SilverhammerNZ"]CrowleyTripp Naked Eye ribbon exposed!
[/quote]

Hey Larry,

Long time no hear :wink:
Thanks for the CT. I wanted to see those naked for a long time. Any chance to see the other side?
Report when you test it.
 

Latest posts

Back
Top