Building capsules

GroupDIY Audio Forum

Help Support GroupDIY Audio Forum:

This site may earn a commission from merchant affiliate links, including eBay, Amazon, and others.
You are my idol but You make me jealous. I have a broken AKG 414, I opened it, gave it look, I spend some time watching it and finally I closed it! :thumb: Great job
 
I have been taking this project one step at a time (over a year now). I have also made a lot of bad parts.

Regarding your 414. There is a lot of good troubleshooting info here and people who are willing to help with repairs. Post your symptoms and see if anyone has had the problem before. For example, there was recently a thread about DC/DC converter issues with the 414.
 
[quote author="burdij"]I use a Harbor Freight 9x20 cheapie lathe, a Harbor Freight mini-mill that I have recently converted to CNC and a 20 year old Ryobi drill press. The big investment has been in tooling. I was machining the acrylic for the capsule bodies on the lathe but since I have made the acrylic rings for the jig on the mill, I think I am going to try running some capsule bodies on that. Then I don't have to do everything manually. Here is a picture of the mill, post conversion. It looks really clean here. Of course, it doesn't look like that anymore:

mini_mill_after_conv.jpg
[/quote]

Thanks,

I do not know much about metalwork and I find it hard to choose the right tools for making capsules. What is the best machine to buy for DIY capsules and mic bodyparts? Should I buy a mill or a lathe? Can anyone point me in the direction of the perfect machine? :wink:

Richard
 
theres a thread about this subject (cnc milling/lathe machines). just do a search.


i've also got a mini mill and lathe which is bascially a sherline version for sale. PM me if your interested for more info. :grin:
 
For capsules you need a mill and a lathe both. CNC on the mill is very useful, or at minimum, X-Y-Z readouts and a lot of patience. I can't imagine doing capsules by counting turns on a handwheel... For mic body parts, most of the work is usually lathe-work. A mill is nice but you can design things to be put together with just a lathe.

-Dale
 
I´m impressed! Links to some articles that might be of interest to some. /Toby


http://www.conditionedresponse.com/DIY/microphones/index.html

http://www.10000cows.com/SomeMicPhotos.htm


/Toby
 
I agree with Dale. Because of the tolerances involved (>= .001in.) you need both a lathe and a mill. Drilling the capsule backplate holes using very brittle carbide drills isn't something you can do on an average drill press.
 
[quote author="burdij"]I agree with Dale. Because of the tolerances involved (>= .001in.) you need both a lathe and a mill. Drilling the capsule backplate holes using very brittle carbide drills isn't something you can do on an average drill press.[/quote]

I think there's only one way that's faster at breaking carbide drill bits than trying to use them in a normal drill press. That's smashing them with a hammer. Those carbide bits don't even really like to be used in a Jacob's chuck in a good mill - you have to use a collet. In a Jacob's chuck on my mill, I don't think I'd ge through a capsule on one drill bit. I tried it once. Using the collet and a Sherline mill, I can do over 100 capsules without bit breakage, and I'm feeding pretty fast, I think - 260 mm/minute.

-Dale
 
I just would like to add that I don't use a lathe or a mill for any of my capsules. The only power tool I use is a very cheap drill press. Most of my work is done by hand.

I wouldn't recommend my method of building as a guidline but it shouldn't discourage anyone who doesn't own a lathe or mill from trying to build a capsule.

Patience, working methodically and keeping things clean are much more important.
 
The second capsule has been finished. This one uses the same backplate and hole pattern but incorporates a phase or delay plate and a very narrow chamber behind the backplate.

Here are a couple of pictures showing the diaphragm installation. The diaphragm was pre-tensioned to 1KHz.:

diaphragm_install_1.jpg


diaphragm_install_2.jpg


This image shows the capsule from the edge. The brass plate on the rear is held away from the body by a spacer.

35mm_new_front.jpg


This image shows the rear of the capsule. There are now 16 holes in the phase plate. With 16 holes it produces approximately the same output level as the capsule in the TLM103.

35mm_phase_plate.jpg
 
It's hard to tell with this program material over my computer speakers( maybe a voice and bass would be easier) but it sounds like you might be able to open up your phase network just a little more ( an extra offset hole or 2).

There will be obvious differences in sound between these 2 capsules no matter what tweeking you might do just because of the difference in their construction.

This sample is quite an improvement from your description of a "telephone" sounding mic. Though it's impossible for us to judge the self noise of the capsule.
 
I agree with Dale - a recording of some voice would be good.

Keep up the good work. I am impressed!
 
Here is a second capsule, a KK-47 clone, double-sided. The first picture shows the parts:

kk47_parts.jpg


This is the assembled capsule:

kk47_assembled.jpg


I am working on some better samples of the previous capsule. The source material I used turned out to be very "dense" and mangling it with MP3 conversion didn't help either.
 
Just in case some of you need this kind of stuff, I saved a very old post about DIY capsules from the old location of this forum and placed it here:
http://slash14.free.fr/capsule_online.zip
You can also try
http://slash14.free.fr/capsule_offline.zip
Archive is bigger because pictures are embedded within the archive, in case actual online pictures disappear some day ...
Some of you will probably find some of their own posts ;) If you feel that some information should not be put online (such as your nickname or email) let me know ASAP, I'll correct the file.
I hope you'll find interesting things inside.
 
After doing some testing of the k-47 capsule in a chinese mike body, one that had a nice 34mm capsule but horrible mid-high brittleness, even using the new capsule (this mike uses an FET feeding emitter follower outs), I came to the conclusion that I needed a better testing platform. So, after a couple of weeks of work, I have built a clone 47 body. It is shown here with the k-47 clone capsule:

47_internal_front.jpg


47_internal_back.jpg


The capsule sounds much better than with the FET circuit, not as boomy as the TLM103 but with TLM-like clear mids and highs. Still some mid-band hollowness but I think that is partially due to my monitor chain. The circuit is a straight copy of the U47 with an EF86 with suppressor, screen and plate connected in a triode config and filament supplied from a filament supply rather than B+. That cathode is supplied from a resistor in the filament circuit as in the U47. The transformer is a Cinemag CM2461NiCo, a sweet sounding tranny.
 
As you probably know, I've been building M7 clones. When my sound isn't quite right, it's usually a clearance issue between the diaphragm and the backplate. I use a capacitance meter to measure my clearance - with the diaphragm the size it is I would expect around 75 pF or so.

You might also try lighter tensioning - I tension my diaphragms using a weight system, but I recall checking the free-air resonance on a few diaphragms and they were in the 800 Hz region from what I recall. On that capsule design, the tension isn't as critical as on other mics (K67, CK12).

I machine the diaphragm 'spacer' right into the backplate, on all of my mics now, that's the way the M7 was done - it had to be since the diaphragm is glued right onto the backplate. Neumann has switched to this system on their new K47's. I now have a CNC setup on my lathe that makes it easy to get the right clearance. What I used to do was slightly over-cut (I'd do a 40 to 45 micron cut) then lap the edge on 2500-grit abrasive paper on a piece of glass 'till I got the right capacitance on a dummy diaphragm.

That's an awesome job!!! Looks a lot like what I went through a couple years back.

I built a mic using a 6AH6 in exactly the same configuration that you described. It's my main vocal mic now. Sometimes the 6AH6's go a bit noisy though. I usually buy a bunch of tubes and pick the quiet one. EF86 would probably be a better choice.

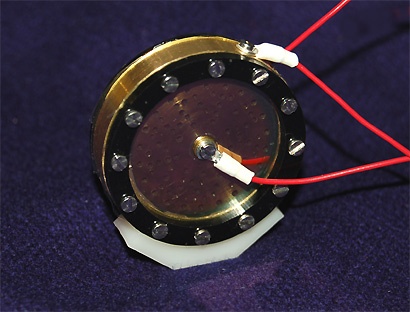
One thing to watch is that centre screw... is it stainless steel? If so, they don't travel very well when screwed into plastic - especially nylon-based plastics like Delrin. I switched to brass screws and polycarbonate, and the capsules hold together better. The stainless screws don't grab into plastic as well so they'll come undone in shipping.

If you feel like building a lot of them, there's far more demand than I expected for M7/K47 capsules.... but I still find it more fun playing with different hole patterns and trying different things. Sometimes the change you make is good, sometimes it sounds like, well, not good.

I can't say enough encouragement! You've come a long way in a very short time. Awesome!

-Dale
 
Like Dale, for this type of capsule I'd recommend 800hz as a tuning frequency. You might also consider using a smaller solder tab without the plastic cover to connect your center electrode. Anything close to the membrane can cause bumps in the frequency response.
 
Dale, thanks for you comments. I tried two different spacings on this capsule. One, at two mils (~51 microns), had a capacitance of 65pf and really was lacking in bass response as well as -6 to -10 db less sensitive than the TLM. The second, and better one, was at one mil (~25 microns) with 77pf capacitance and has very much better bass response. It is about equal in sensitivity with the TLM. An M7 lollipop capsule I have measures 110pf but of course there is more area covered by gold in that design.

I tensioned the diaphragm on the jig shown somewhere above at 950Hz and then glued the diaphragm ring to it using an aerospace epoxy (since not much else sticks to delrin, apparently). This produced a dramatically better high frequency performance than simply clamping the diaphragm to the capsule with the ring. I am thinking this may be a clue as to how to improve the performance of some of the non-glued import capsules.

Having to wait for the glue to set also slows the assembly process down quite a bit as it takes 24-36 hrs. to cure at room temperature. I am going to experiment with baking the epoxy but I have to determine what effect this is going to have on the tension of the diaphragm. It cures in 6 hrs. at 150 deg. F, a temperature that may not effect the diaphragm too much.
 

Latest posts

Back
Top