[BUILD] CAPI 553F~500 Series~LC Equalizer~Official Support Thread

GroupDIY Audio Forum

Help Support GroupDIY Audio Forum:

This site may earn a commission from merchant affiliate links, including eBay, Amazon, and others.
Well I got the DOA and the VPR test rigs finished. Bought some known good DOAs and both of my 553F builds fired right up and tested good all the way through on dry runs and passed signal just dandy with the DOA installed.
Now to build some 528's.
 
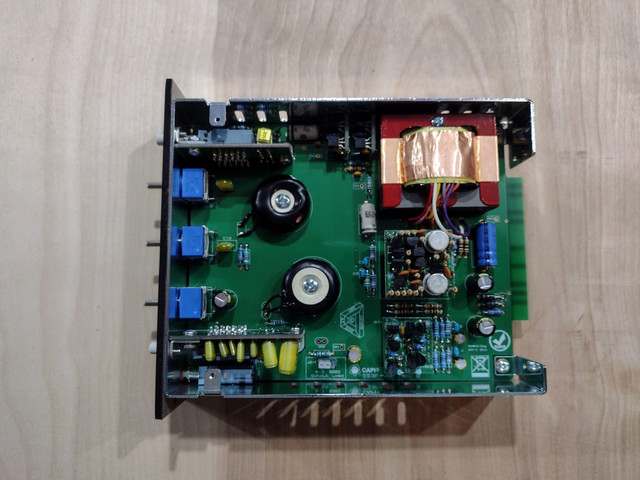
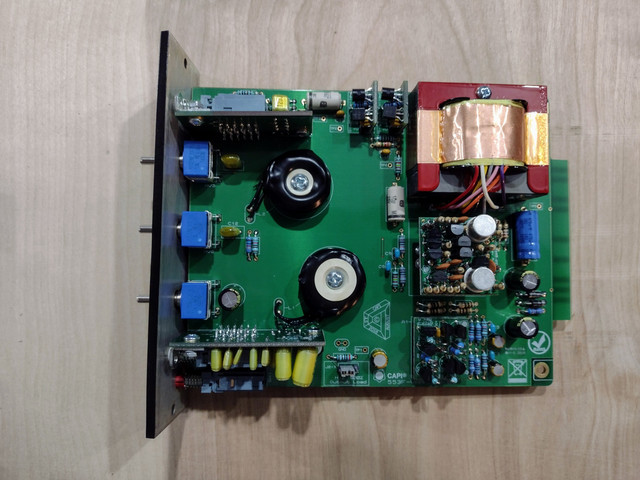
Working on my 553F and it’s been mostly smooth sailing, but I’m a bit confused about installing the inductors, since rev B doesn’t appear to accommodate cable ties. Should I just hot glue them?

The only other thing that confused me a bit were the 100pf caps, which were WIMA brand in my kit, with a wider lead spacing and package size than the PCB seems to expect. I crammed them in there, but they’re definitely not the component specified in the BOM (different brand, plus these are rated for 100V, not 50V).
 
Working on my 553F and it’s been mostly smooth sailing, but I’m a bit confused about installing the inductors, since rev B doesn’t appear to accommodate cable ties. Should I just hot glue them?
didn't your kit come with bolts to secure the inductors?
Mine did, though one of the inductors was too fat, so I made a run to Ace Hardware and picked up same thread size bolt with 1/4" more length to it.

Oh speaking of 553F I think I figured out why my DOA got smoked in my first one.
It seems my API 8 slot lunchbox (the one with DB25 connectors only) has a finicky power connector.
If it isn't plugged in exactly right one of the rails drops. So it's just positive and phantom.
I think it was the positive rail, but can't be sure because I have had the hardest time replicating the behavior.
It seems to be dependent on how much power cable weight is pulling downwards?
Gonna fix that and like, not buy any API racks again.
CAPI DB25 11 slot next.
 
Last edited:
didn't your kit come with bolts to secure the inductors?
Mine did, though one of the inductors was too fat, so I made a run to Ace Hardware and picked up same thread size bolt with 1/4" more length to it..

Aha, I hadn’t looked at the hardware BOM, but I see the inductor hardware listed now. I don’t have the kit in front of me now but I‘m sure it’s there. Good to know that I might need to make a substitution there.
 
Working on my 553F and it’s been mostly smooth sailing, but I’m a bit confused about installing the inductors, since rev B doesn’t appear to accommodate cable ties. Should I just hot glue them?

The only other thing that confused me a bit were the 100pf caps, which were WIMA brand in my kit, with a wider lead spacing and package size than the PCB seems to expect. I crammed them in there, but they’re definitely not the component specified in the BOM (different brand, plus these are rated for 100V, not 50V).
We had a handful of kits sneak out with 150pF red box WIMA caps instead of the smaller blue Murata's. Send me an email thru the store and I'll mail you the proper caps.
 
Aha, I hadn’t looked at the hardware BOM, but I see the inductor hardware listed now. I don’t have the kit in front of me now but I‘m sure it’s there. Good to know that I might need to make a substitution there.
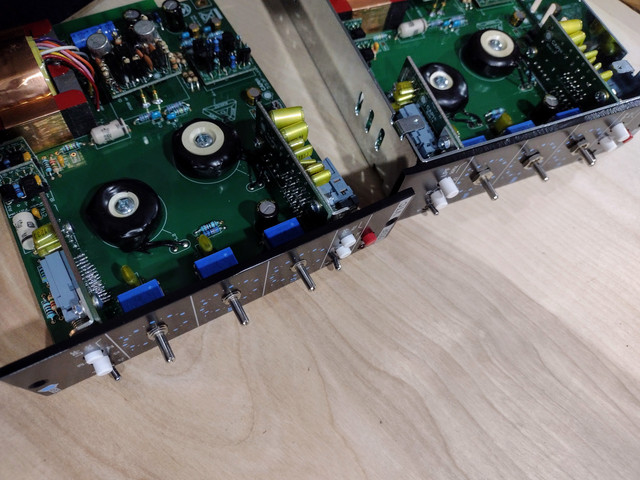
I don't know if the substitution of a longer bolt is always required. My difficult inductor toroid just had a slightly bulgier bit of the covering which lined up with the leads to make it fatter top to bottom. The included bolt would have worked if I had inverted the lock nut, but the lock washer would just be hanging in the air.
Didn't want a not small component coming loose and banging around inside so I went the safe route.
Have to say, my new favorite thing with these is pushing that midrange band on bass guitar or synth.
Built two and somehow they always wind up on my Oberheim on the way in or the way out.
 
We had a handful of kits sneak out with 150pF red box WIMA caps instead of the smaller blue Murata's. Send me an email thru the store and I'll mail you the proper caps.

Thanks Jeff, think I'm OK though. The caps are in and I'm on to the final stages of the build. If I feel less than confident about how things are looking or testing, I may take you up on that.

And yes, I meant 150pf, not 100.
 
Well, I ran into a hiccup when taking my measurements. Between the A1 O socket and C I get an initial reading of 10K, slowly rising to about 40K. All other readings are as expected. How should I proceed?
 
Well, I ran into a hiccup when taking my measurements. Between the A1 O socket and C I get an initial reading of 10K, slowly rising to about 40K. All other readings are as expected. How should I proceed?
This is fine. I don't think we specify readings for the opamp sockets on this build. You are basically making sure there is no direct short.
 
Awesome, I thought maybe the assembly aid might not be to the letter on that part since that section differs in the rev B. Now to apply some juice.

Edit: everything seems good to me. I didn't take the test readings because I don't have an extension jig and therefore that's a bit difficult, but all the functions work as expected and sound very good. It's great to finally have a CAPI piece in my rack. And I have two open slots, so hopefully this won't be the last one to go in there.

Edit 2: by the way, kudos for providing the steel enclosure. Most of my 500 series modules were built from kits, and none of them have this; consequently, it's a pain to seat them into the rack properly. This one fits into place with a satisfying ker-chunk.
 
Last edited:
Jeff,

I finished my 553F finally today. Ran it though my test setup and I am getting ready to install it in my 511-VPR rack. I know that the J2-1 jumpers are not needed, but I installed the header since it was included and taped the jumper to inside bottom of the case. Based on what you have marked on the PCB it can be used to send a hi-z output or a 600 Ohm output impedance signal, but what were you thinking that would be used for? I am also thinking that the EQ without a jumper, outputs at whatever impedance the signal went in at. Is that correct?
Just curious.

Oh, and I did get the ceramic caps you sent me in the mail last week.

Thank you!
Charles
All their old EQ's were setup to drive a 600 ohm load since the EQ slot drove the console fader. Any old EQ will have around 1.25dB of gain if driving a high impedance load. I would just set it to 600 ohms and move on.
 
All their old EQ's were setup to drive a 600 ohm load since the EQ slot drove the console fader. Any old EQ will have around 1.25dB of gain if driving a high impedance load. I would just set it to 600 ohms and move on.
Okay, will do, 600 ohms.
 
Hello,

I have some 553Fs I'm building and I'm having a mechanical issue. For the first unit I built, I put the switches in towards the end of the build, and they aligned perfectly.

For the second unit, I put in the switches earlier in the process so they wouldn't interfere with the Inductors, but these switches don't align. When pressed in they stick and don't pop out.

I have to press down in one direction or another to get the switches to pop out after being depressed.
Any clues or tips as to aligning the PCBs? When I look at it I don't see any difference.
 
Last edited:
I de-soldered the 90 degree headers and things are better on unit #2, but not what I would call good enough. For my third one I decided to do this step last, so I could place them perfectly without soldering and then solder them in. I have the sub PCBs totally flat against the main PCB, but there is still too much friction from the front panel. Are the sub PCBs supposed to not be parallel with the main PCB?
 
I'd double check to make sure you got the metalwork lined up right. When I did my first 553F everything looked peachy but wasn't quite lining up. I got hot under the collar so I put it down and came back later. Turns out I had something running in front instead of behind or underneath. Sorry I can't remember more than that. Last year during lockdown is still blurry you know?
I do recall the sub-PCBs weren't a problem, but the switches were noticeably tight.
I removed and resoldered switches and sub PCBs with the metal stuff aligned correctly.
It was actually the impetus for me to take the plunge on a Hakko 301. Man I shoulda bought one of those years ago!
Desoldering is actually fun now!
 
I de-soldered the 90 degree headers and things are better on unit #2, but not what I would call good enough. For my third one I decided to do this step last, so I could place them perfectly without soldering and then solder them in. I have the sub PCBs totally flat against the main PCB, but there is still too much friction from the front panel. Are the sub PCBs supposed to not be parallel with the main PCB?
Yes the small filter PCBs should be parallel to the main PCB. I'd have to look at CAD files but they should be .02" or .03" away from the main PCB. The mounting holes for the small Keystone brackets are all oversized to allow the boards to be adjusted. Sometimes the Keystone brackets are not bent perfectly to 90˚. This will skew the boards slightly. Its all mechanical assembly and just needs a little finessing.
 
Lets say you are stripping the wire on a 1H inductor and the wire just pops away from the inductor before you start applying torque. Is there any way to repair this or does it need to be replaced?
 
My first four are done and all worked instantly. Unit #5 is almost perfect but has one small issue. There is something wrong with the HPF board. The 30 Hz works as it should, as does 110 Hz, when both switches are pushed in. When just the 70 Hz button is pushed in, there is a short to ground and all audio cuts out. Any hints as to what would be the issue?
 
Back
Top