Bunch of Big Heatsinks dunno what to do with it.

GroupDIY Audio Forum

Help Support GroupDIY Audio Forum:

This site may earn a commission from merchant affiliate links, including eBay, Amazon, and others.

zayance

Well-known member
GDIY Supporter
White Market Member
Joined
Feb 25, 2009
Messages
2,325
Location
France/Swiss
Hi There,


I have them laying around for sometime now/
It breaks my heart to just dumped them for the aluminium, but they are heavy, and so sending them out dunno if it's also worth it.
What would you guys do?
I maybe will keep one or two, but i have about 5 in random shapes and some by pair.

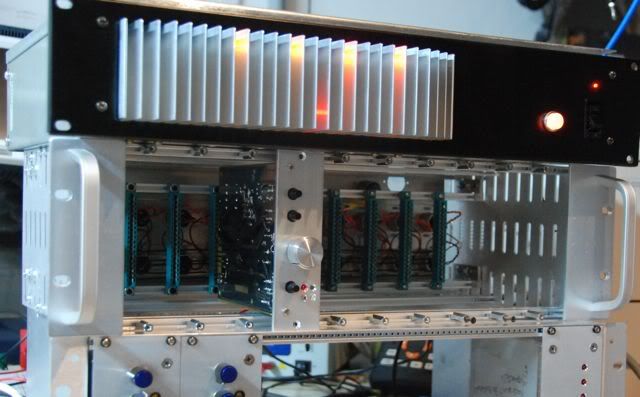
Just some pics for showing these, their dimension is about 200 to 300mm long and 120 to 180mm wide, depending on model.
And they can weight from 1.9 to 3.6Kg

20121219_195435.jpg


20121219_195834.jpg
 
LOL, nice. Looks like something that came off a car audio amplifier.

Put them up on the black market, "make on offer, you pay shipping", someone will see a use for them.
 
It looks like the right orientation and aspect ratio for an amp hanging off the back of a loudspeaker. Generally with an HS like that, we would use a heavy aluminum piece of right angle stock as a heat spreader to get heat from the power devices to the heat sink. For an extrusion that tall perhaps 2 spreaders, one across the bottom, one half way up. You want to drive heat into the bottom of the HS with vertical fins to promote convection. 

Probably more than enough HS for a modern class D amp without a fan... For class A/B passive cooling that looks more like 75-100W or so. 

JR
 
Awesome sink

If you have a bandsaw or a friend with the bandsaw
You can slice and make it to  fit a 19 inch rack unit

I did that with this 2U PSU
Front.jpg


Cutting isn't that bad takes about 20 minutes
It goes very slowly through the fins of course and quickly in between them. Gravity feed saw would be best but I did mine by hand.

A big sink lets you make a PSU with no fan... Minimize fans in the studio.... Etc

You can see that I mounted the LED indicators in the sink which looks cool

Also the sink goes well back into the case allowing air circulation in the case and keeping fingers out.


While this may be TMI, while at Peavey I used literally tons of heat sink like that for the small XR600 and similar top-box powered mixers. Using thousands of pieces per month we semi-automated the cut-off operation (power hacksaw, or horizontal bandsaw IIRC with fixtures for precise length), and then de-burred them in a tumbler (kind of like a concrete mixer with hard media inside to round off sharp edges).

It is generally an effective, reliable heat sink for low hundreds of watts. We did encounter some production issues with flatness of the extrusion. I don't know details but sometimes extrusions like that are extruded kind of rolled up, and then flattened out while still hot when it comes out of the (round) extrusion die. Flatness affects the resistance of the heat transfer from the spreader bar.

Be careful about any sharp edges especially after bolted to something heavy. You can draw blood pretty easily if not de-burred and not careful, or so I heard from dealers and customers.  8)

JR 
 
Rodney... I am honored! 

It is pretty, I did two different versions there are pictures in GDIY51x PSU thread I think.  Both have LED's in the sink but in different positions.
Both use the heat of the sink to drive convective air flow THROUGH the enclosure (by setting the rack back inside the front panel, the opening is HUGE, it is as if the case is open to the air, but little fingers still can't get inside).

Here is #2.
http://groupdiy.com/index.php?topic=36874.msg574335;topicseen#msg574335

Here is #1.
http://groupdiy.com/index.php?topic=36874.msg529756;topicseen#msg529756

(little secret A...in #1 the LED's stay on even if a fuse blows, need to get around to fixing that someday, but I never blow fuses).
(little secret B...look how the caps block the regulator heat sink mount screws.  That is a real problem.  In #1 it took an hour to get them bolted down.  In # 2 I bolted them to an intermediate plate (L bracket).  I think the solution might be mounting the regulators upside down ( or redesign the PSU board to put the regulators BETWEEN the caps, or fall back to what all the other builds did, put the regulators on wires...)

Bruce

PS: Look at the size of the opening to the outside air, between the fins.
IMG_0660.jpg
 
zayance said:
I had the idea of keeping them for whatever DIY loudspeaker or amp of course etc...
That's why i'll keep a pair, but i don't need them all so...

Get yourself a pair of Pier's Piccolo PCBs and build a nice chipamp!
Built one last year. Trust me, you won't regret it  8)

Cheers,
Carsten
 
culteousness1 said:
zayance said:
I had the idea of keeping them for whatever DIY loudspeaker or amp of course etc...
That's why i'll keep a pair, but i don't need them all so...

Get yourself a pair of Pier's Piccolo PCBs and build a nice chipamp!
Built one last year. Trust me, you won't regret it  8)

Cheers,
Carsten

Ok good to know, thanks.
Anyway i'll see wich ones i keep, and will try to do an offer here, but again don't know if it's worth it.
 

Latest posts

Back
Top