GSSL HELP THREAD!!!

GroupDIY Audio Forum

Help Support GroupDIY Audio Forum:

This site may earn a commission from merchant affiliate links, including eBay, Amazon, and others.
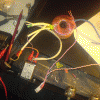
[quote author="karl j"]Also, blew my meter light. Was gonna wire off of the Tranny secondaries. I found what I need to do to drop the voltage to about 10volts (AC) checking with my meter. I connected the meter light via alligator clips (without the resistors) and fried the meter light.

Ooops.

Glad I bought a spare.[/quote]

I've got to stay quiet on that one as I fried a 2520 today ! :green:

Be very very (did I write "very" ? :wink: ) carefull when "opening" the meter for replacing the led. They are so fragile !!! :!:
I broke one by trying to understand how to open it properly...


eD)))
 
[quote author="safe as milk"]
my 7815 keep frying itself with no ic's or vca's in there.[/quote]

As mentioned several times above, don't measure voltages from 78xx/79xx without load - they won't regulate correctly.

Mount IC's (observe orientation - they are mounted differently!!) and measure again...

7815's are tough bastards - very hard to kill.

Jakob E.
 
I took the power for the Behringer LED's from the small +15v "link" on the
board, near the space for the on-board transformer.
I used a 10k r covered in heat shrink and twisted the lead into a small "O"
to attach wire to the VU.
Ground wire was a spare "bottom of case" ground, via lock washer/bolt.
Didn't want a wire going all the way around the case to the "mains IEC" ground point !.
Works fine, 7815/7915 get quite warm but I'm able to hold my finger on them - like a hot cup of coffee :shock:
I only get a slight "hum" with the makeup gain cranked, so I'm pleased with
the sound quality.
I can't see me ever having the makeup THAT high !
I used the 47k to the threshold pot as recommended and followed Matt's
great list for the 2180LB. ( no trimpots/1M's/10k's etc )

MM.
 
Hey Marty, I pulled the power for my super side-chain from that spot (I used the 202c vca so the other 15 volt spot wasn't available). But, I could still wire the meter off of it I guess. The meter itself still works, just the light blew. Before I bother trying to fix it's LED I'll just put my spare meter in.

I tried the threshold both with and without the 47k resistor. Still getting way to much compression. I know the threshold changes with the ratio, but even with the tresh all the way up, when I change ratios the amt of compression increases a bit. The meter (which isn't very calibrated yet) shows in increase of about 5dB of GR as I switch from 1.5:1 to 4:1, and another 5dB when I switch to 10:1.

The side-chain needs to be adjusted too. But, when I switch the filter to "external", the GR goes down a bit and ALMOST behaves normally.

I gotta go walk my dogs right now, but when I get back, I'm gonna get back on the compressor!
 
Karl, you do know that threshold sensitivity is greater when fully counter clockwise ??
Turning it clockwise reduces compression for me right down to virtually nothing.
Sorry if thats a bit "obvious" just that I'm more used to that control working
the other way around on most devices.
Marty.
 
karl,

There are 3 possibilities :

1) Your threshold is too much sensitive.
2) You meter is not calibrated correctely.
3) the (1) and (2) together

Can you hear this "extreme" gain reduction ? Or it's just what your meter shows you ?

eD)))
 
I have a weird ground issue due to the type of case, it's all powder coated so
there's NO proper connection between bottom and back panels !
My VU LED's keep going out as ground from main and Audio is on the back
panel, this one is bolted to the bottom !!
I'll just have to connect the LED ground to the board or the back plate.
Funny thing is, with the GSSL on top of any other rack case, the LED's then
work because the bottom small bolt touches the other case :)

MM>
 
Marty,

You can take off the paint with sand paper.
I usually make that "under the screws".
Sometimes, just the fact to screw/unscrew the screws a few times will do the trick.

All the parts of your chassis must be "connected" together.
Test with your ohm meter (in continuity mode).

eD)))

EDITED : Each part of your chassis must offer a path to the ground.
 
karl,

You have to calibrate your SuperSC.

I'm not at home so I don't have the schematics... Maybe I'm totally wrong.

According to me, the outputs of the SuperSC board are too high.
If I remember correctly, when you are in the external mode, the signal passes just a couple of resistors (the equivalent of the 2x47k of the main board I think) and when you are in a "filter mode", the signal passes an active circuit and the outputs have to be calibrated with variable resistors...

The Supersidechain rules definitely the way your threshold acts.

eD)))
 
Yeah, I figured as much. I started working on it earlier, but then the computer ran out of battery and I had to take the dogs back out. I need to print some of the calibration stuff out so I don't need the computer to do the work.
 
[quote author="vertiges"]Marty,

You can take off the paint with sand paper.
I usually make that "under the screws".
Sometimes, just the fact to screw/unscrew the screws a few times will do the trick.

All the parts of your chassis must be "connected" together.
Test with your ohm meter (in continuity mode).

eD)))

EDITED : Each part of your chassis must offer a path to the ground.[/quote]

Yes, I understand that, just seems "odd" that this case's front/back bottom and
sides all seem to be unconnected !
I'll try the screw thing and make a hard connection between the back and bottom
plate where the main earth is bolted on.
Otherwise this GSSL is working perfectly, ran some mix tracks through it last night
and I'm VERY impressed with the results :)
I'm going to add the sidechain/thrust board when the PCB is available and
possibly Keith's extra VCA, but the case is very shallow so room could be a problem !
MM.
 
Hi

Sorry I but have a noob question about the power supply (this is my first 'real' diy).
I'm in france (please excuse my poor english..) and i have an amveco 62063.
So I connected the black and red wires together. And take the 220V with the yellow and violet.
On the secondary side i have connect red and brown together. And green wire on the spdt switch. But when I test with a multimeter I have nothing (0.0V) enter green and blue wire. what is wrong? No explosion and no 18v I don't understand..

thanks
]
 
[quote author="FreelY"]Hi

Sorry I but have a noob question about the power supply (this is my first 'real' diy).
I'm in france (please excuse my poor english..) and i have an amveco 62063.
So I connected the black and red wires together. And take the 220V with the yellow and violet.
On the secondary side i have connect red and brown together. And green wire on the spdt switch. But when I test with a multimeter I have nothing (0.0V) enter green and blue wire. what is wrong? No explosion and no 18v I don't understand..

thanks
][/quote]
EDIT - Be very careful , this is mains voltage !!!!

OK, on primary side connect red/black together and cover in heat shrink.
Yellow and violet are your Live and neutral from mains. ( these should be fused and sent to the mains switch )
Secondary side, connect red and brown together and that is "0" volts which
goes to the middle connection on the GSSL boards three pin power connection.
`Green and Blue will be the other two 18v AC connections on that power
connection on the board.
What I find disturbing is that these colours are totally reversed from all the
other Toroid transformers that I've used !!
You may need to check this, but the Amveco data sheet says that this is
correct ??

Marty.
 
humm ok the spdt is on 220V/ primary side not secondary.
I thought its maybe better for protect the PCB wen you put ON the compressor .
Otherwise red/black are together and cover in heat shrink.Yellow and violet are on Live and neutral from mains (yellow on fuse). Secondary black and red are on the middle connection board.
So apparently I'm wrong only for the spdt switch, I go check that..

thx Marty

but the Amveco data sheet says that this is
correct ??
yes ameveco said: ..black and red together and apply 220 across yellow and violet. Secondary in series: red and brown together. output across green and blue
 
[quote author="MartyMart"]
Yes, I understand that, just seems "odd" that this case's front/back bottom and
sides all seem to be unconnected ! [/quote]

The paint seems to be non-conductive. But all the part have to offer a path to ground for safety & shielding reasons.

[quote author="MartyMart"]
I'll try the screw thing and make a hard connection between the back and bottom
plate where the main earth is bolted on.
Otherwise this GSSL is working perfectly, ran some mix tracks through it last night
and I'm VERY impressed with the results :)
I'm going to add the sidechain/thrust board when the PCB is available and
possibly Keith's extra VCA, but the case is very shallow so room could be a problem ! [/quote]

Maybe you should make a second one in a 2U rack ? :wink:

eD)))
 
[quote author="FreelY"]humm ok the spdt is on 220V/ primary side not secondary.
I thought its maybe better for protect the PCB wen you put ON the compressor .
Otherwise red/black are together and cover in heat shrink.Yellow and violet are on Live and neutral from mains (yellow on fuse). Secondary black and red are on the middle connection board.
So apparently I'm wrong only for the spdt switch, I go check that..
[/quote]

As Marty Said pay attention, you're playing with dangerous voltages !!

1) Your chassis has to be grounded !
2) Use a fuse !
3) Be sure your switch can handle 220 Volts.
4) Use thermo-schrink-tube ! (gaine thermo-rétrécissante)

eD)))
 
[quote author="FreelY"]humm ok the spdt is on 220V/ primary side not secondary.
I thought its maybe better for protect the PCB wen you put ON the compressor .
Otherwise red/black are together and cover in heat shrink.Yellow and violet are on Live and neutral from mains (yellow on fuse). Secondary black and red are on the middle connection board.
So apparently I'm wrong only for the spdt switch, I go check that..

thx Marty

but the Amveco data sheet says that this is
correct ??
yes ameveco said: ..black and red together and apply 220 across yellow and violet. Secondary in series: red and brown together. output across green and blue[/quote]
make shure you joined the primary red wire with the black one as there are 2 red wires coming in/out!
You may have missed to switch your meter reading from DC to AC voltage when measuring your secondary voltages.
A light bulb (desk lamp, ...) in series with your line in voltage is a handy current limiting fuse for 1st.power up.
 
I plugged the secondaries in series. This is right?
The switch accept 3A@250VAC. But for the moment without switch: same thing no 18V :?
Looks like that:
 

Latest posts

Back
Top