1176 in 51x/500 format, or 51X-F76 Build Support Thread

GroupDIY Audio Forum

Help Support GroupDIY Audio Forum:

This site may earn a commission from merchant affiliate links, including eBay, Amazon, and others.
More on attenuator.

I have been looking for balanced attenuator information.  I don't really have the experience to be sure, but it seems that if one wired either side of the balanced line to ground through a resistor or worse a variable resistor, unless those were perfectly matched it would interfere with the CMRR of the transformer.  A variable pot would never be perfectly matched, and even resistors would not be.

in the attached file you can see the "attenuator option" schematic.  I don't understand it, and I am beginning to believe that it is incomplete, but it does show the attenuator as grounded.

(this would be a good time for someone to show up with a clear schematic of the trafo attenuator option.  If there is anyone in the Levant with such a thing <grin>)

Now here is the original URIE Schematic from Waltzing bear sitehttp://www.waltzingbear.com/Schematics/Urei/Urei_1176LN_series_F_page_1.htm, which shows some attenuator wiring, which is not grounded.  It seems to be implemented with a simple single pot (I dont understand what the RIA pot is), and would not interfere with CMRR as far as I can see, although it would not maintain impedance through the range of attenuation. 

It might be possible to wire a U attenuator, using one of those 600 ohm attenuators, although I don't know what the taper's are and whether they would work to make a U, usually they are wired as a T.  I found a balanced attenuator wiring diagram in the Audio Cyclopedia, I could put up if you want, but I am not sure it is the right thing.

This thread talks about using the T attenuator to make a balanced attenuator, by basically putting the wings of the T in one side (ex. Hot side) and putting the common ground on the other side (cold).  Neither is grounded so the result I think (please correct me if I am wrong) is that the impedance with respect to ground is not effected, and thus CMRR is maintained for the transformer.

http://www.groupdiy.com/index.php?topic=11964.0

Here is a thread that speaks to the CMRR issue, if I understand it correctly

http://www.groupdiy.com/index.php?topic=2192

And another one...

http://www.groupdiy.com/index.php?topic=14888.msg190942#msg190942
 

Attachments

  • attenuator.jpg
    attenuator.jpg
    286.4 KB
Please stare into schematic, top right:

TOATT+, TOATT-, FRATT+, FRATT-, ATT_G1, ATT_G2.

These pads are marked same way at bottom of PCB.

CMRR talks: all revisions of 1176 used unbalanced T-pad 600 Ohm attenuator before input trafo as
tones of other oldygoody equipment. It works.

Input trafo:

http://hairballaudio.com/shop/product_info.php?cPath=24&products_id=35

Same source for attenuator. You'll need to find a knob for 6.35mm shaft.

R'5, top right on schemo: (already was mentioned, but in case of whatever):
Use R'5 270 Ohm with inp traf and don't use it with bal. line receiver.
 

Attachments

  • tpadattf76.jpg
    tpadattf76.jpg
    6.9 KB
bruce0 said:
Well I am finally getting around to building these, and I have a couple of questions.

The schematic in the FEELER (the only schematic I could find) says there is an attenuator option, I can't find it.

The circuit board specifies a Cinemag option, what is the cinemag transformer recommended or specified. (I would prefer transformer balanced input, So I want to choose that option).

What attenuator is appropriate, does it fit?

There are a lot of little op-amp boards hear, but it does not appear that there is a lot of op amp sockets to put them in.  Which should I build.

Is there any sort of guide beyond the photographs....

Is there an official schematic?

I need to order the input trafo and attenuator, and then I am off to the races.

http://ij-audio.com/downloads/51XF76.zip

audio_SCHEM.PNG
 
mulletchuck said:
ok, for the trimmers for the Motherboard:

121 T / W101 = 100R
X103 / 0104G = 10K
127 T / X 202 = 2K
the 100K trimmer was a different color than the others and said "100K" on it.  the other 3 were blue and did not indicate their value.

Ops) They do, but not in normal human language)
104 = 100k
202 = 2k etc

Thanx for this picture, Bruce.

http://i1221.photobucket.com/albums/dd463/Bruce0/F76%20Build%20Photos/labeledPCBSegmentsTop.jpg

1U_top (bottom left) is for dual, 1RU build. NOT USED for 500 (51X).
The card with 18 pin connector and xlr's is for testing the unit, we had lot of spares and thrown them in first batch of kits.
For testing, I recommend RACKIT!
 
Igor:

Thanks... This helps.

To clarify:

*ATTENUATOR*

The attenuator is installed in the same location as the input pot, and is hand wired to the back of the board, to pads for that purpose.

The attenuator is a 600 ohm T attenuator, installed ungrounded (and thus  with the transformer it forms a balanced line attenuator, like the original URIE was).  The ground ATT_G1 and ATT_G2 on the schematic are also marked on the bottom of the circuit board, and are for grounding shields.  This is because the wiring for the attenuator runs the full length of the board and needs shielding, the shields to be connected at the back of the board.  The shields should only be grounded on one end (the back).

And yes, the attenuator will be lovely like that, and will not interfere with CMR, because it is not grounded but just bridges and attenuates the transformer. The ATT_G1 and ATT_G2 are shield grounding pads (not marked as such on the sketch, but they ground the shields on the sketch below).

*TRANSFORMER*

The ONLY transformers that are known to fit are the two from OEP and Ed Anderson, there is no CINEMAG option, despite the "Cinemag" on the soldermask. 

 
I have attached a picture of the Cinemag .... Same text appears when I stare into the Schematic ;)

Hah!  that's funny...

Maybe it is just a typo!

I have been bothering the guy over at Cinemag, because the board shows that his trafo fits... And I couldn't figure what to order... Now that you are asking "Cinemag?" I begin to see why he is confused!!!

bb
 

Attachments

  • cinemagic.jpg
    cinemagic.jpg
    123.7 KB
there is a cinemag input transformer that fits in the same footprint as the c-3837-1 and has a similar ratio: the CMMI-2PCA.  it is not listed on their website, and i've never actually seen one, but i do remember that david geren mentioned it being a new design in 2007.  you can contact cinemag to see if they will make it and how exactly to hook it up.

ed
 
Got it. The package was taken from Cinemag without updating. Sorry guys, my typo.
In any case, I tried Hairball trannies+atten's. It works.
I prefer the sound with balanced line receiver, but mind, I have very bad taste :)
Many of people I know will like more trannie's sound and they using relatively cheap monitors,
but in clean environment with good acoustics, the things works different (for me, again).
All is matter of taste.
 
3nity said:
Footprint of the CMMI-2 is different than the one on the pcb.

footprint of the CMMI-2C is different, it is a much larger, rectangular transformer.  but the PCA versions of all of cinemag's transformers are in the same small round can/footprint as igor used -- it is a standard EE2425 bobbin.  again, i've never seen the actual CMMI-2PCA or datasheet, but it should be possible to make it work.  contact cinemag for further details.

ed
 
Yep. The iron which was used in many trannies. My personal favorite type(grade) is:
 

Attachments

  • 2425.JPG
    2425.JPG
    45.1 KB
Igor and Ed:

Thanks so much, that is exactly what I needed, you guys are awesome... and Ed, the big square line trafo's etc wrong pinout... and trying the CMMI-2 that is what I sort of figured was the case, but having very little experience with cinemag, I appreciate the insight. I thought it might fit, but I didn't see the datasheet either...

I use everything on the road, it moves.  Iron is heavy, that's bad... but I have to say that I love transformers for making sure I don't have hum and noise when I set up.  It is always really clean that way.

I was however tempted to try the 1206 from THAT on something... But it is not completely plug compatible with the 1246, and bought a couple to try it out, but I think I will go with transformers for this build... so I can tell the artist... "just like old timey!"

Thanks again... I am ready to go... I will just chose and go.
 
Igor, could you post some pics for how the pots for Input/Output get connected to the "TOATT+ TOATT- FRATT+ FRATT-" pads?    the motherboard also has INP_LVL and OP_LVL pads i'm curious about.
 
Mulletchuck:

Attached is a picture, I think this is how it works.

Hairball has a little PCB for $1.75 that wires the attenuators you purchase there correctly (they have TOATT labeled Input), if it won't fit, it will at least help wire it.

http://hairballaudio.com/shop/product_info.php?cPath=29&products_id=54

So does Classic API

http://classicapi.com/catalog/product_info.php?cPath=48&products_id=255


Attachments

  • attenuator.jpg
    attenuator.jpg
    372.6 KB
Non-T-Pad version: FORGET about T-Pad and all these to_att, from_att pads.

Connect 10k log potentiometers (they are supplied with kit) to INP_LVL and OP_LVL

1=CW
2=WIPER
3=CCW

No scanner here, sorry

To get more precision range of 40db on potentiometers, put 100R resistor between pad 3 (ground) and CCW.
 
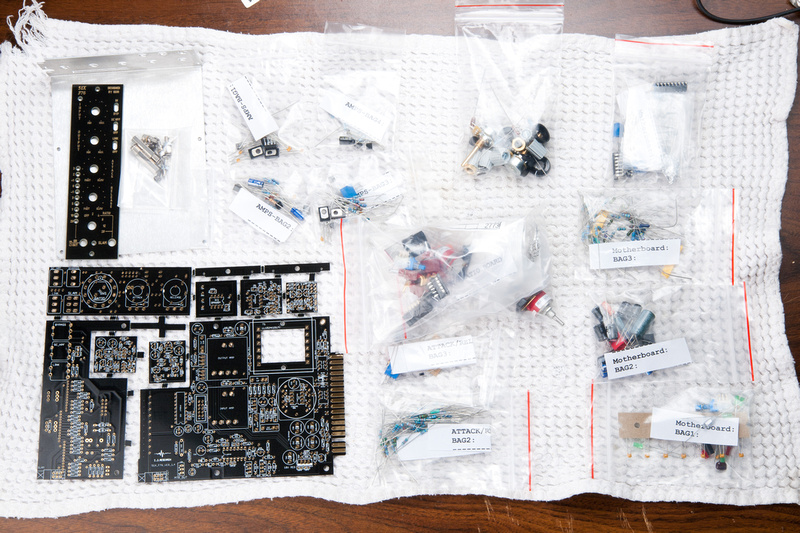
OK. . . a little late to the party, but Igor indicated that I could post in the official support thread, so hopefully this won't be a complete waste of bandwidth.

p637583722-4.jpg


Now, we will see if this monkey can figure out how to put together an IJ research kit.  I'm sure hilarity will ensue as much of the schematics look Greek to me, but doesn't stop me from squinting at them for a couple of days to try and get some orientation.

This is very different than the starter projects I tried before that were very defined and to be honest more geared towards production and sales as kits.  If I understand correctly, Igor's main focus is manufacturing small runs of completed units for his clients but carries a side benefit of DIY availability.  So, not as much hand-holding on the support side, and a different type of documentation to study.  Luckily, full kits were made available, so much of the component selection (which would be difficult and time-consuming for newbie) has been done.  Still, this seems to me like a big-boy project with lots of choices.

Build options:

I figure Igor has had the most experimentation with various possible configurations, so I will attempt to build to his preferred configuration and hear the unit that way . . . which I understand deviates from the classic 1176 sound but in his verbiage is more flexible and sounds "more pedigree".  Everyone has different tastes and this kit has options, but I figure I'll try it this way first.  But, I do have a couple of questions about his configuration.  Here is how I plan to build.  Please let me know if this is in line with Igor's preferred configuration.

1. Balanced Line Receiver

2.  IJ input amp

3.  3 Grayhill front (as supplied in kit)

4.  input/output pots (as supplied in kit)

5.  ???? output amp ????  Is this s +-24V amp?  Igor indicates he uses "his own" output amp, but I do not see an IJ one supplied in kit.  So, as indicated in docs, I can build one of the kit options. . . which one would Igor prefer from the kit?  I also have a pair of APP2520E amps that can run 24V.

6.  LL1524 output transformer (sourced through Igor's friend salvaged)

Ultimately, I would like to try all of the included amp options, but I assume I will have to buy a few more small components to build out all of the amps.

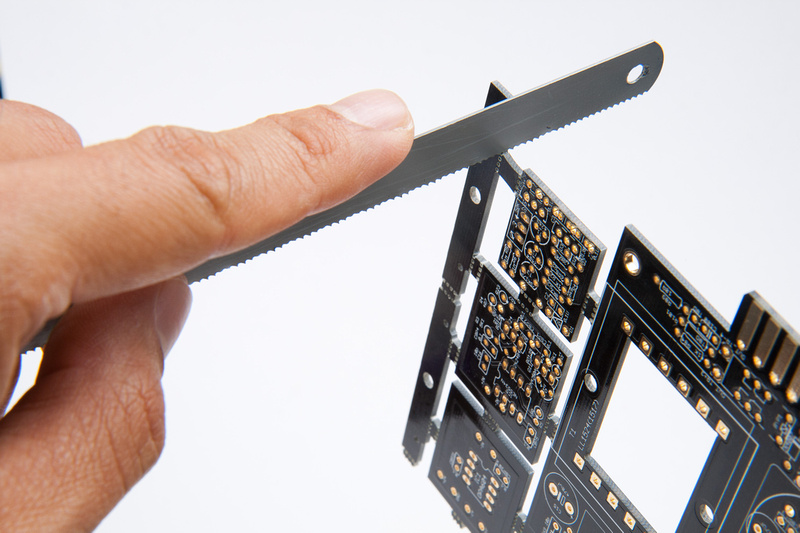
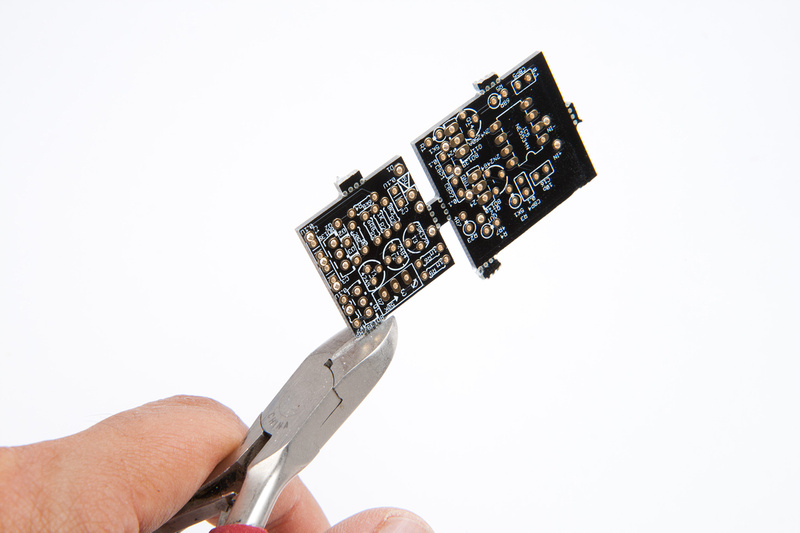
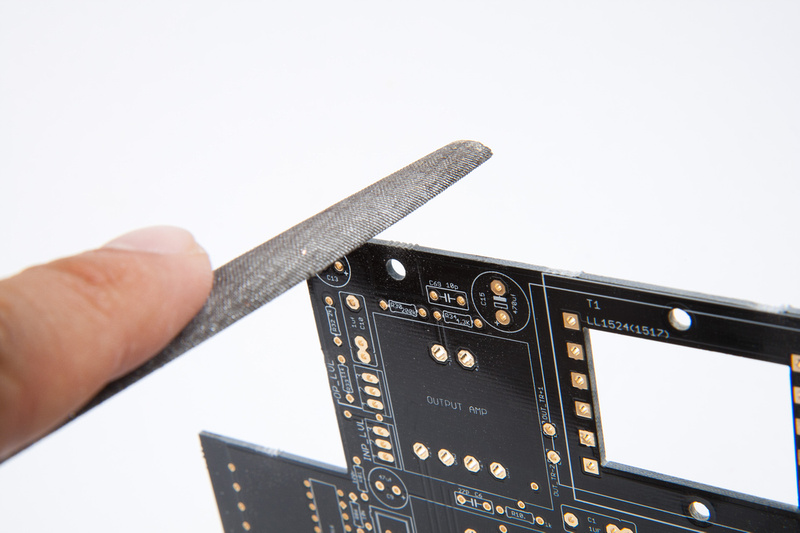
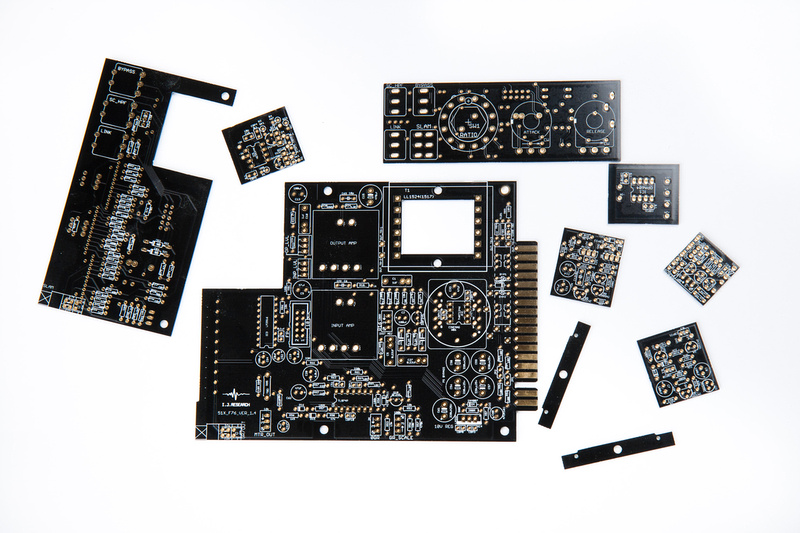
OK. . . a few general questions that I hope I will get some answers on, but for now, I'm going to saw apart the PCB's and clean them up.  I used a hacksaw blade, a wire cutter, and a file to get these separated.

p587088541-4.jpg


p1027047205-4.jpg


p542883096-4.jpg


and, pretty PCB's ready to go.

p712163465-4.jpg
 

Latest posts

Back
Top