[BUILD] 1176LN Rev D DIY

GroupDIY Audio Forum

Help Support GroupDIY Audio Forum:

This site may earn a commission from merchant affiliate links, including eBay, Amazon, and others.
[quote author="Neeno"]Ok guys... sorry but i was pretty busy... we had 60cm snow this night...
I love this country ! ahahah

This should work, it's the way i connected my t-attenuator...
1176%20t-attenuator.JPG


Check it, try it and post back please !
Cheers[/quote]

looking to prep this before the boards arrive. these values are dual gang 10k log taper and 2x 600ohm resistors correct? anyone have a part number for the dual audio pot? might be hard to source.
 
Here's my Rev D.
I spent about a year leisurely acquiring the parts.
I had a ground loop issue that was causing serious grief, but once I cleared that up, this unit calibrated with ease.
The result, as many have attested, is aurally outstanding!

Here is a HUGE thanks to mnats, edanderson, ap123, kato, sintech, and everyone else involved in this thread.


So, the wiring could be more tidy, but oh well...it works!


Awesome work Skylar!

How did you mount the pushbutton PCB's to the enclosure? I see bolts going to the front panel but clearly the bolts don't travel through to the front.

Mike
 
That's a beautiful build, Skylar, and it looks as though you mostly have yourself to thank. The boards are probably less than 10% by weight. :wink:
[quote author="buschfsu"] these values are dual gang 10k log taper and 2x 600ohm resistors correct? [/quote]
I thought our earlier exchange might have been a hint, but I'll just say it - you might want to spend more time reading and less time posting. It is not a dual gang 10k log taper at all.

Though my Rev D page is far from complete and contains a few errors, the linked threads including the one about the T attenuator should have enough information to point you in the right direction. As always, the page is linked from the first post of this thread.
 
i don't mean to clog the board but some of this stuff is not all that clear.

nydave said "The short story is, you can't do it with an off-the-shelf pot."

and neno's diagram that you point to has no values listed. nor does the BOM.

just a little confused (not so much lazy)
 
the short answer is that to duplicate the original front end of the class A 1176, you need a special type of pot called a t-pad attenuator. there are a few different types, made by a few different companies, some surplus, some new. there is nothing you can order from the usual digikey/mouser type places that will work. this thread and the mnats 1176 pages have a lot of good info about what is available and from whence.

ed
 
Echo,

RE: pushbutton mounting

The back of the 4mm front panel is tapped with 2.5mm deep 4-40 blind holes.
I took careful measurements for this section of the front panel so that everything would line up.
 
Almost forgot...here is a wiring diagram I used as a guide while building my unit.

This diagram reflects how I have my unit wired currently.

Note that this guide is for Altran input, PEC T-Pad, mnats pushbutton boards, Cinemag output, fused IEC power inlet, and 120V AC mains.

Also, all points where the chassis ground symbol appears are connected at the same chassis ground spot: the input XLR pin 1.

I have broken up the master diagram into several (more digestible) chunks in pdf format.

EDIT: fixed the link, combined to one pdf

http://www.equinoxsystems.net/DIY/SG-1176-RevD-Wiring_ALL.pdf

NEW version with input wiring fixed:

http://www.equinoxsystems.net/DIY/SG-1176-RevD-Wiring_ALLv2.pdf

http://www.equinoxsystems.net/DIY/SG-1176-RevD-Wiring_ALLv3.pdf

EDIT: diagram sent to GroupDIY gmail account.
 
The input/output knobs are General Radio KNSP6 I believe.

I got them from a local surplus store.

Old General Radio gear had THE best knobs. period.

GENERAL_RADIO_1432-A_DECADE_RESISTOR_WITH_TEXT_B5_N1.jpg


variac2.jpg

Hmmmm, and where do we recognize these knobs from?


fair_1.jpg
 
I've received a few PMs about the latest batch of boards for this project. Not sure why no one just posts their questions here as there isn't anything secret about it and I don't intend to show any favoritism toward any particular person or group. I also don't intend to answer any PMs about the board order - I simply don't have the time to have one on one communication about them but I'm very happy to discuss it publicaly.

So here's the update: the boards are late arriving. The factory hasn't been very good at communicating with me but it's hard to get upset since they caught what could have been a fatal error (well, not exactly fatal...) so I'm giving them the benefit of the doubt.

I will have to check the boards (read: build one) before offering them for sale and posting the self-etch files. I was hoping to do this during the school break but who knows what will happen until I hear from the factory. The email went out today so hopefully they will get back to me soon.

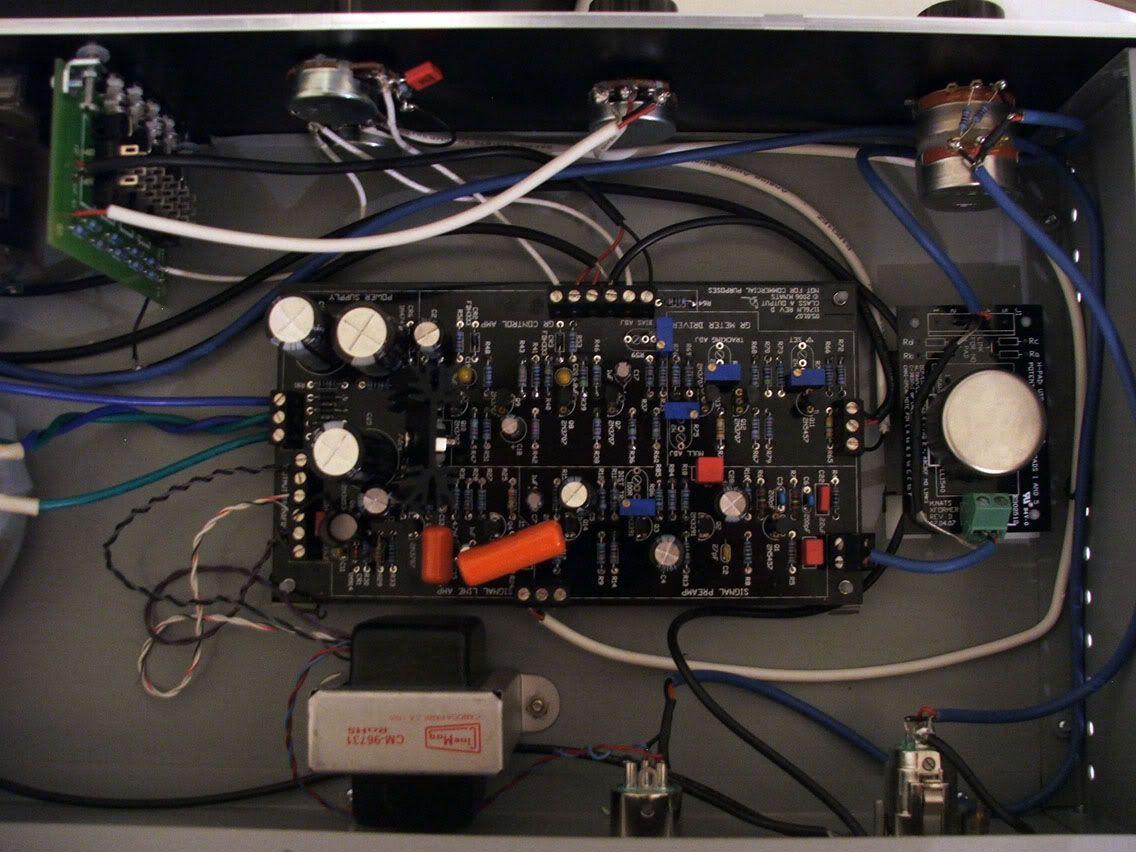
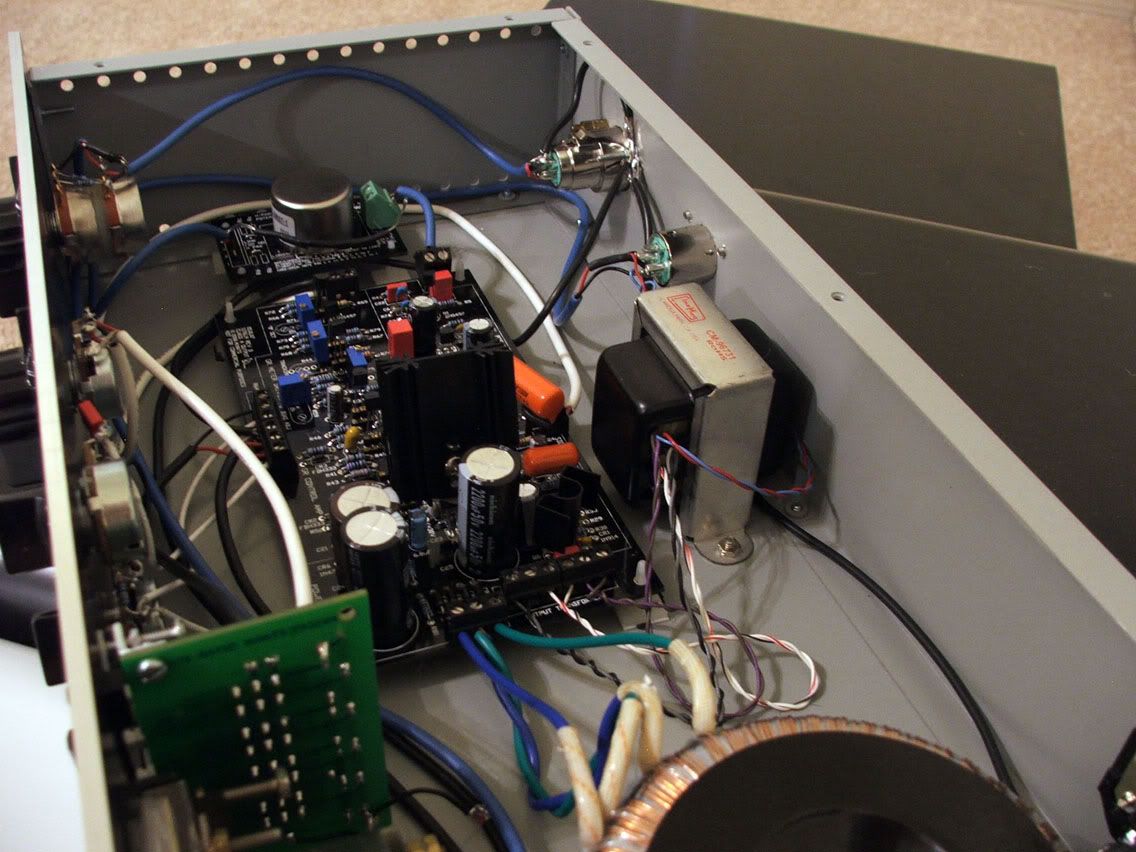
Once they arrive I'll get onto stuffing the board and dropping it into my already-built dualie. If they work as advertised, I'll make a post on the Black Market.

That's the scoop - please feel free to ask any questions right here. But please, let's not turn this into a "I want two sets of boards" thread. I will post in the Black Market when the time comes.

______________________________________

Latest news: The boards shipped today so I should have them by early next week. That should give me enough time to stuff one board before school starts again...
 
I'm just about the **finally** finish up and wire my 1176"d".

I have a quick question for the experts. It seems a bit silly to bring the output all the way to the front panel right by the psu for the meter board. Wouldn't it be better to place a relay right between the output tranny and the output xlr, place the meter board somewhere near the output xlr and have the front panel actuate the relay as required for the meter function? In that way, when the meter is bypassed, the signal path would be optimized.

Thanks in advance, I'm quite excited :twisted:

Andy
 

Latest posts

Back
Top