Mixer Console build

GroupDIY Audio Forum

Help Support GroupDIY Audio Forum:

This site may earn a commission from merchant affiliate links, including eBay, Amazon, and others.
the front panel consists of 4mm laser cut wood(maple veneered MDF) and then this is overlayed with 1.6mm coloured plastic panel which provides the recess for the nuts etc.

I attached the plastic panels with M2 hex screws and nuts.

Not sure if the finished panels will be using the same materials. If I go with the wood I may add some kind of aluminium or copper shielding layer. I'm also considering doing the coloured panels in anodised aluminium.

The good news is that I can do small batch runs for the wood and plastic panels which makes prototyping possible.
 
Humner said:
the front panel consists of 4mm laser cut wood(maple veneered MDF) and then this is overlayed with 1.6mm coloured plastic panel which provides the recess for the nuts etc.

I attached the plastic panels with M2 hex screws and nuts.

Not sure if the finished panels will be using the same materials. If I go with the wood I may add some kind of aluminium or copper shielding layer. I'm also considering doing the coloured panels in anodised aluminium.

The good news is that I can do small batch runs for the wood and plastic panels which makes prototyping possible.

Elegant solution. I have been struggling for some time to separate the mechanical fixing of components from their labelling. At Neve, all the controls were mounted on a plain steel plate that was a mechanical part of the modules. The front panel was aluminium and purely cosmetic. Holes had only to be large enough to take the shafts of the control - all nuts were behind them. Your idea takes this one stage further and recesses the nuts so the front panel can butt right up to the rear panel. As you say, screening is an issue but not an insurmountable one.

Nice idea. Much food for thought. Thanks!

Cheers

Ian
 
...and the sifam knob now sits flush with the panel.
  Great idea man, this must make having to do 24 channels far more feesible.
 
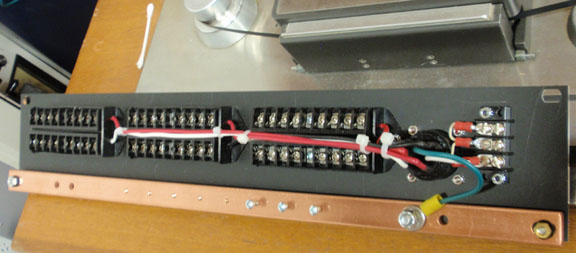
I now have the cardedge PCB's in with a chunky copper bar for the audio star ground - probably a bit overkill, but will do the job I think.

12.jpg


13.jpg
 
That should pay dividends in crosstalk if nothing else. Is that one of those standard electricians things for household wiring?
Cheers

Ian
 
ruffrecords said:
That should pay dividends in crosstalk if nothing else. Is that one of those standard electricians things for household wiring?

Cheers

Ian

Hi ian,

I would say most likely, but it wasn't advertised at such, I bought it from ebay in the US a while ago(Search for "Copper Neutral Bus"), I was planning on using it for smaller projects and cutting it up as needed, but when I saw that it had sat unused in my parts bin I thought why not make use of it.

Because the copper bar wants a higher gauge of wire, I pushed a 4mm copper tube through the center of it(hard to see in the photo) so that the screw down was more suited to the gauge of wire I'm using.

 
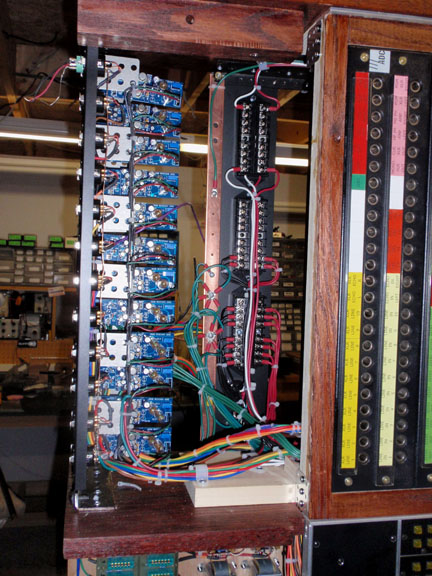
Using one of the prototype channel strip panels and PCB's I did a "dry fit" to make sure everything is lining up. From what I can see, its spot on! That is ignoring the length of the channel strip panel as its only a prototype and not its final length! The height of the panel in relation to it coming off the PCB and card edge is spot on.

Its amazing that you can send off CAD drawings to a collection of different manufacturers using completely different techniques for production, in my case  waterjet cut aluminum, laser cutting wood panels, and PCB's in China and end up with an unbelievable tolerance at the end of it all.

What a world we live in  ;D


14.jpg


15.jpg


Humner said:
I now have the cardedge PCB's in with a chunky copper bar for the audio star ground - probably a bit overkill, but will do the job I think.

12.jpg


13.jpg

Did a copper bus bar for a star in my Sphere desk project. 
This is my Power distro panel.  This is NOT overkill  ;)

4.19_power_distro72.jpg


7.pwdistro372.jpg


This desk is extremely quite.  Bus bars are the way to go!! :)

GARY
 
Humner said:
I now have the cardedge PCB's in with a chunky copper bar for the audio star ground - probably a bit overkill, but will do the job I think.
All these lengths of wire make me twinge  :eek:
What net are they carrying? Audio gnd, PSU gnd, chassis gnd? I don't see how introducing resistance and inductance between supposedly equipotentials can improve performance... ???
 
abbey road d enfer said:
Humner said:
I now have the cardedge PCB's in with a chunky copper bar for the audio star ground - probably a bit overkill, but will do the job I think.
All these lengths of wire make me twinge  :eek:
What net are they carrying? Audio gnd, PSU gnd, chassis gnd? I don't see how introducing resistance and inductance between supposedly equipotentials can improve performance... ???

Its one of the grounding schemes I have made available, I'm keeping my options open as I really don't know what the best scheme will be. At the moment PSU + Audio ground join at the channel strips, and then go to the copper ground bar. I made provisions to be able to split the audio and PSU grounds if needed to separate paths, however my testing so far is showing its not needed.

 
Humner said:
abbey road d enfer said:
Humner said:
I now have the cardedge PCB's in with a chunky copper bar for the audio star ground - probably a bit overkill, but will do the job I think.
All these lengths of wire make me twinge  :eek:
What net are they carrying? Audio gnd, PSU gnd, chassis gnd? I don't see how introducing resistance and inductance between supposedly equipotentials can improve performance... ???
I believe you'll find out you need a very low resistance/inductance path for the "audio ground". For that, you'll need a short/sturdy connection between adjacent modules and/or another bus bar located much closer to the modules. I would recommend you do that now, insted of doing it at the last minute when all the wiring is done.

Its one of the grounding schemes I have made available, I'm keeping my options open as I really don't know what the best scheme will be. At the moment PSU + Audio ground join at the channel strips, and then go to the copper ground bar. I made provisions to be able to split the audio and PSU grounds if needed to separate paths, however my testing so far is showing its not needed.
 
abbey road d enfer said:
I believe you'll find out you need a very low resistance/inductance path for the "audio ground". For that, you'll need a short/sturdy connection between adjacent modules and/or another bus bar located much closer to the modules. I would recommend you do that now, insted of doing it at the last minute when all the wiring is done.

Thanks for the info, you have given me much food for thought, I already have some ideas to implement this without much fuss.

Still have a lot of ground to cover(excuse the pun), maybe a month or 2 until I get some channel strips in there.
 
After having a think, how does this idea look...separate copper bus bars for power and audio ground(entire length of cardedge PCB's), then each bus bar has its own ground wire back to the PSU (which is in separate enclosure).


gnd.jpg
 
I don't spend much time in this forum but you appear to be looking at grounding as a brute force, lower resistance is the only way to reduce ground errors.

That big copper bus bar will have far less impact on signal integrity than the actual circuitry connected to it (electrons don't care how good it looks... it does look good tho).

There have been many discussions in general interest forums about sum bus structures and differential signal handling.

Sorry for the drive post by without specific advice, but this is a well explored topic.  (I think).

JR
 
only as info ,
how much (+/-) this console will it cost in parts and of course in working on time ?
(....just for a simply comparison with an used console price , ready to work..)

peace
 
r2d2 said:
only as info ,
how much (+/-) this console will it cost in parts and of course in working on time ?
(....just for a simply comparison with an used console price , ready to work..)

peace

lots of time and lots of money  ;)

But seriously, its a personal project, so time I really can't say for sure.

If you give me a few more weeks I should have my BOM pretty settled and accurate so I can provide a cost per channel etc.
 
Humner said:
After having a think, how does this idea look...separate copper bus bars for power and audio ground(entire length of cardedge PCB's), then each bus bar has its own ground wire back to the PSU (which is in separate enclosure).
Bus bar for ground is always a good bet. Irrelevant for power rails.
 
Back
Top